
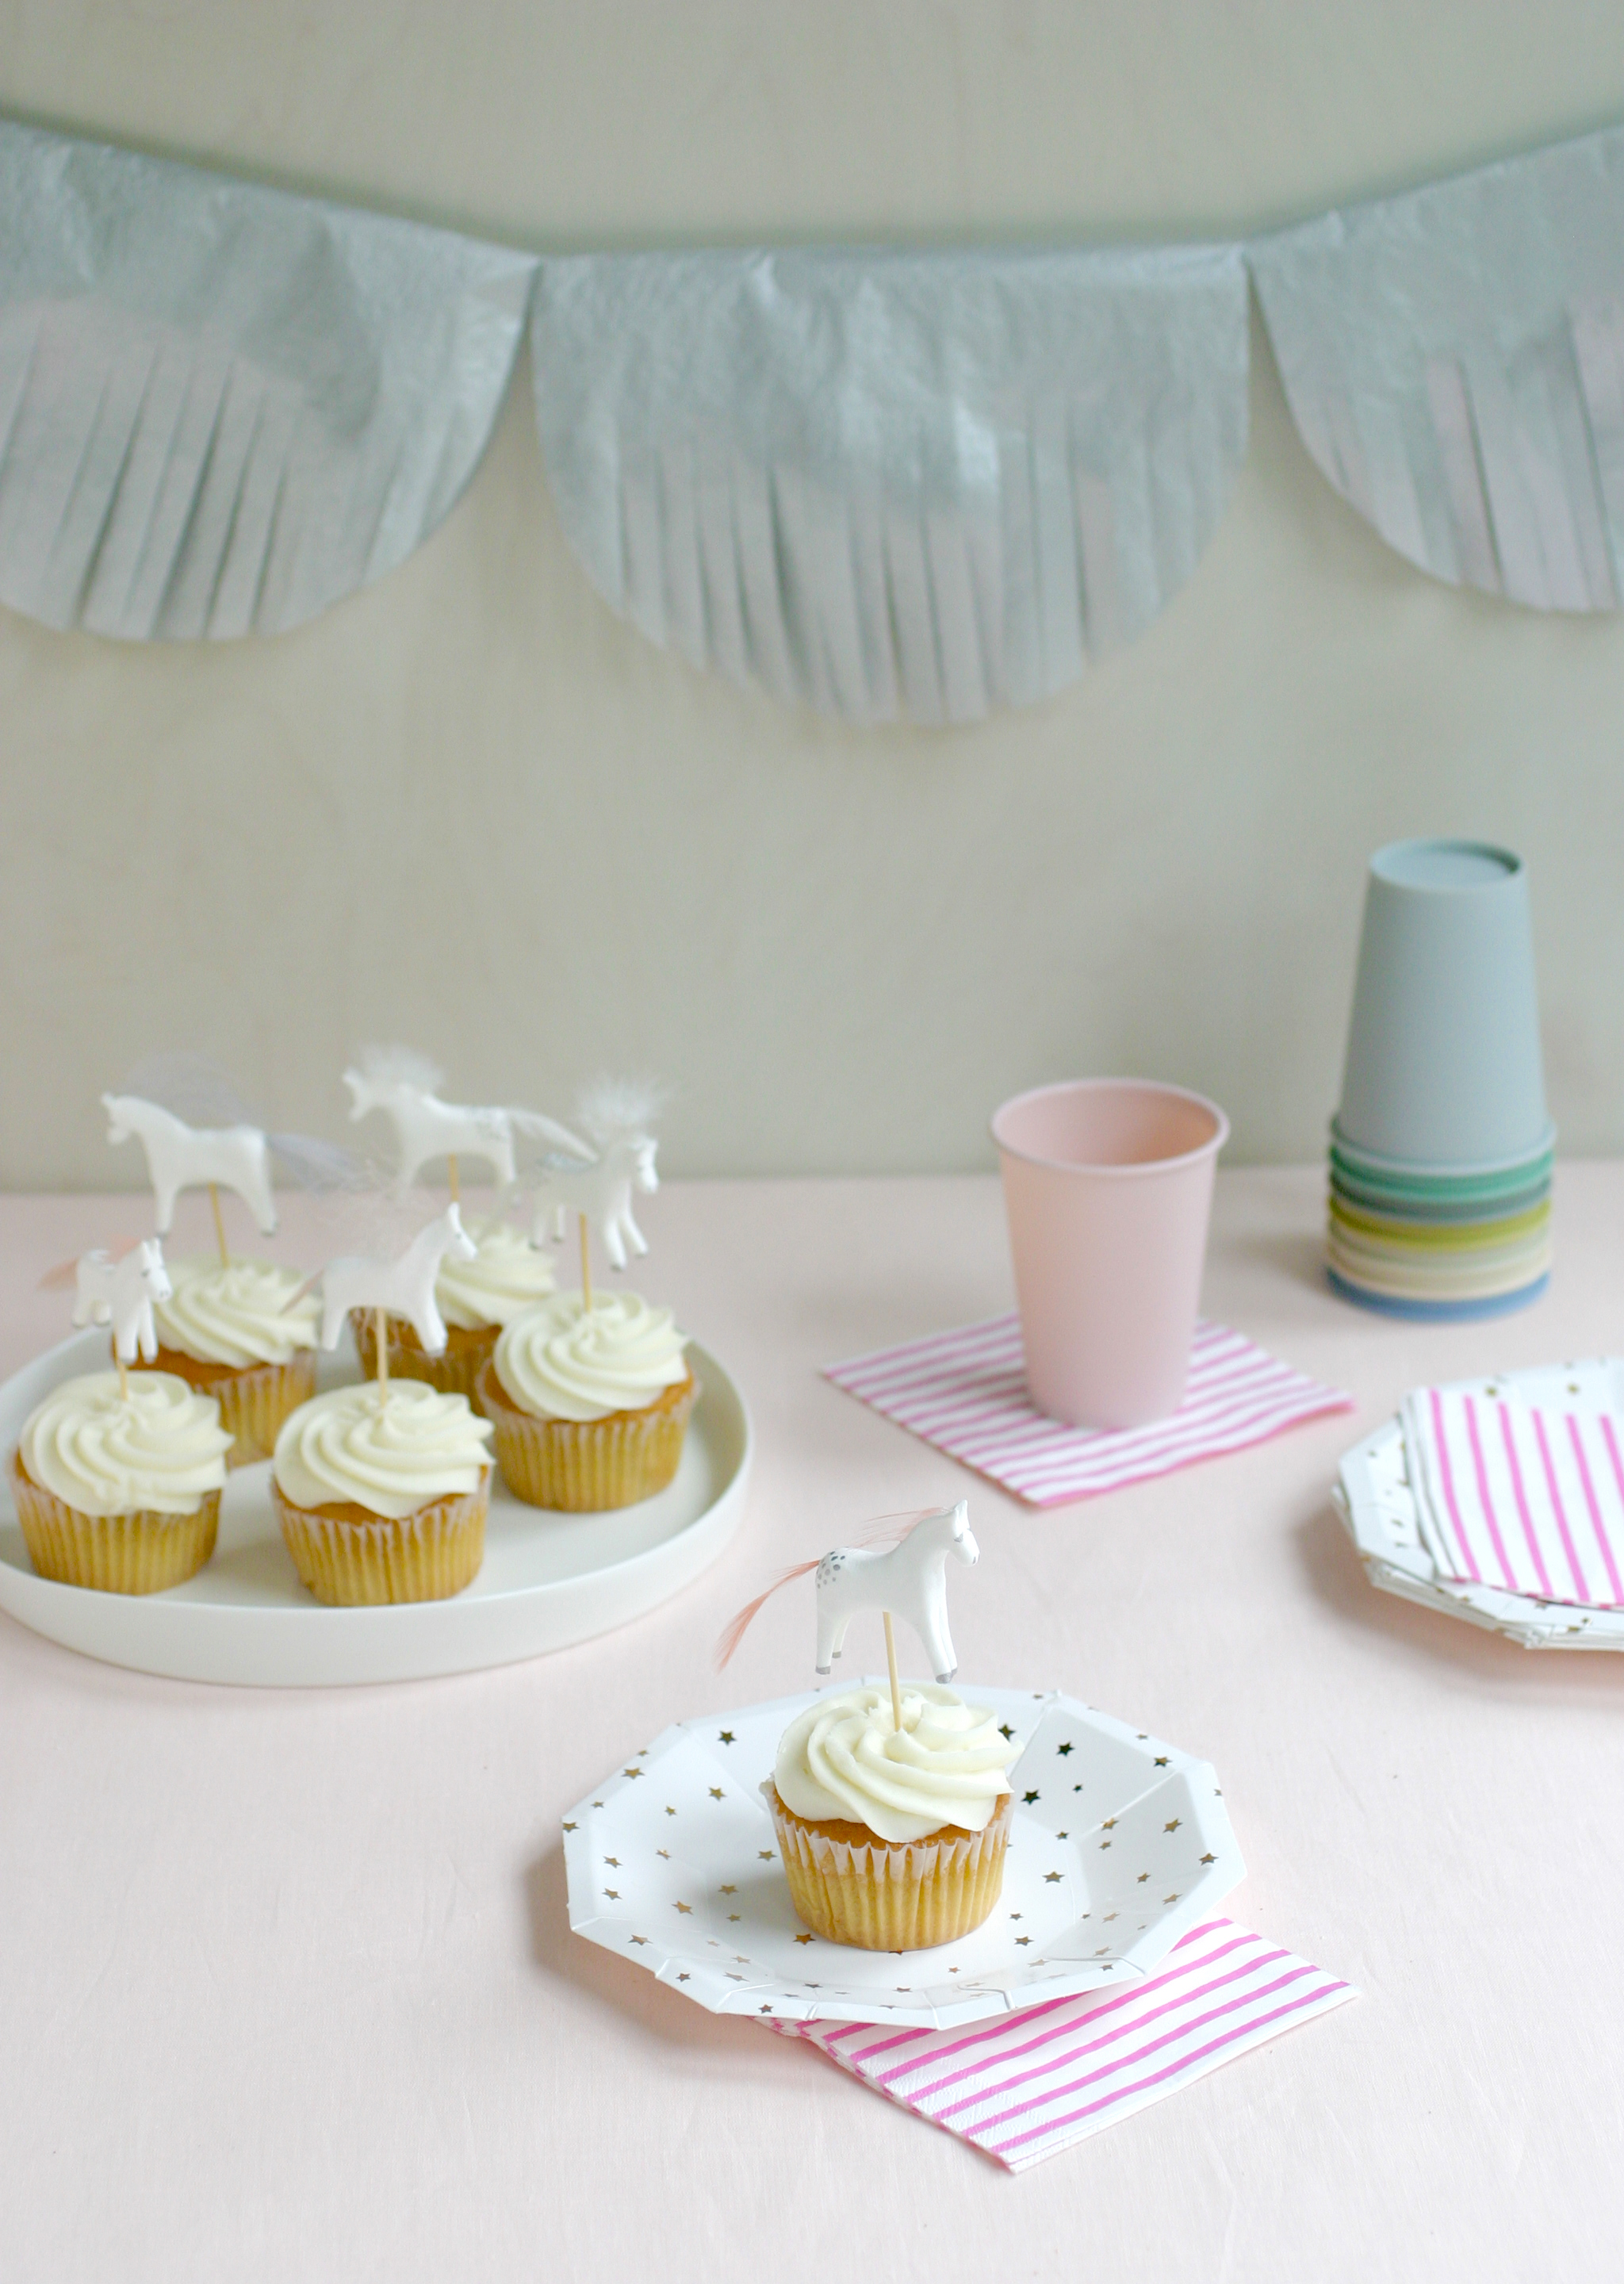
I love horses and tiny things, so this craft is a double win. I made them as a goodbye gift for my coworkers when I left the crafts merchandise department at Martha Stewart. They're small and not too fussy to make so a great opportunity for flow.
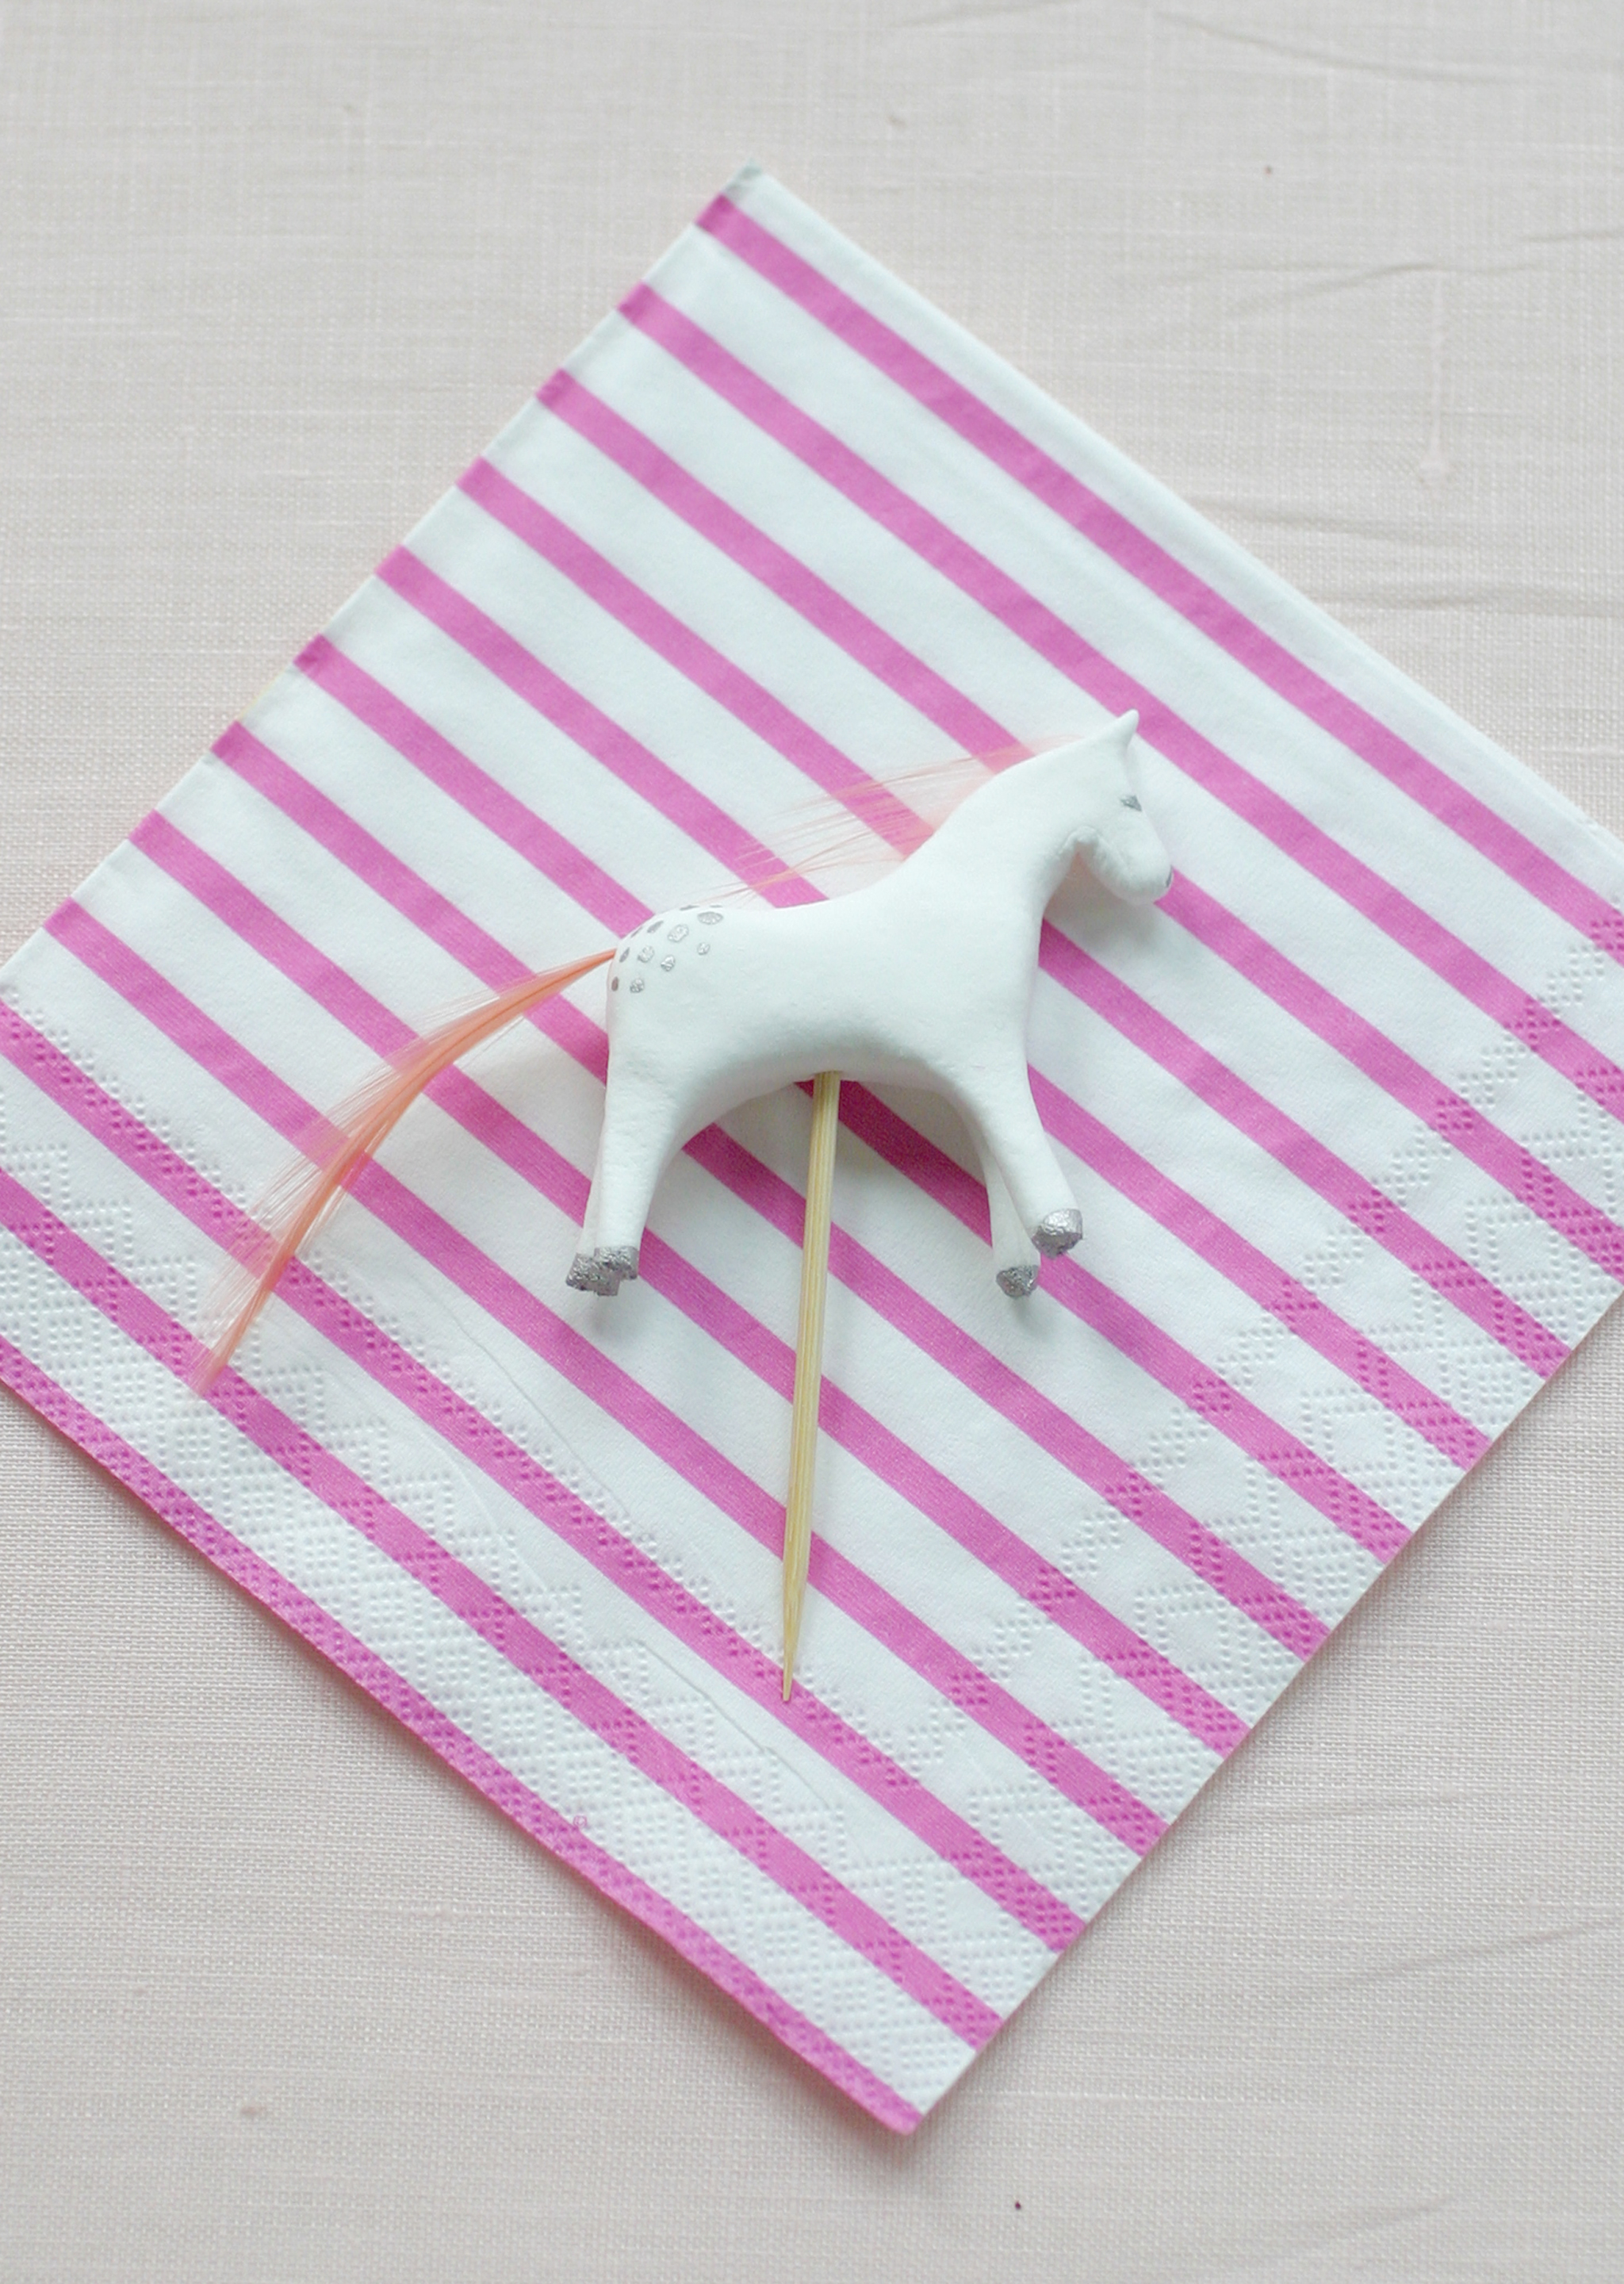

Each one can have its own personality by using different bits of feather and drawing dapples on with the Sharpie. You can also use the technique to make other animals - a polar bear or llama would work well. The air dry clay most commonly comes in white and is easy to work with. If it ever feels a bit dry, just wet your fingers and work into the clay to refresh it.

Supplies:
- feathers
- small scissors
- silver Sharpie or paint pen
- piece of cork or styrofoam
- toothpicks
- air-dry paper clay in white
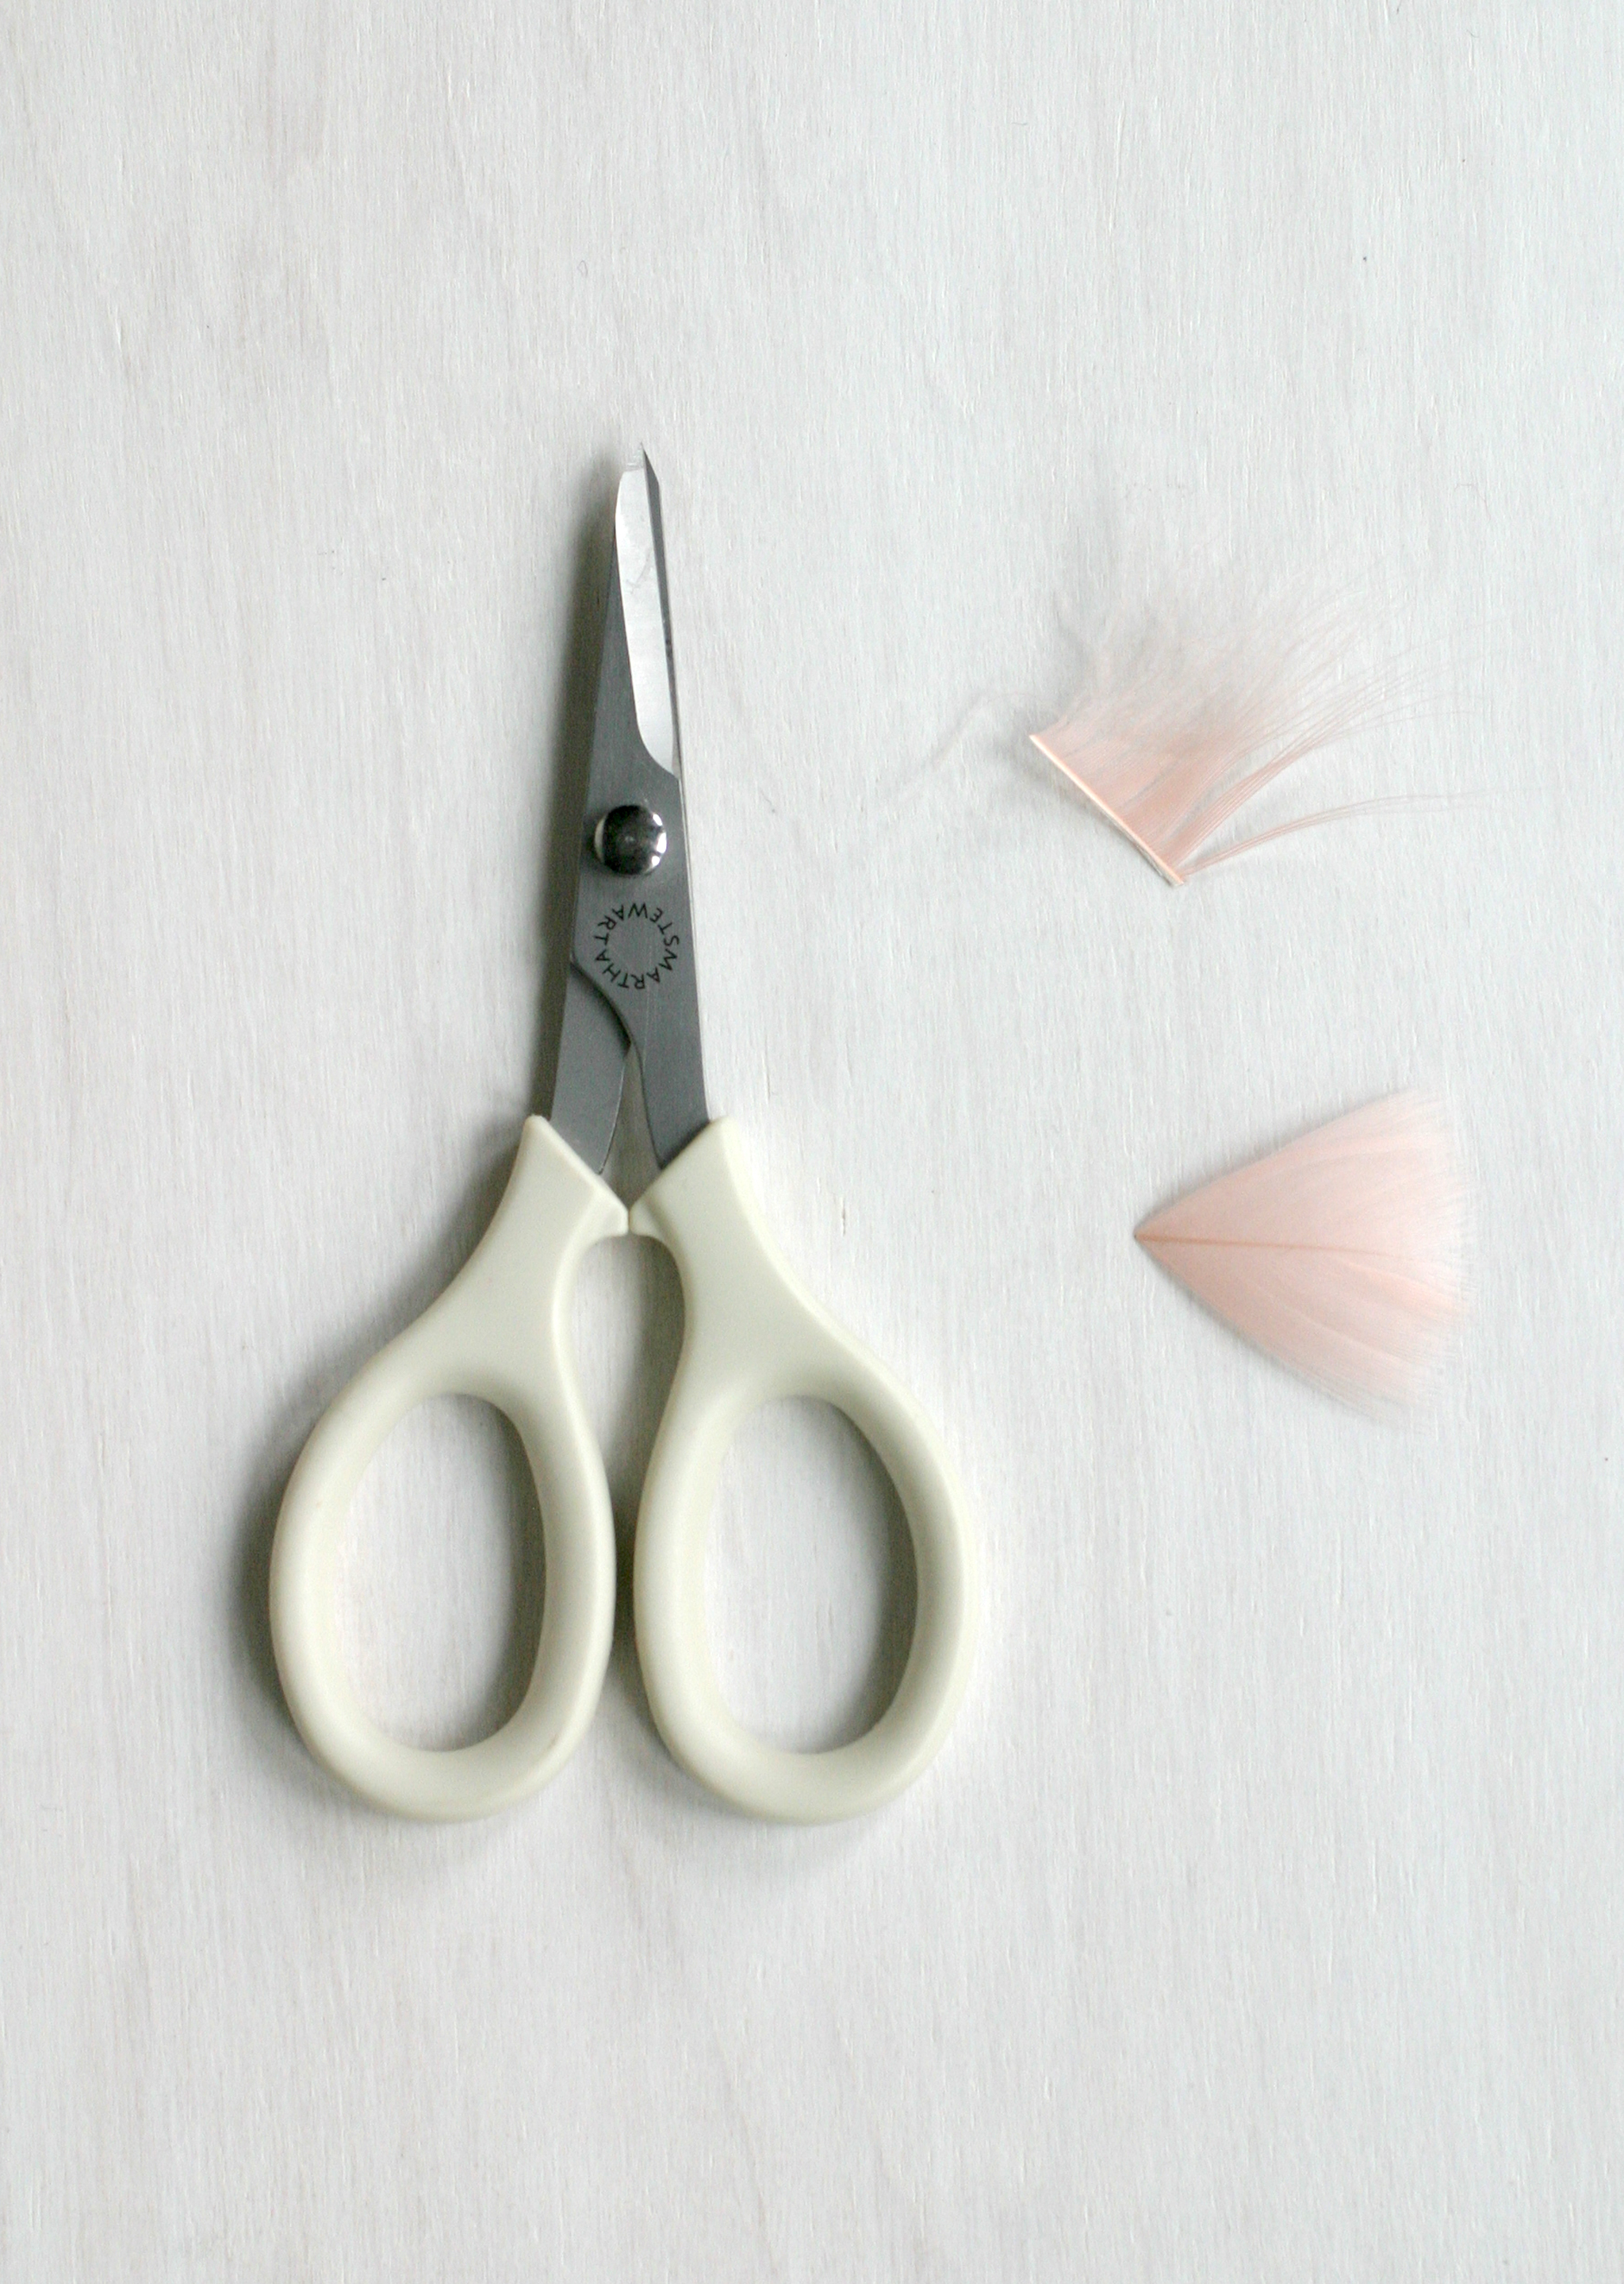

1. Using the scissors, snip off the delicate end of a feather so it's about a half inch long. From another part of the feather, snip out a section that's also about a half inch in length and then cut it through the shaft so you only have one side of the piece with feathered fringe.
2. Break off a chunk of air-dry clay, about the size of a quarter.
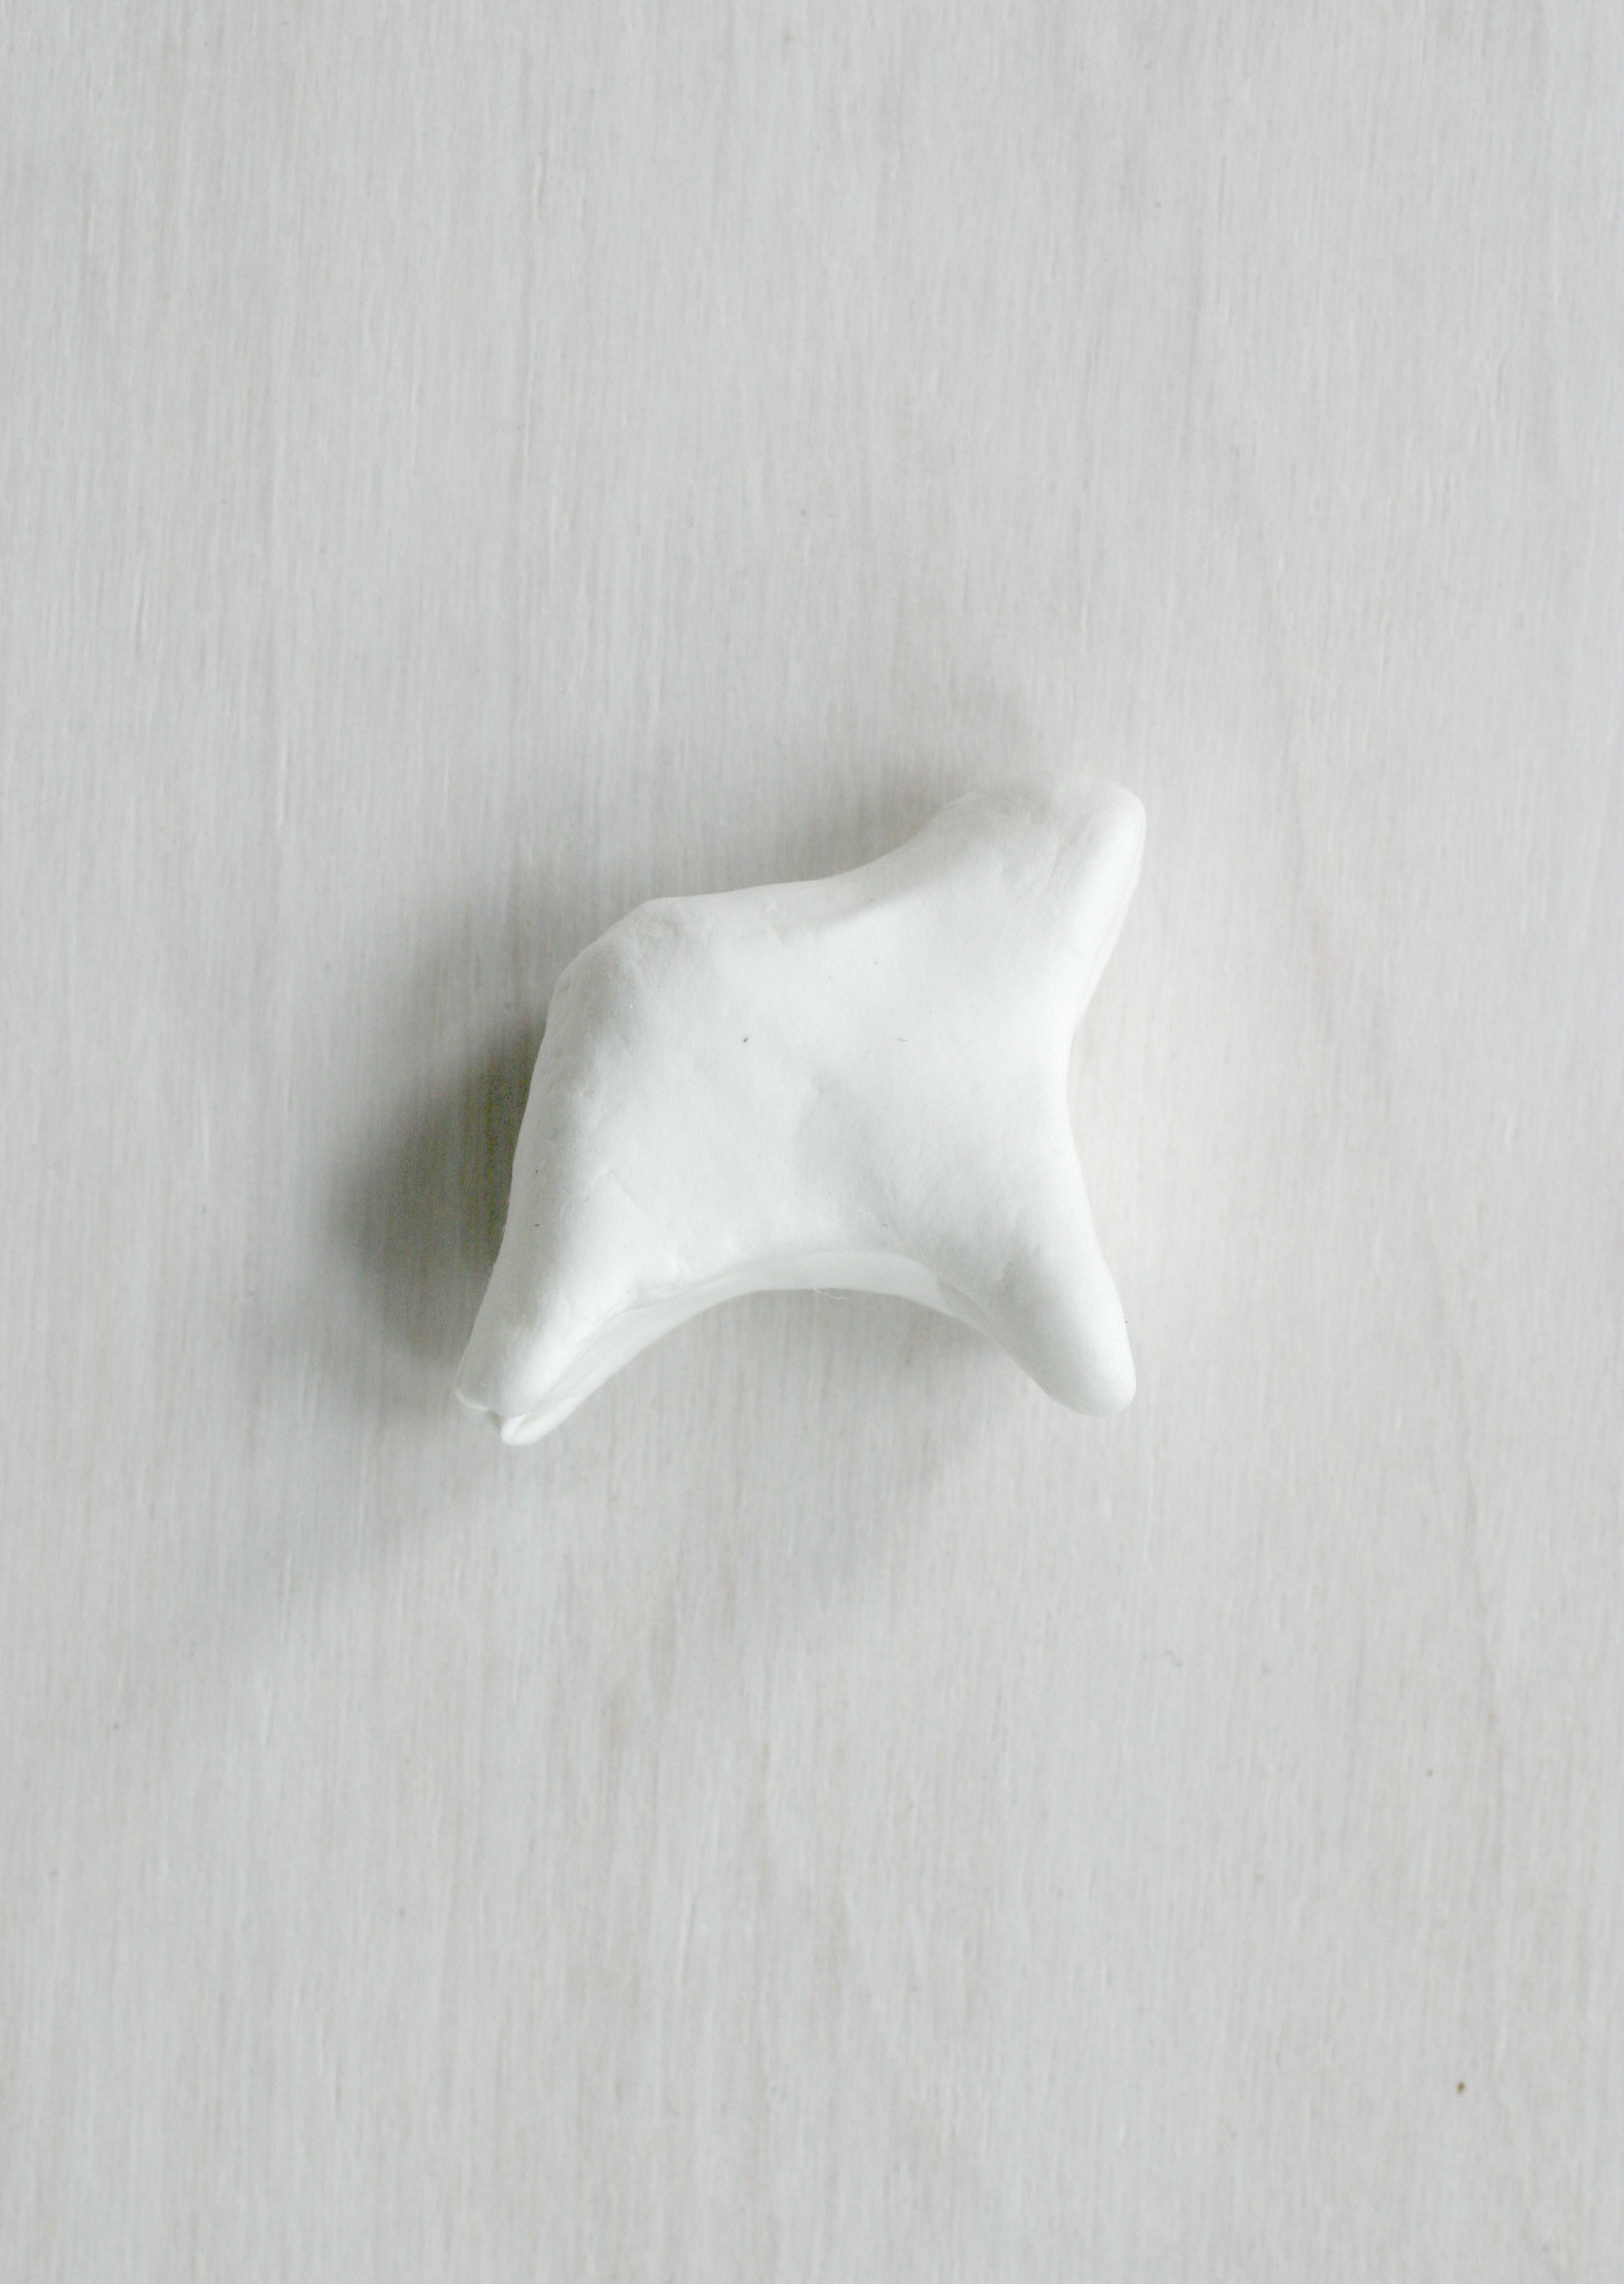
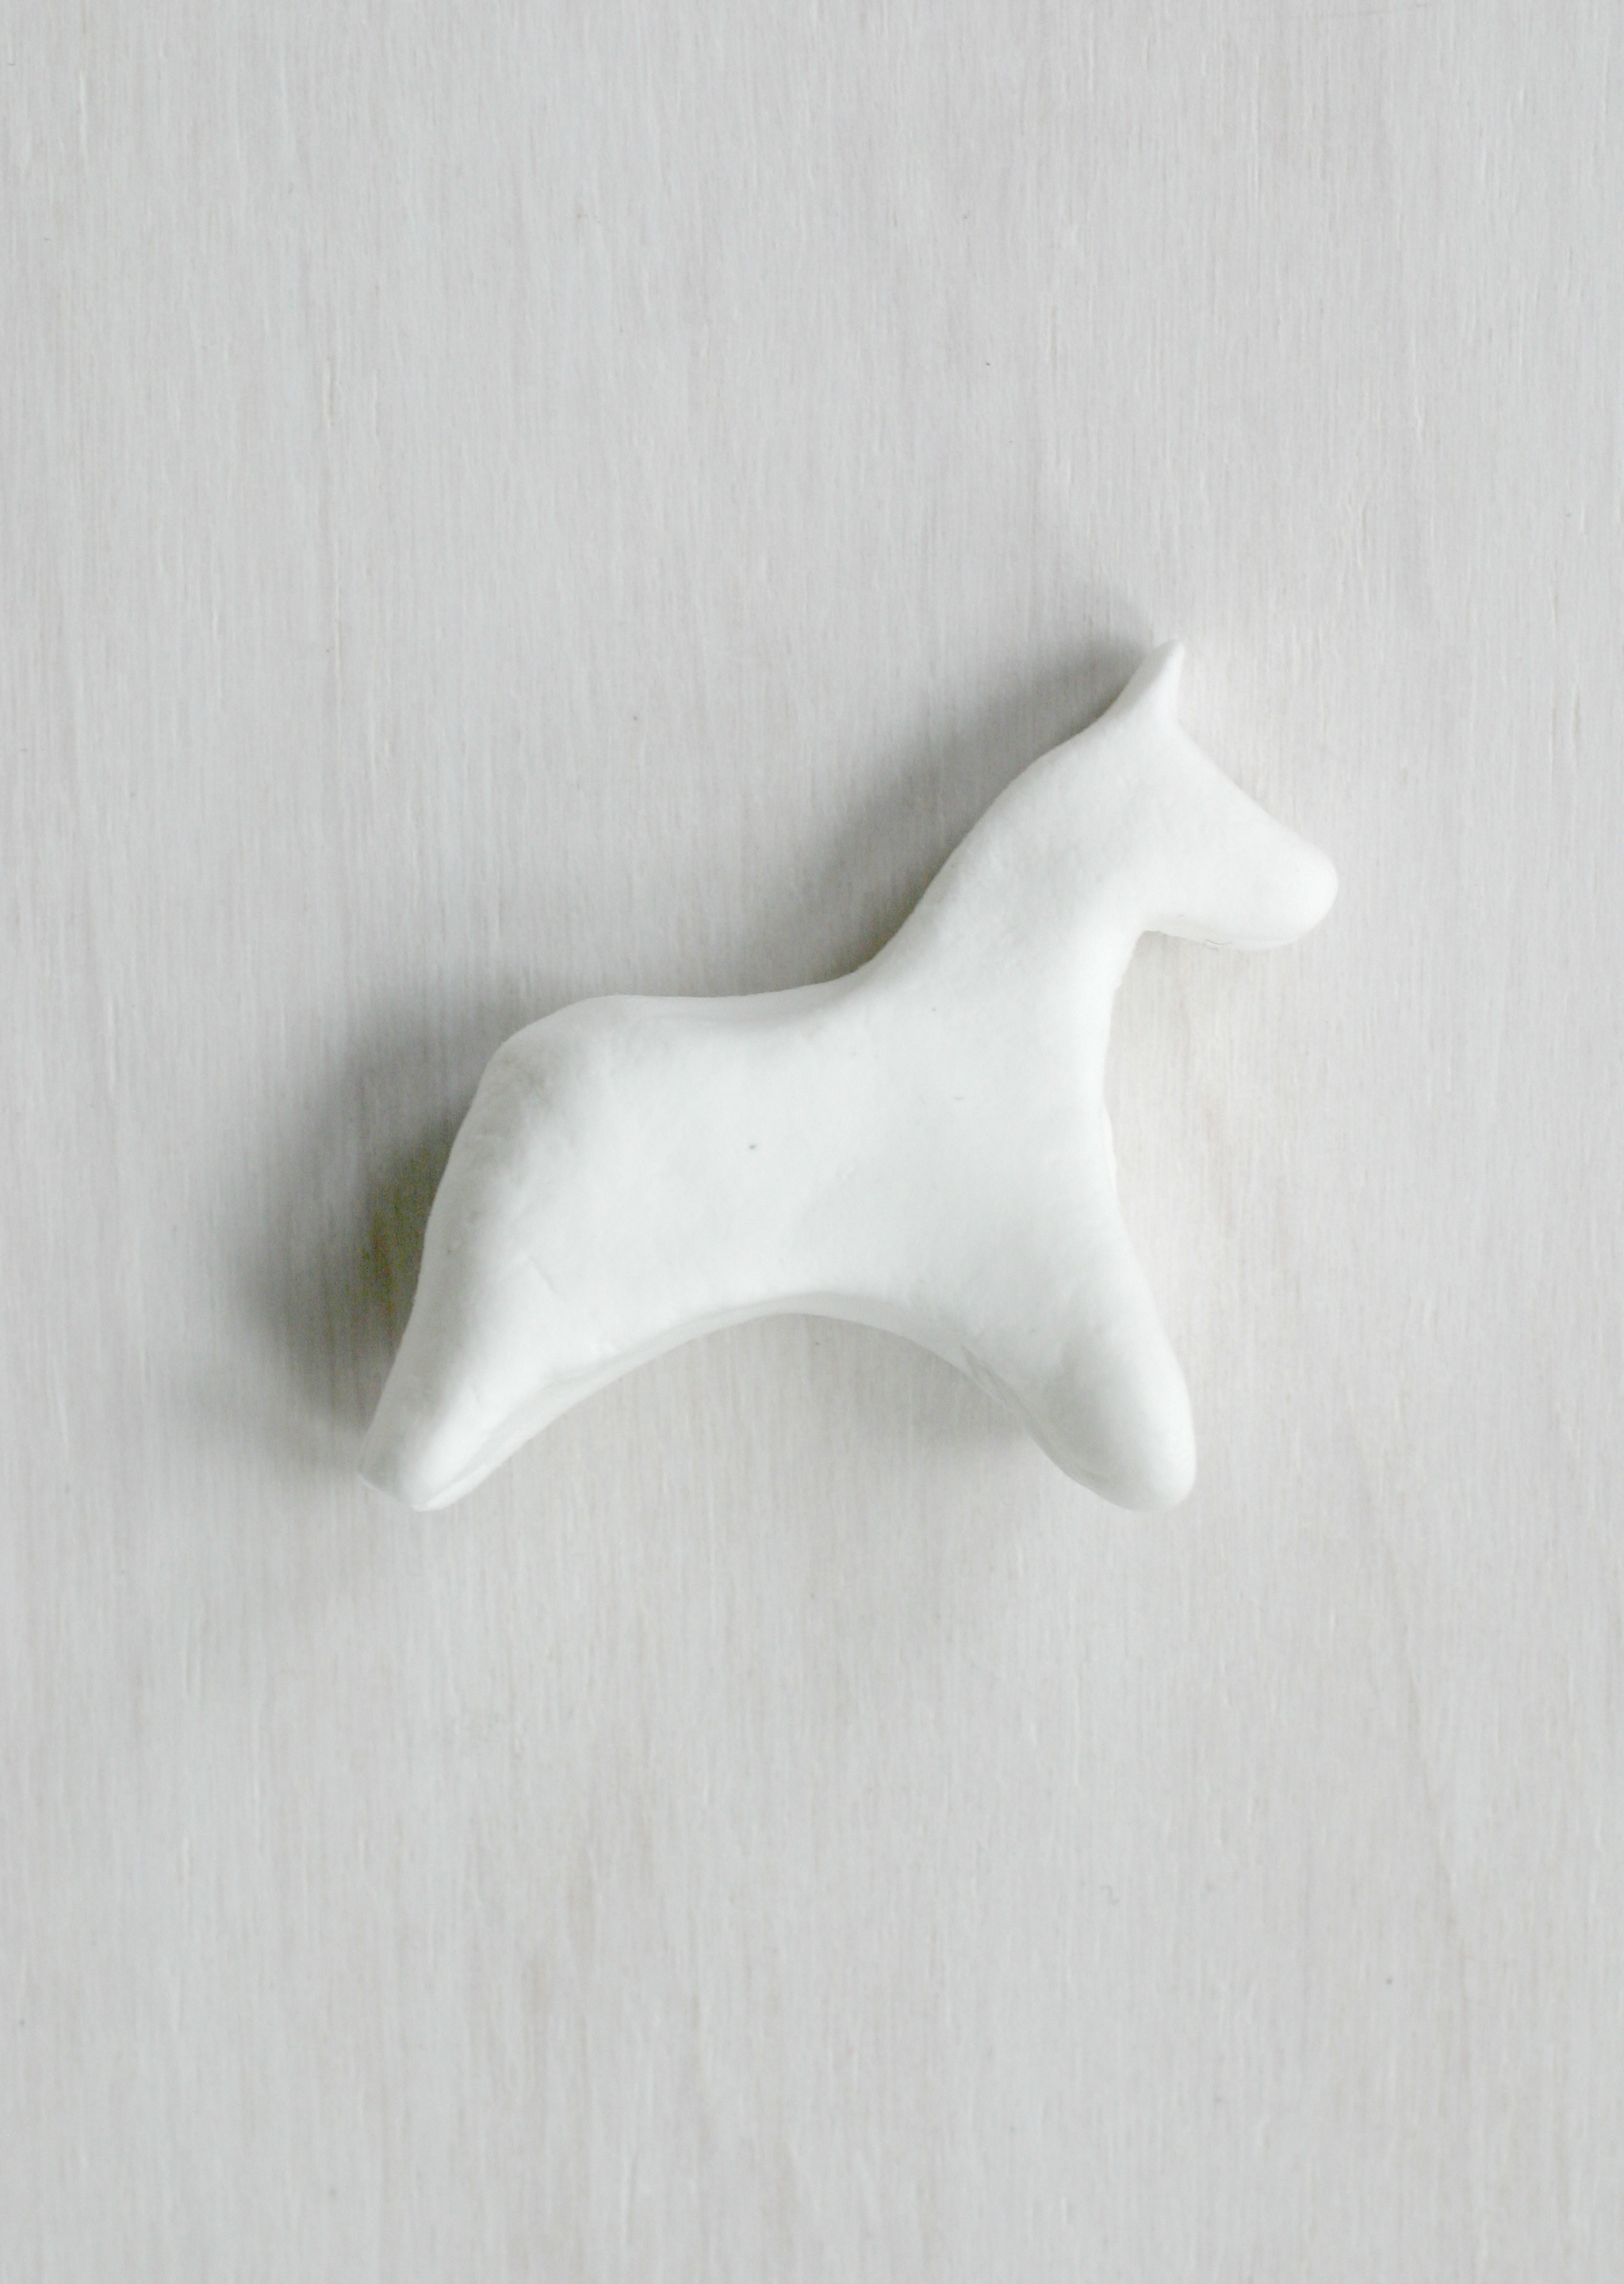
3. Roll the clay into a ball, then flatten it a bit. Gently pull on opposite corners to ease out the beginning of a neck and hind legs. Pull out one more corner for the front legs.
4. Continue gently pulling on the legs so they thin out a bit and get longer. Pull out the neck a bit more, continuing to keep it pretty flat. Bend the end of the neck down, making a sharp corner, and form the shape of the head. Pull up a flap from the top of the head for the ears from the top of the head.

5. Pull out the legs even further so they're nice and long. Squish the body of the horse a bit so it lengthens and thins out.
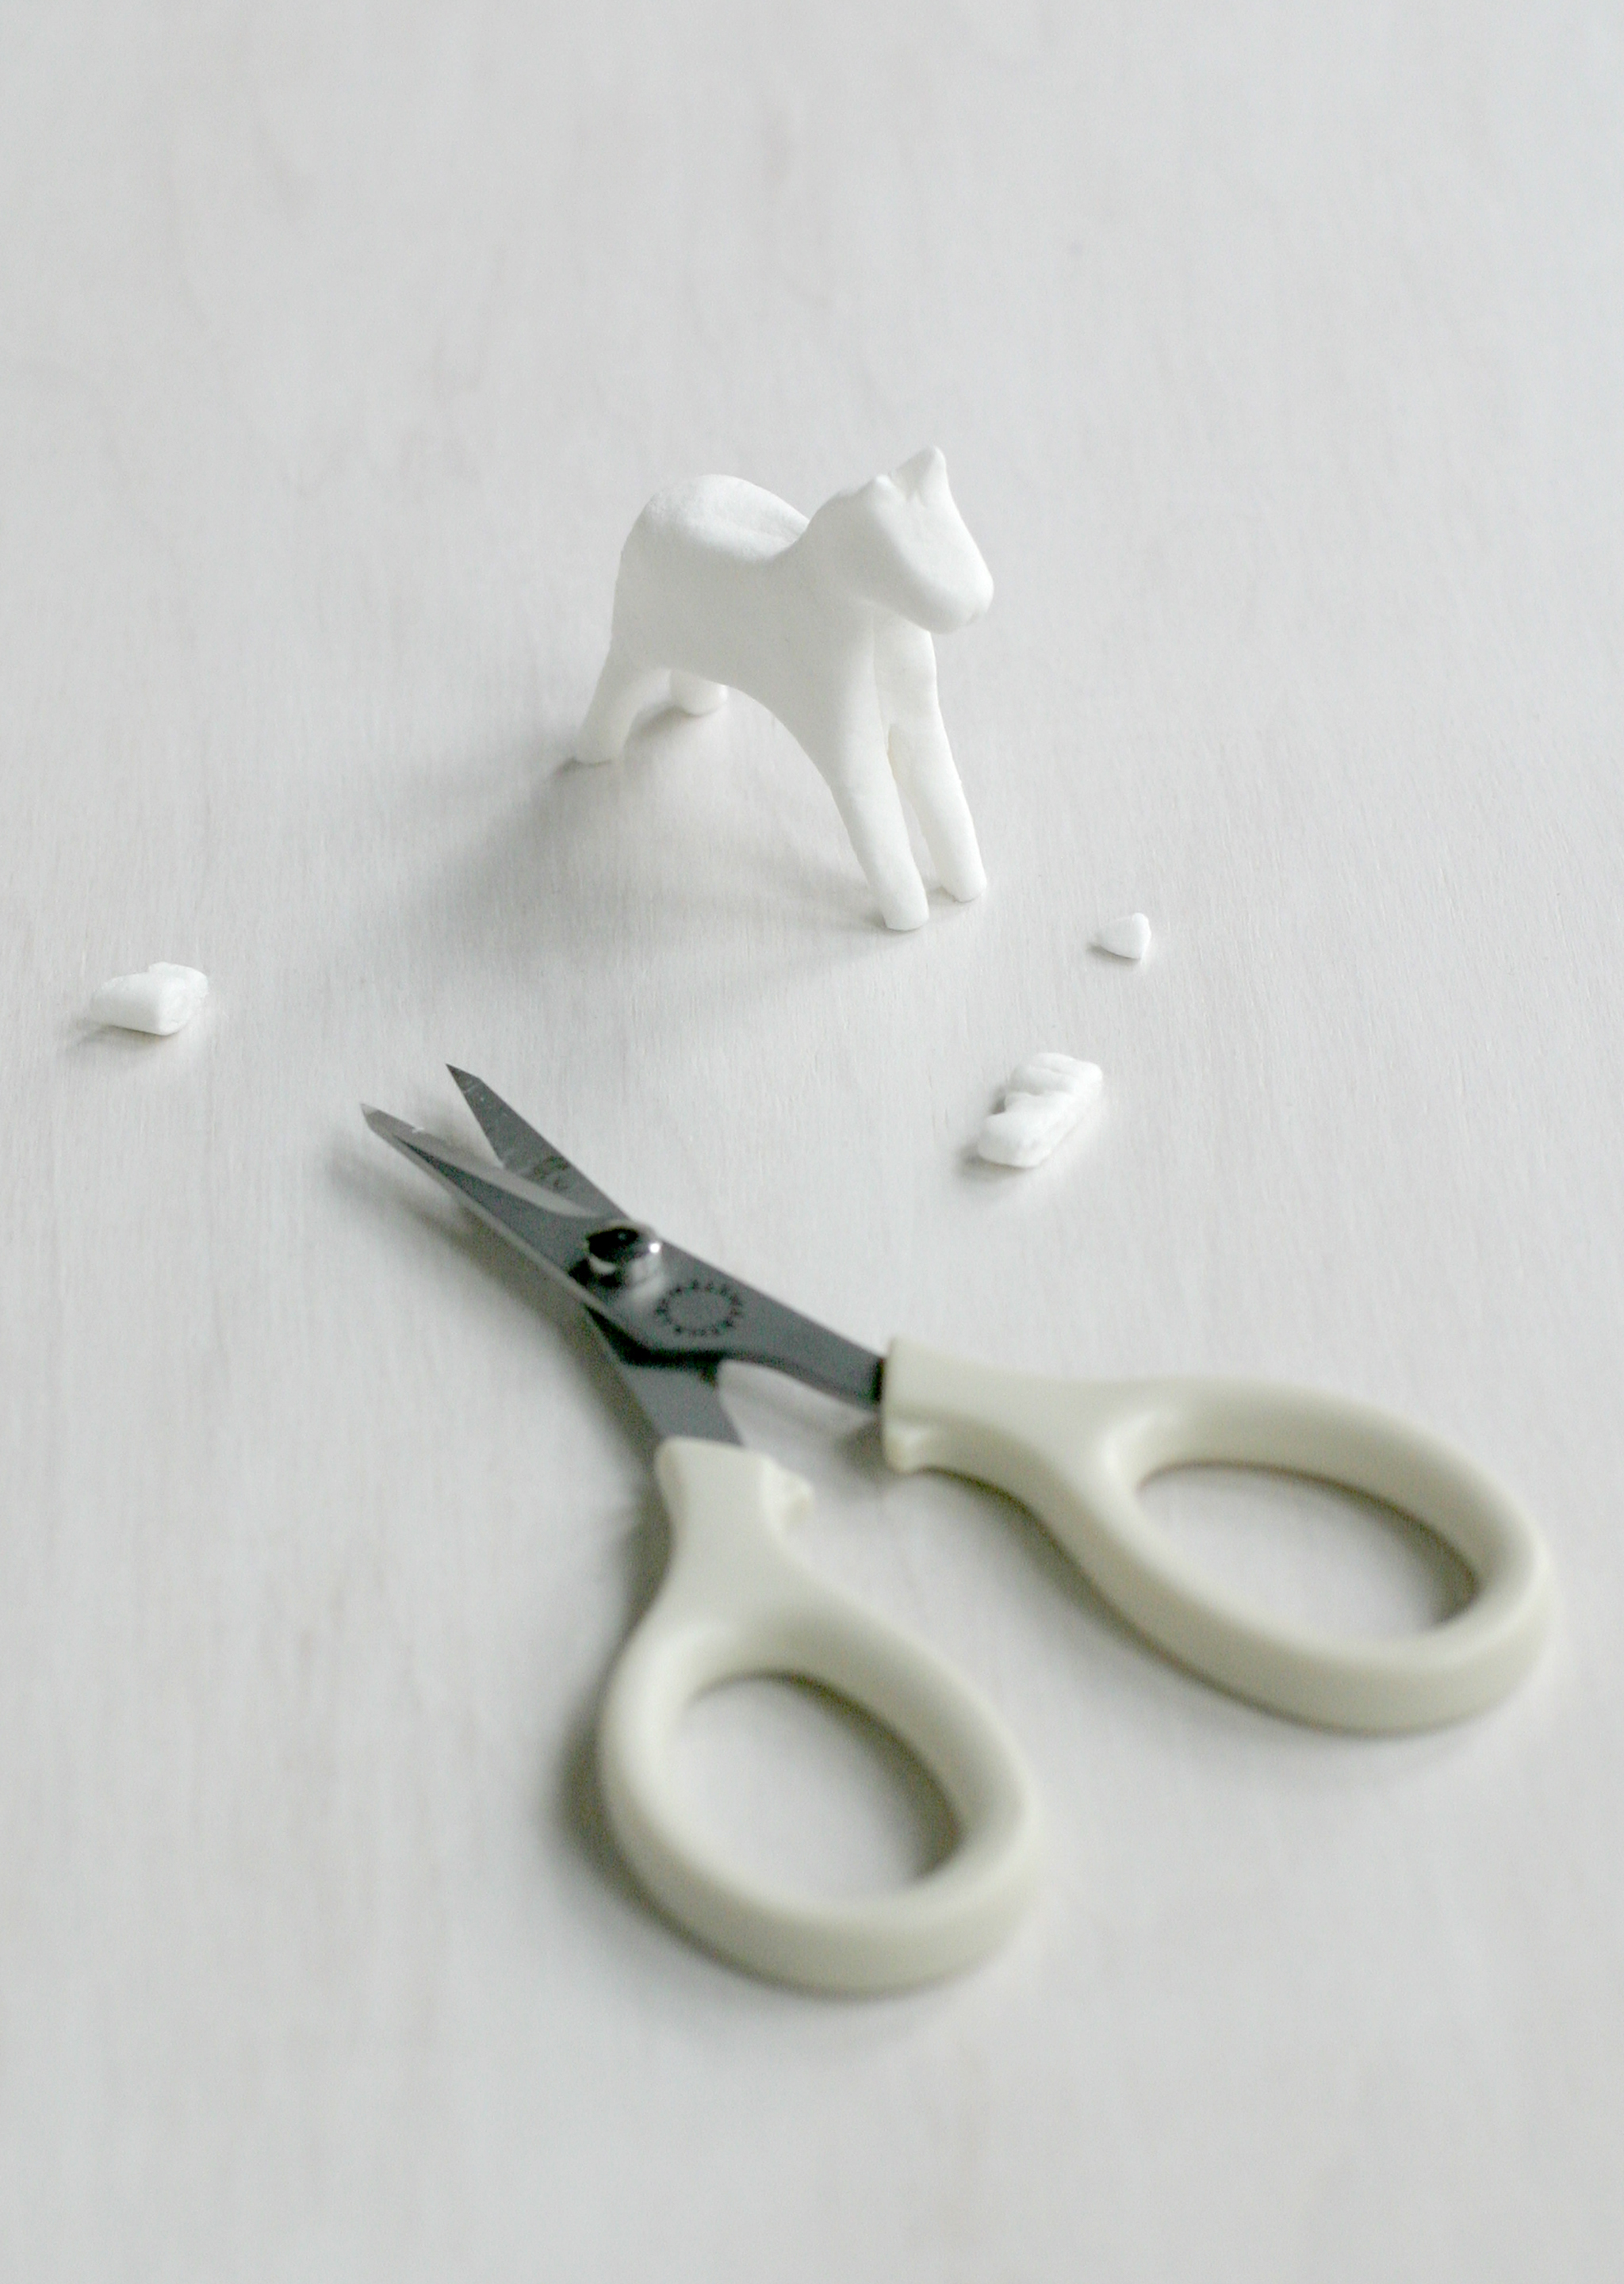
6. Use the scissors to snip the shape of the ears. Snip each set of legs apart and cut off the ends of the legs so they're all the same length.
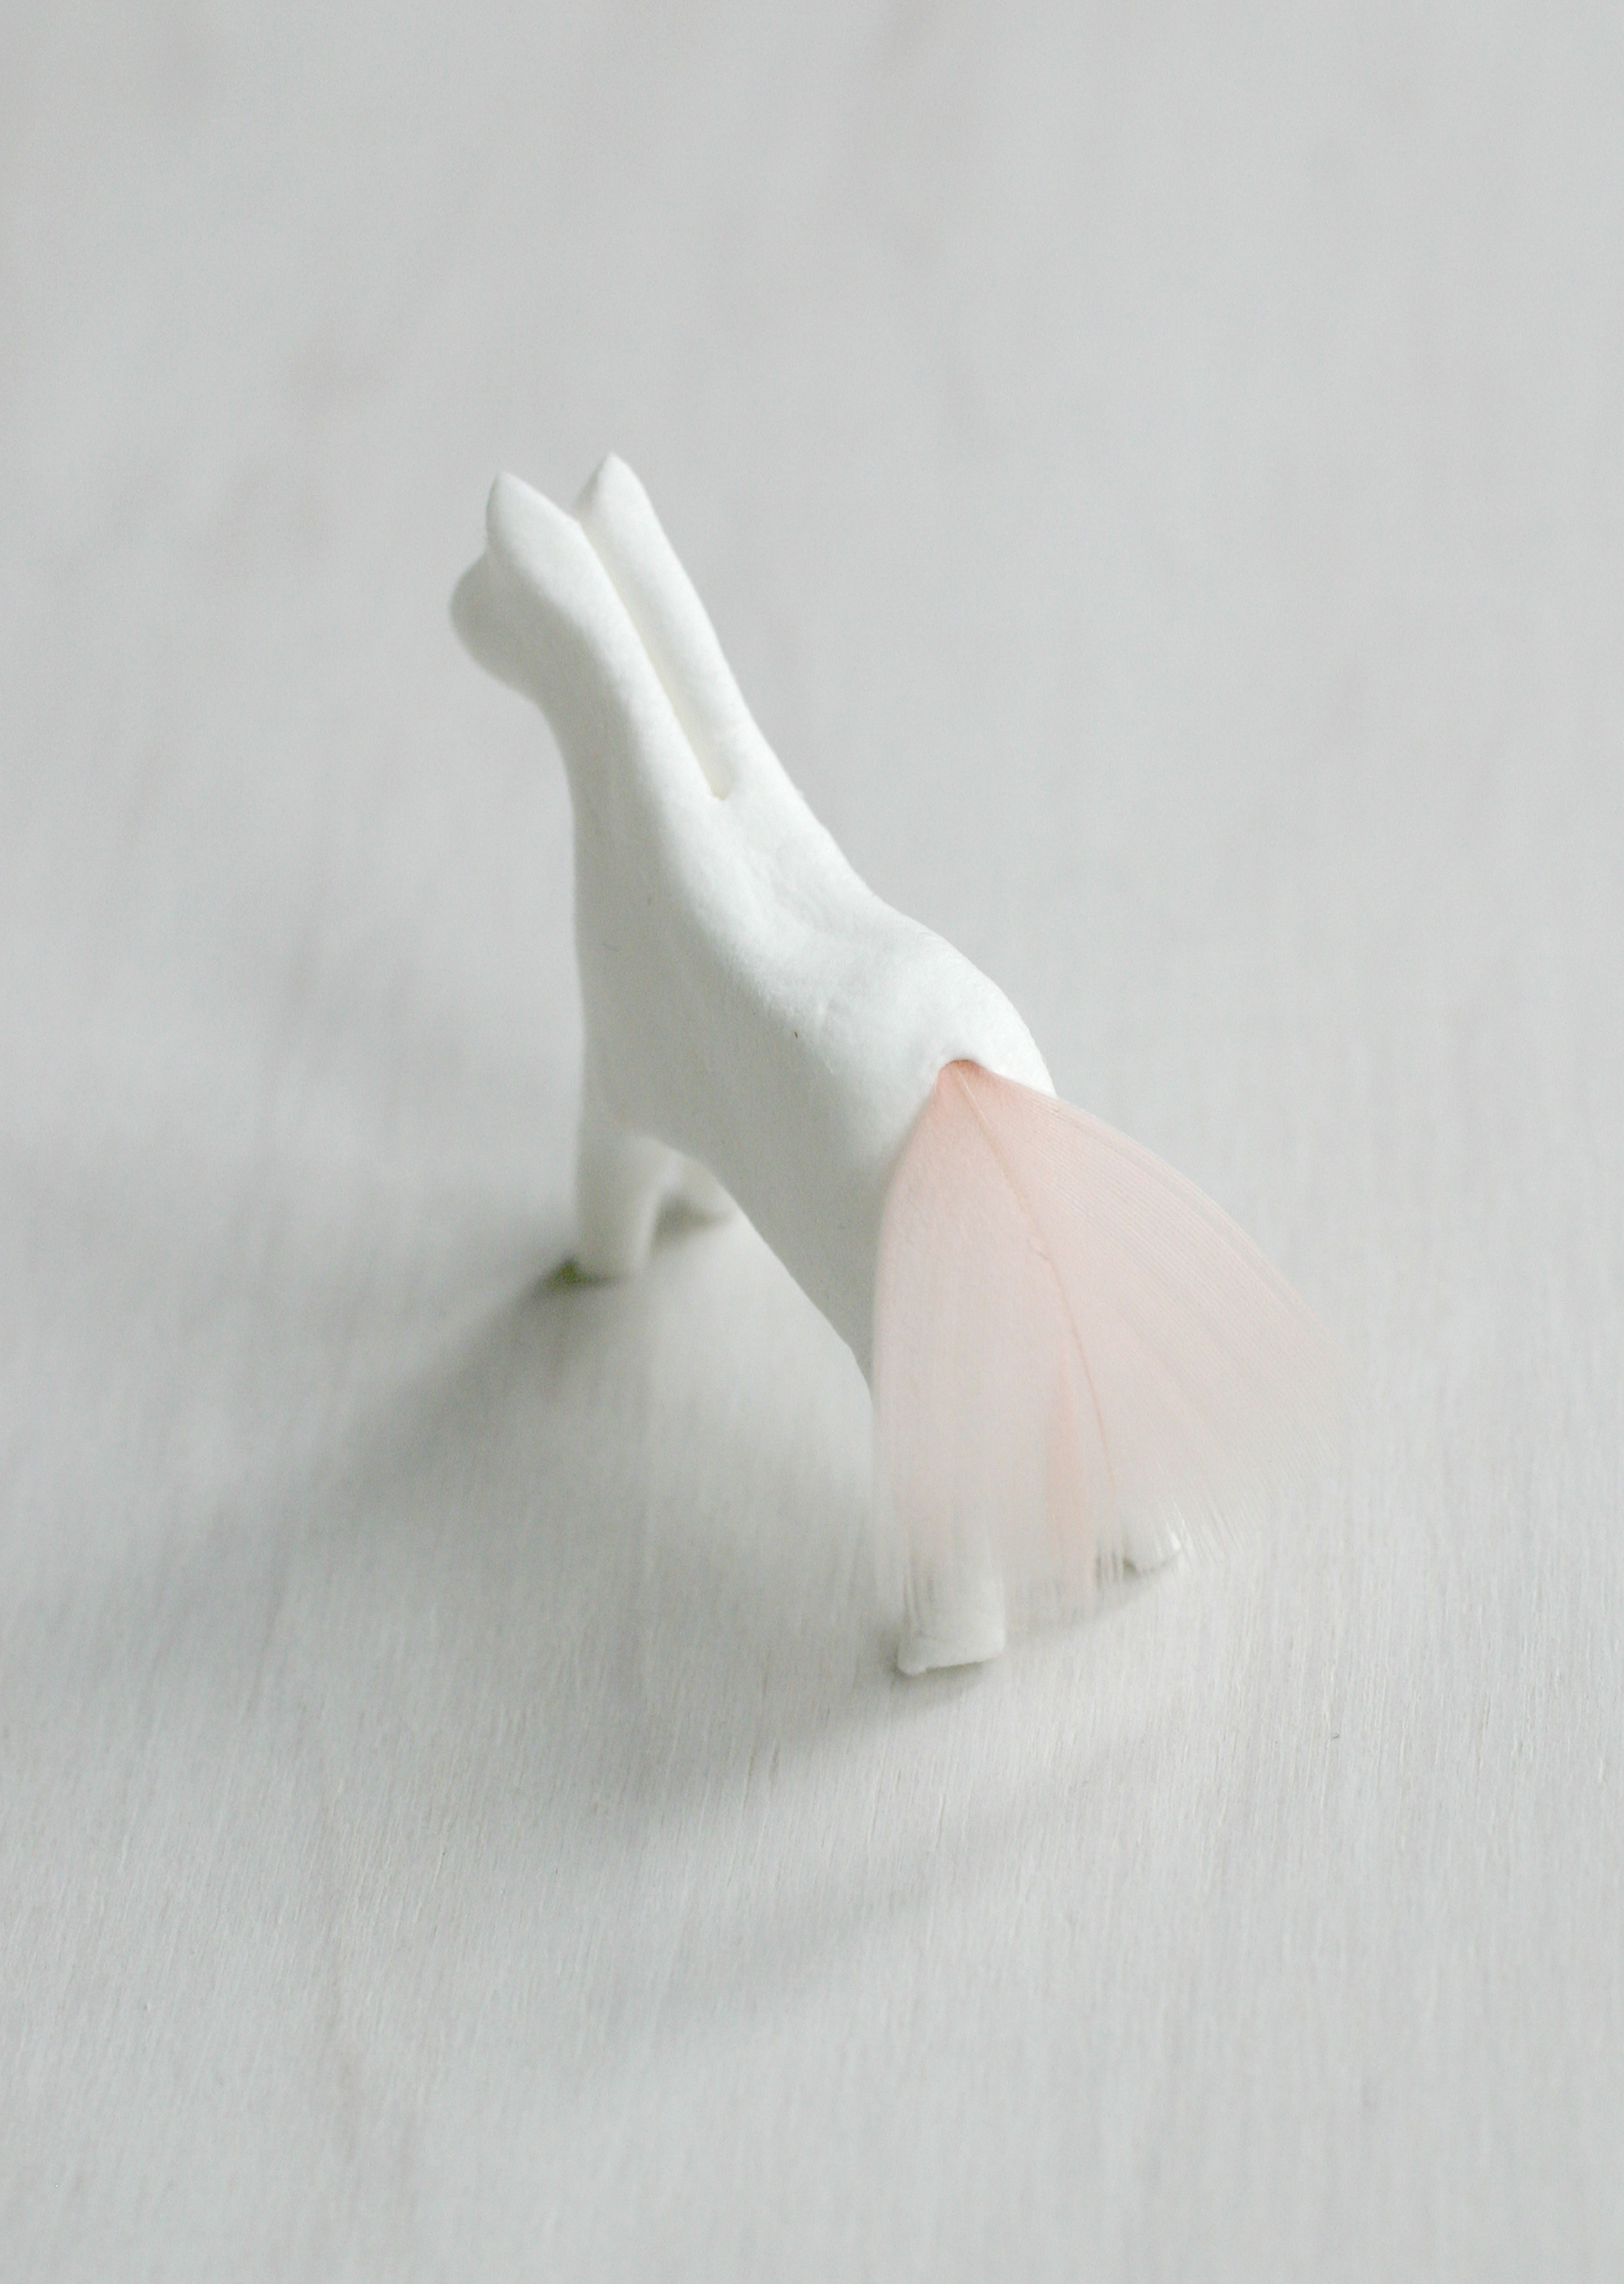
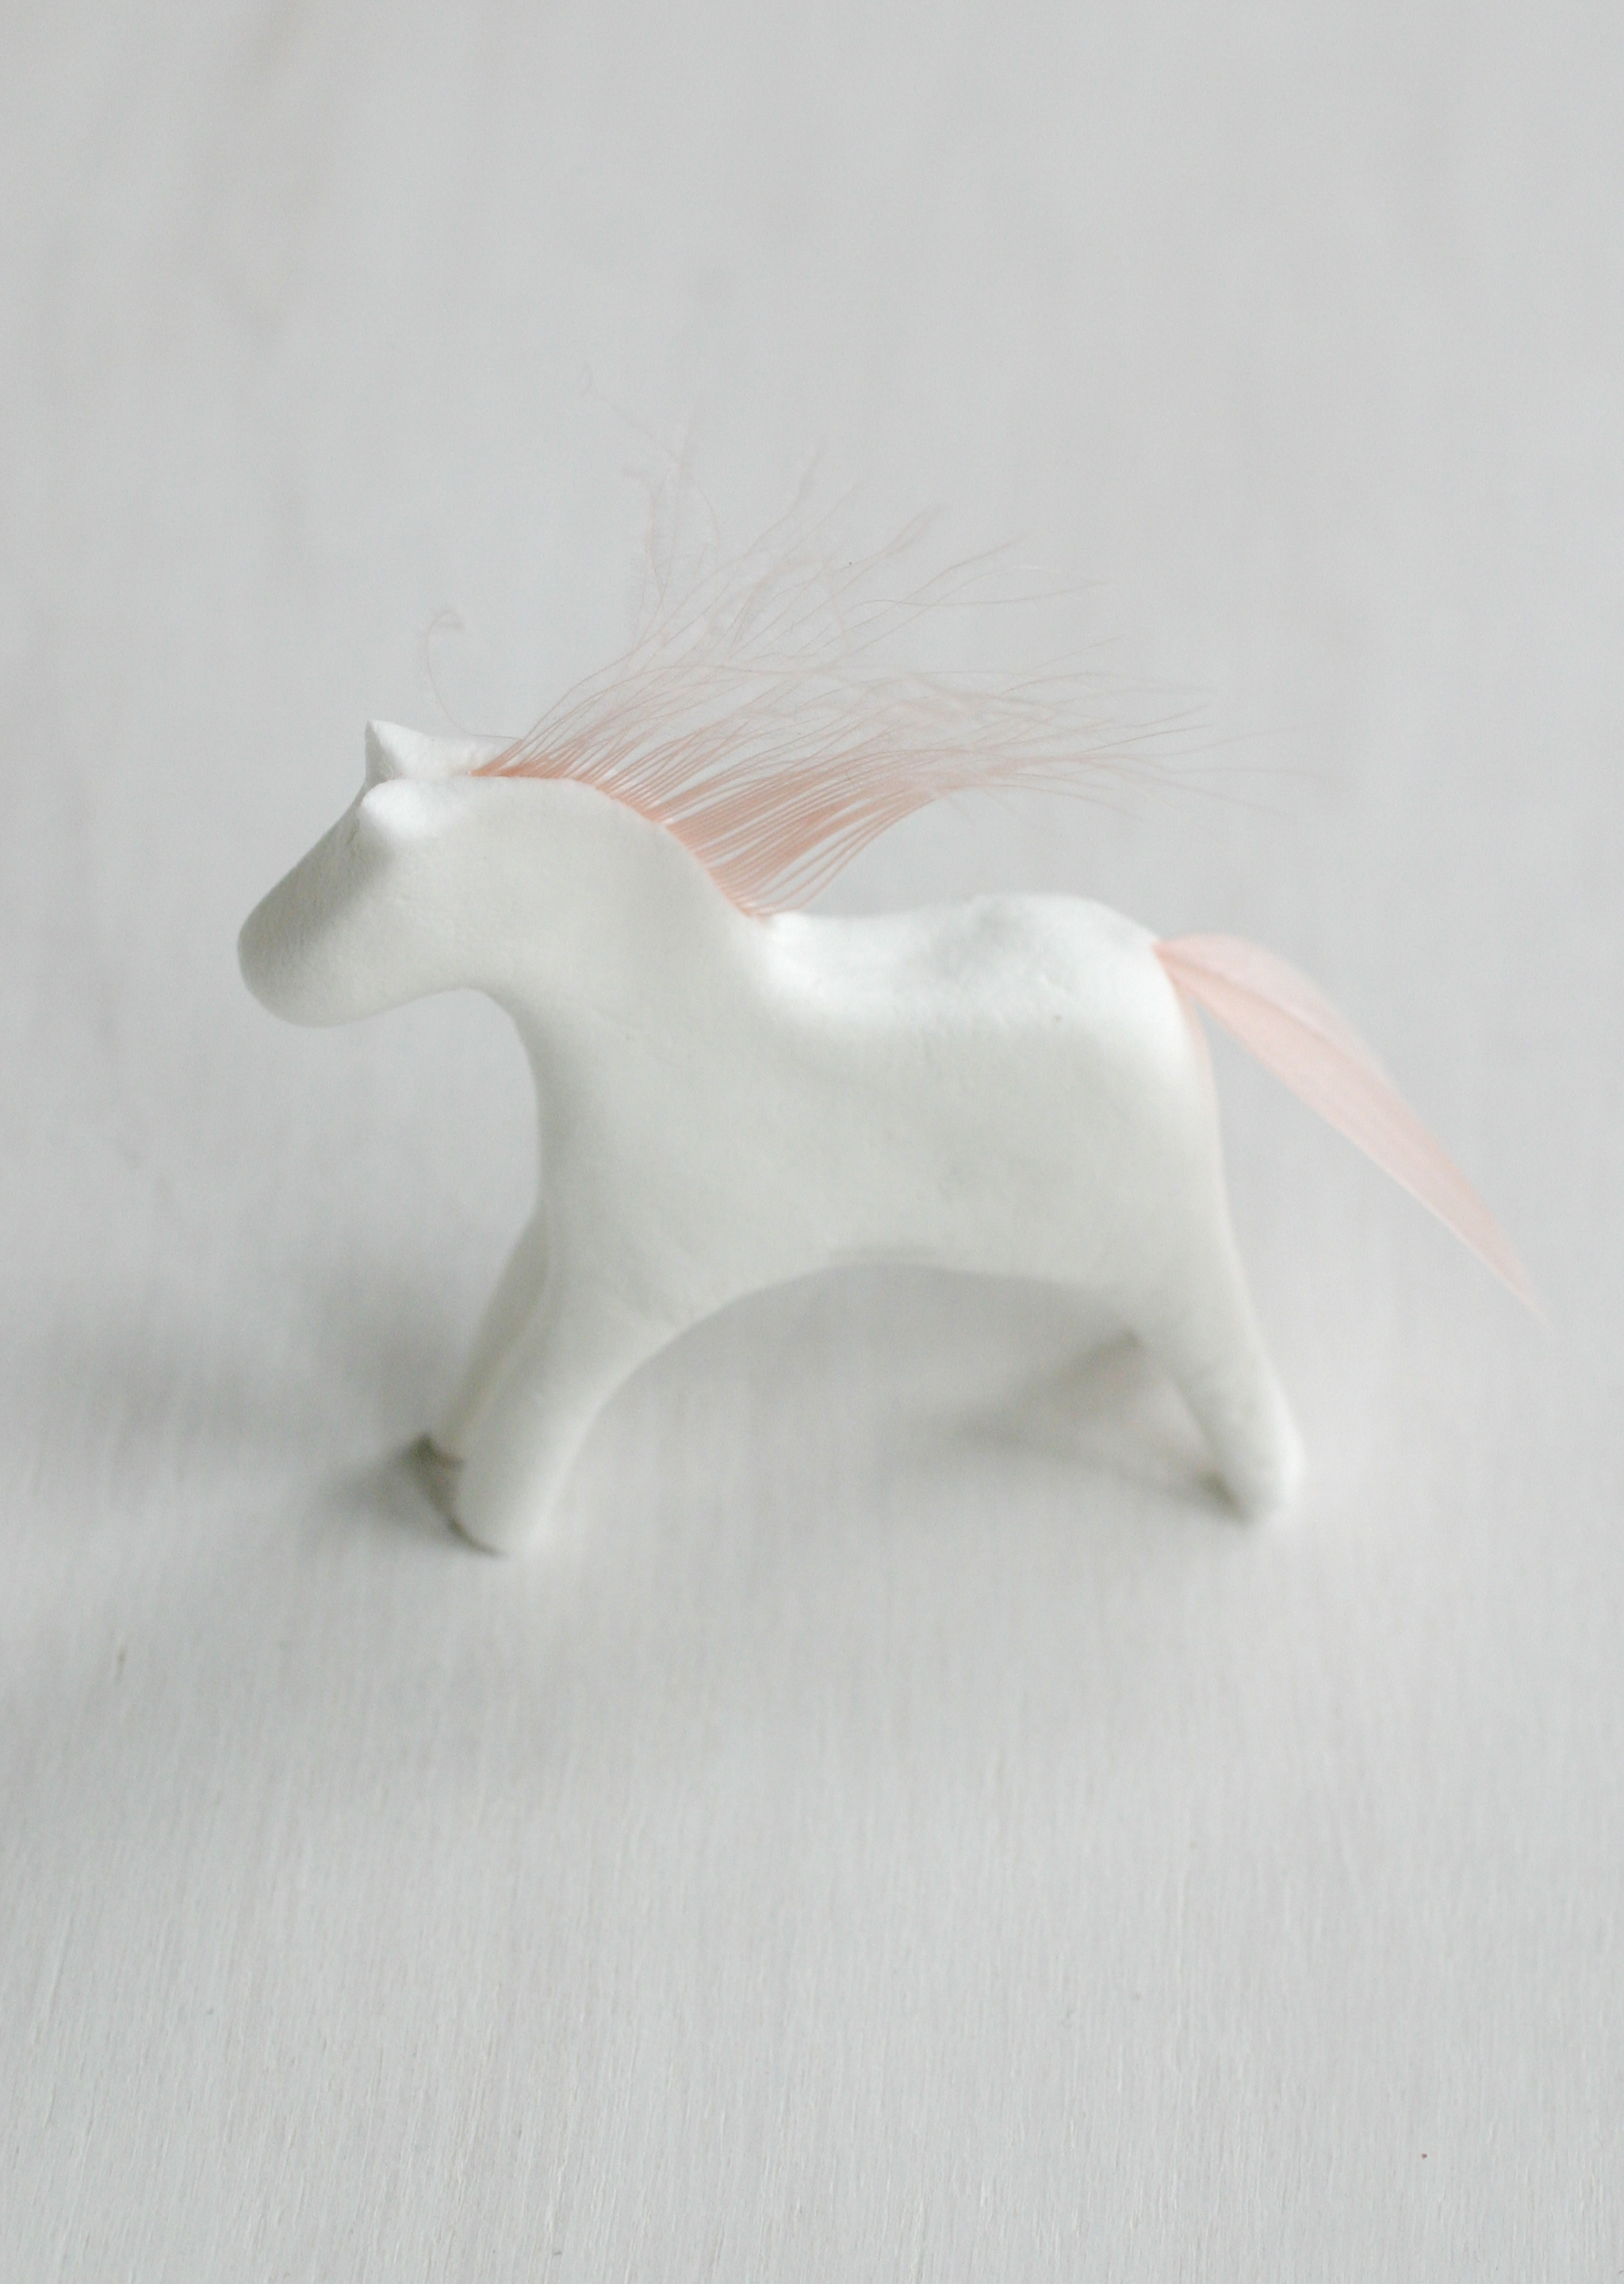
7. Stick the end of the feather into the horse to make the tail. Use the scissors to make a dent down the back of the neck.
8. Place the other piece of feather in the neck for the mane, pressing the clay back together to hold it in place.
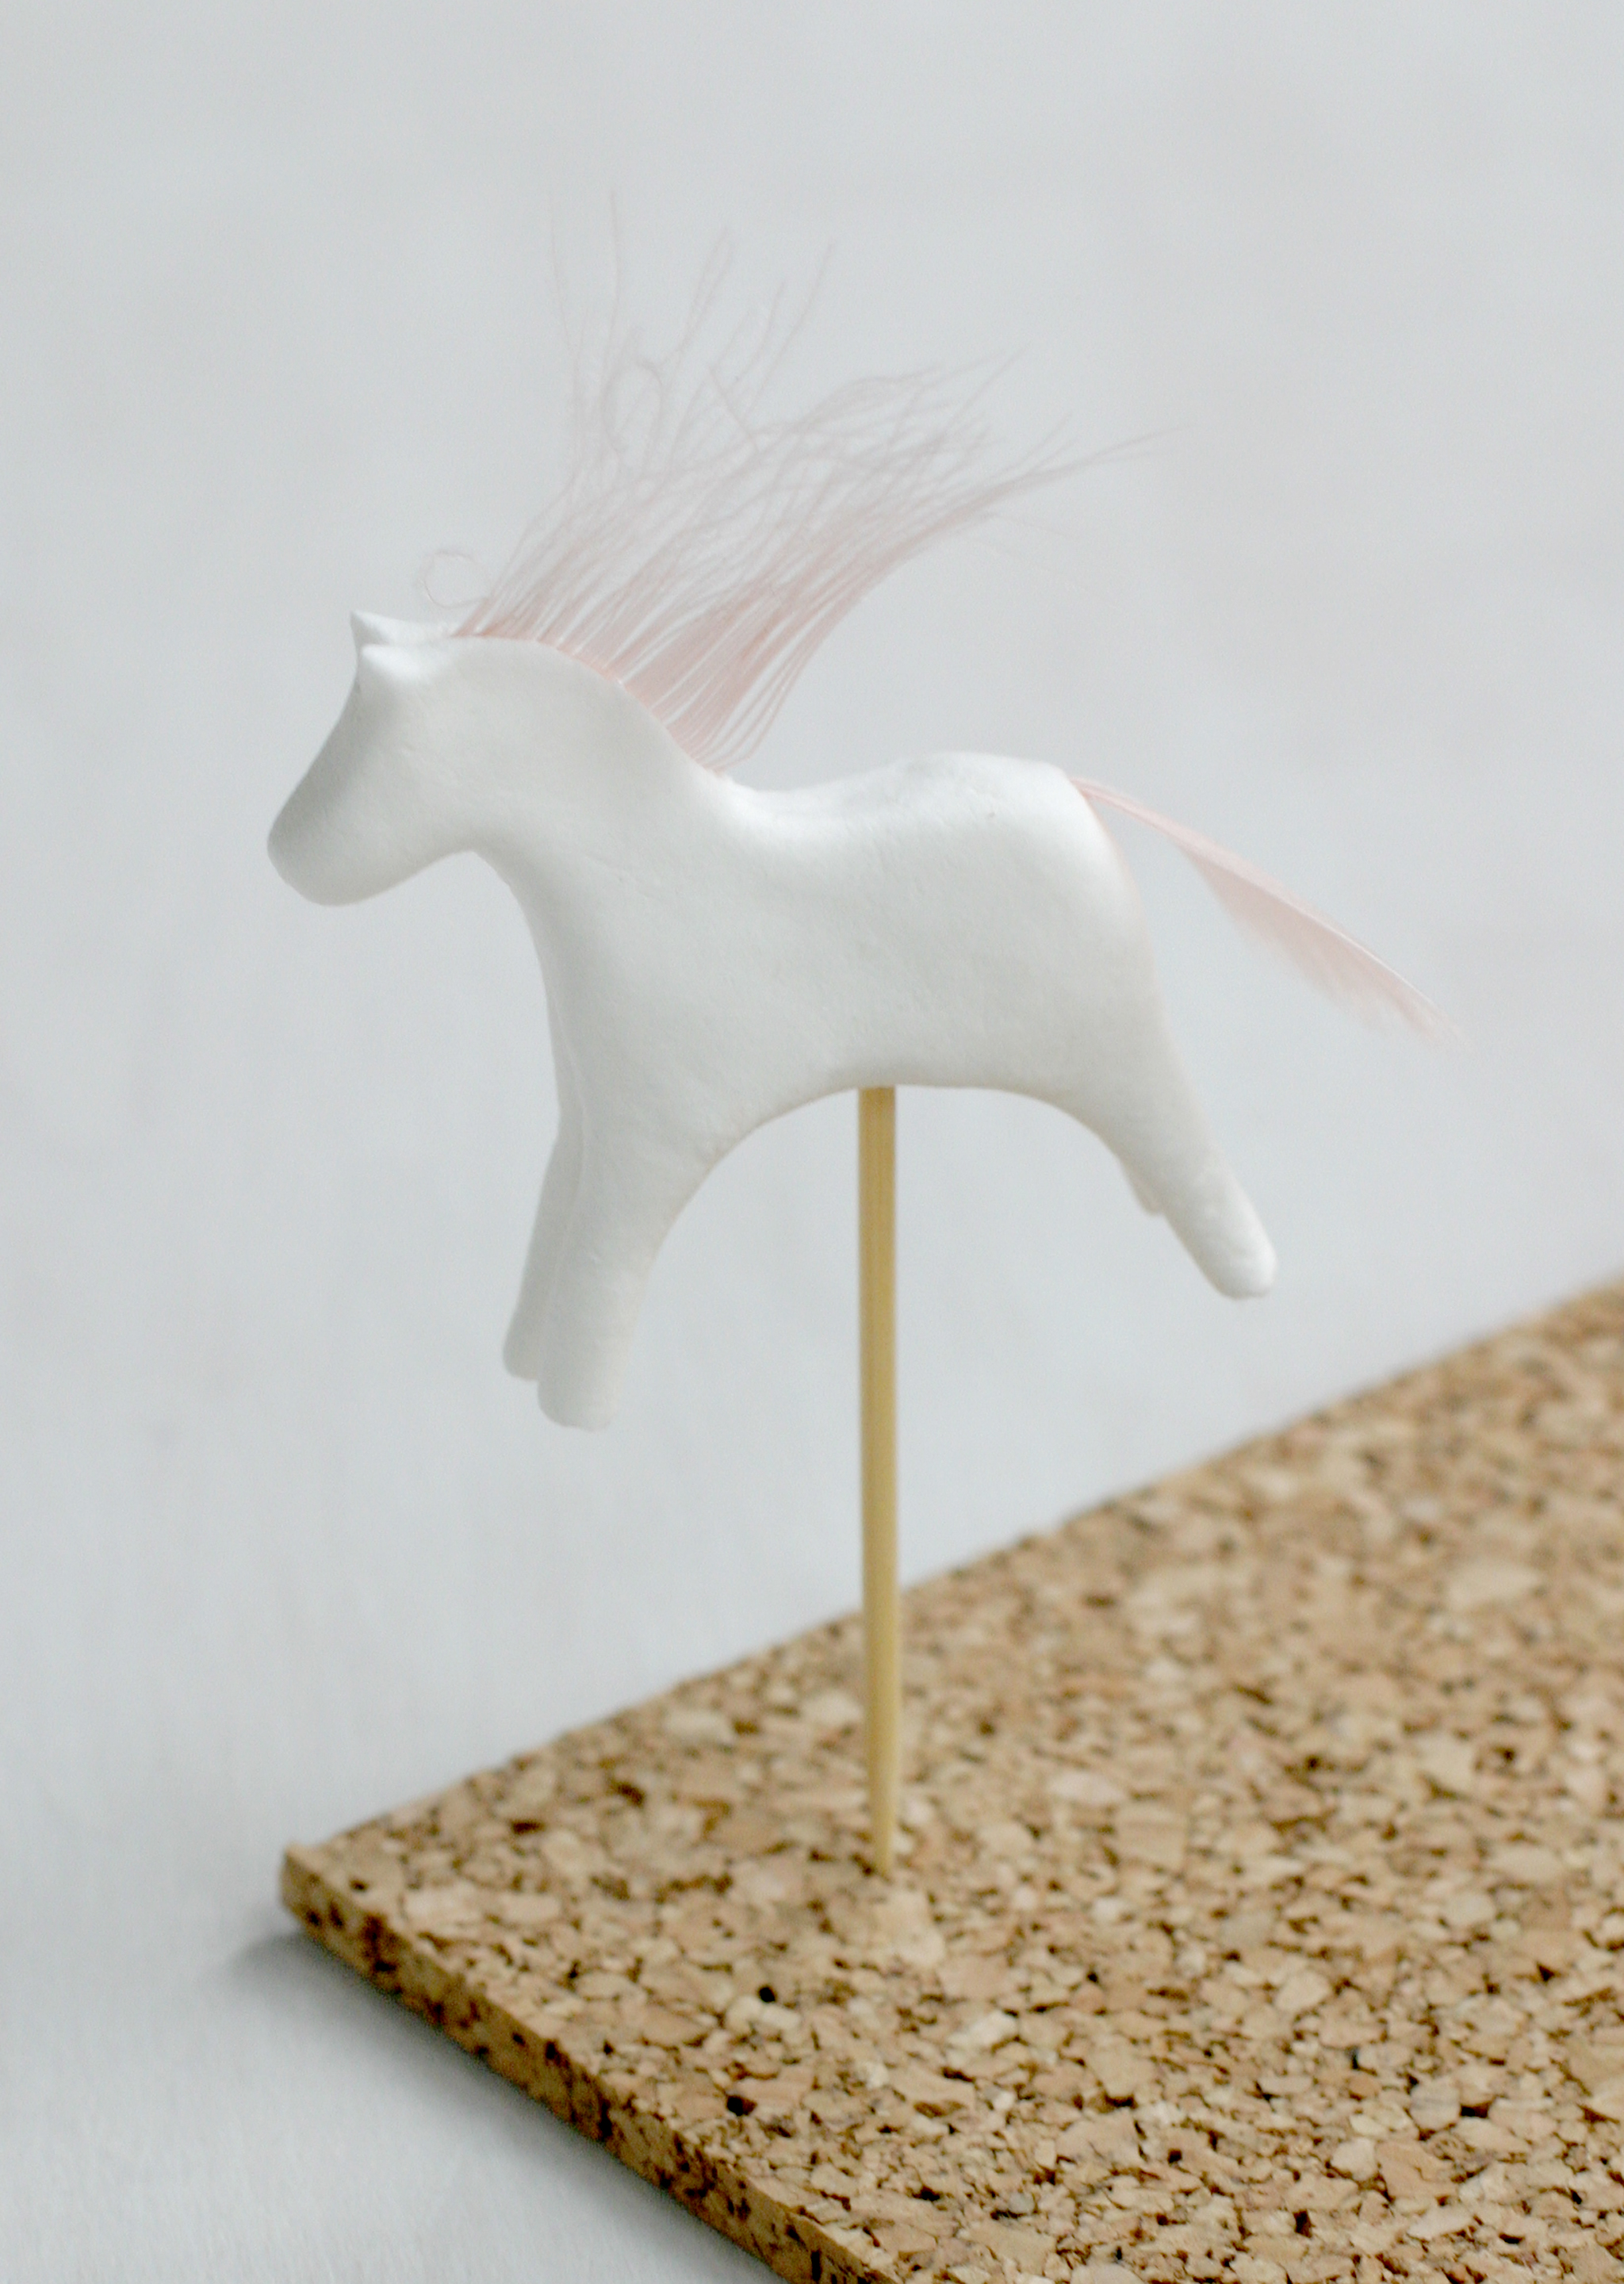
9. Place the horse on a cupcake pick.
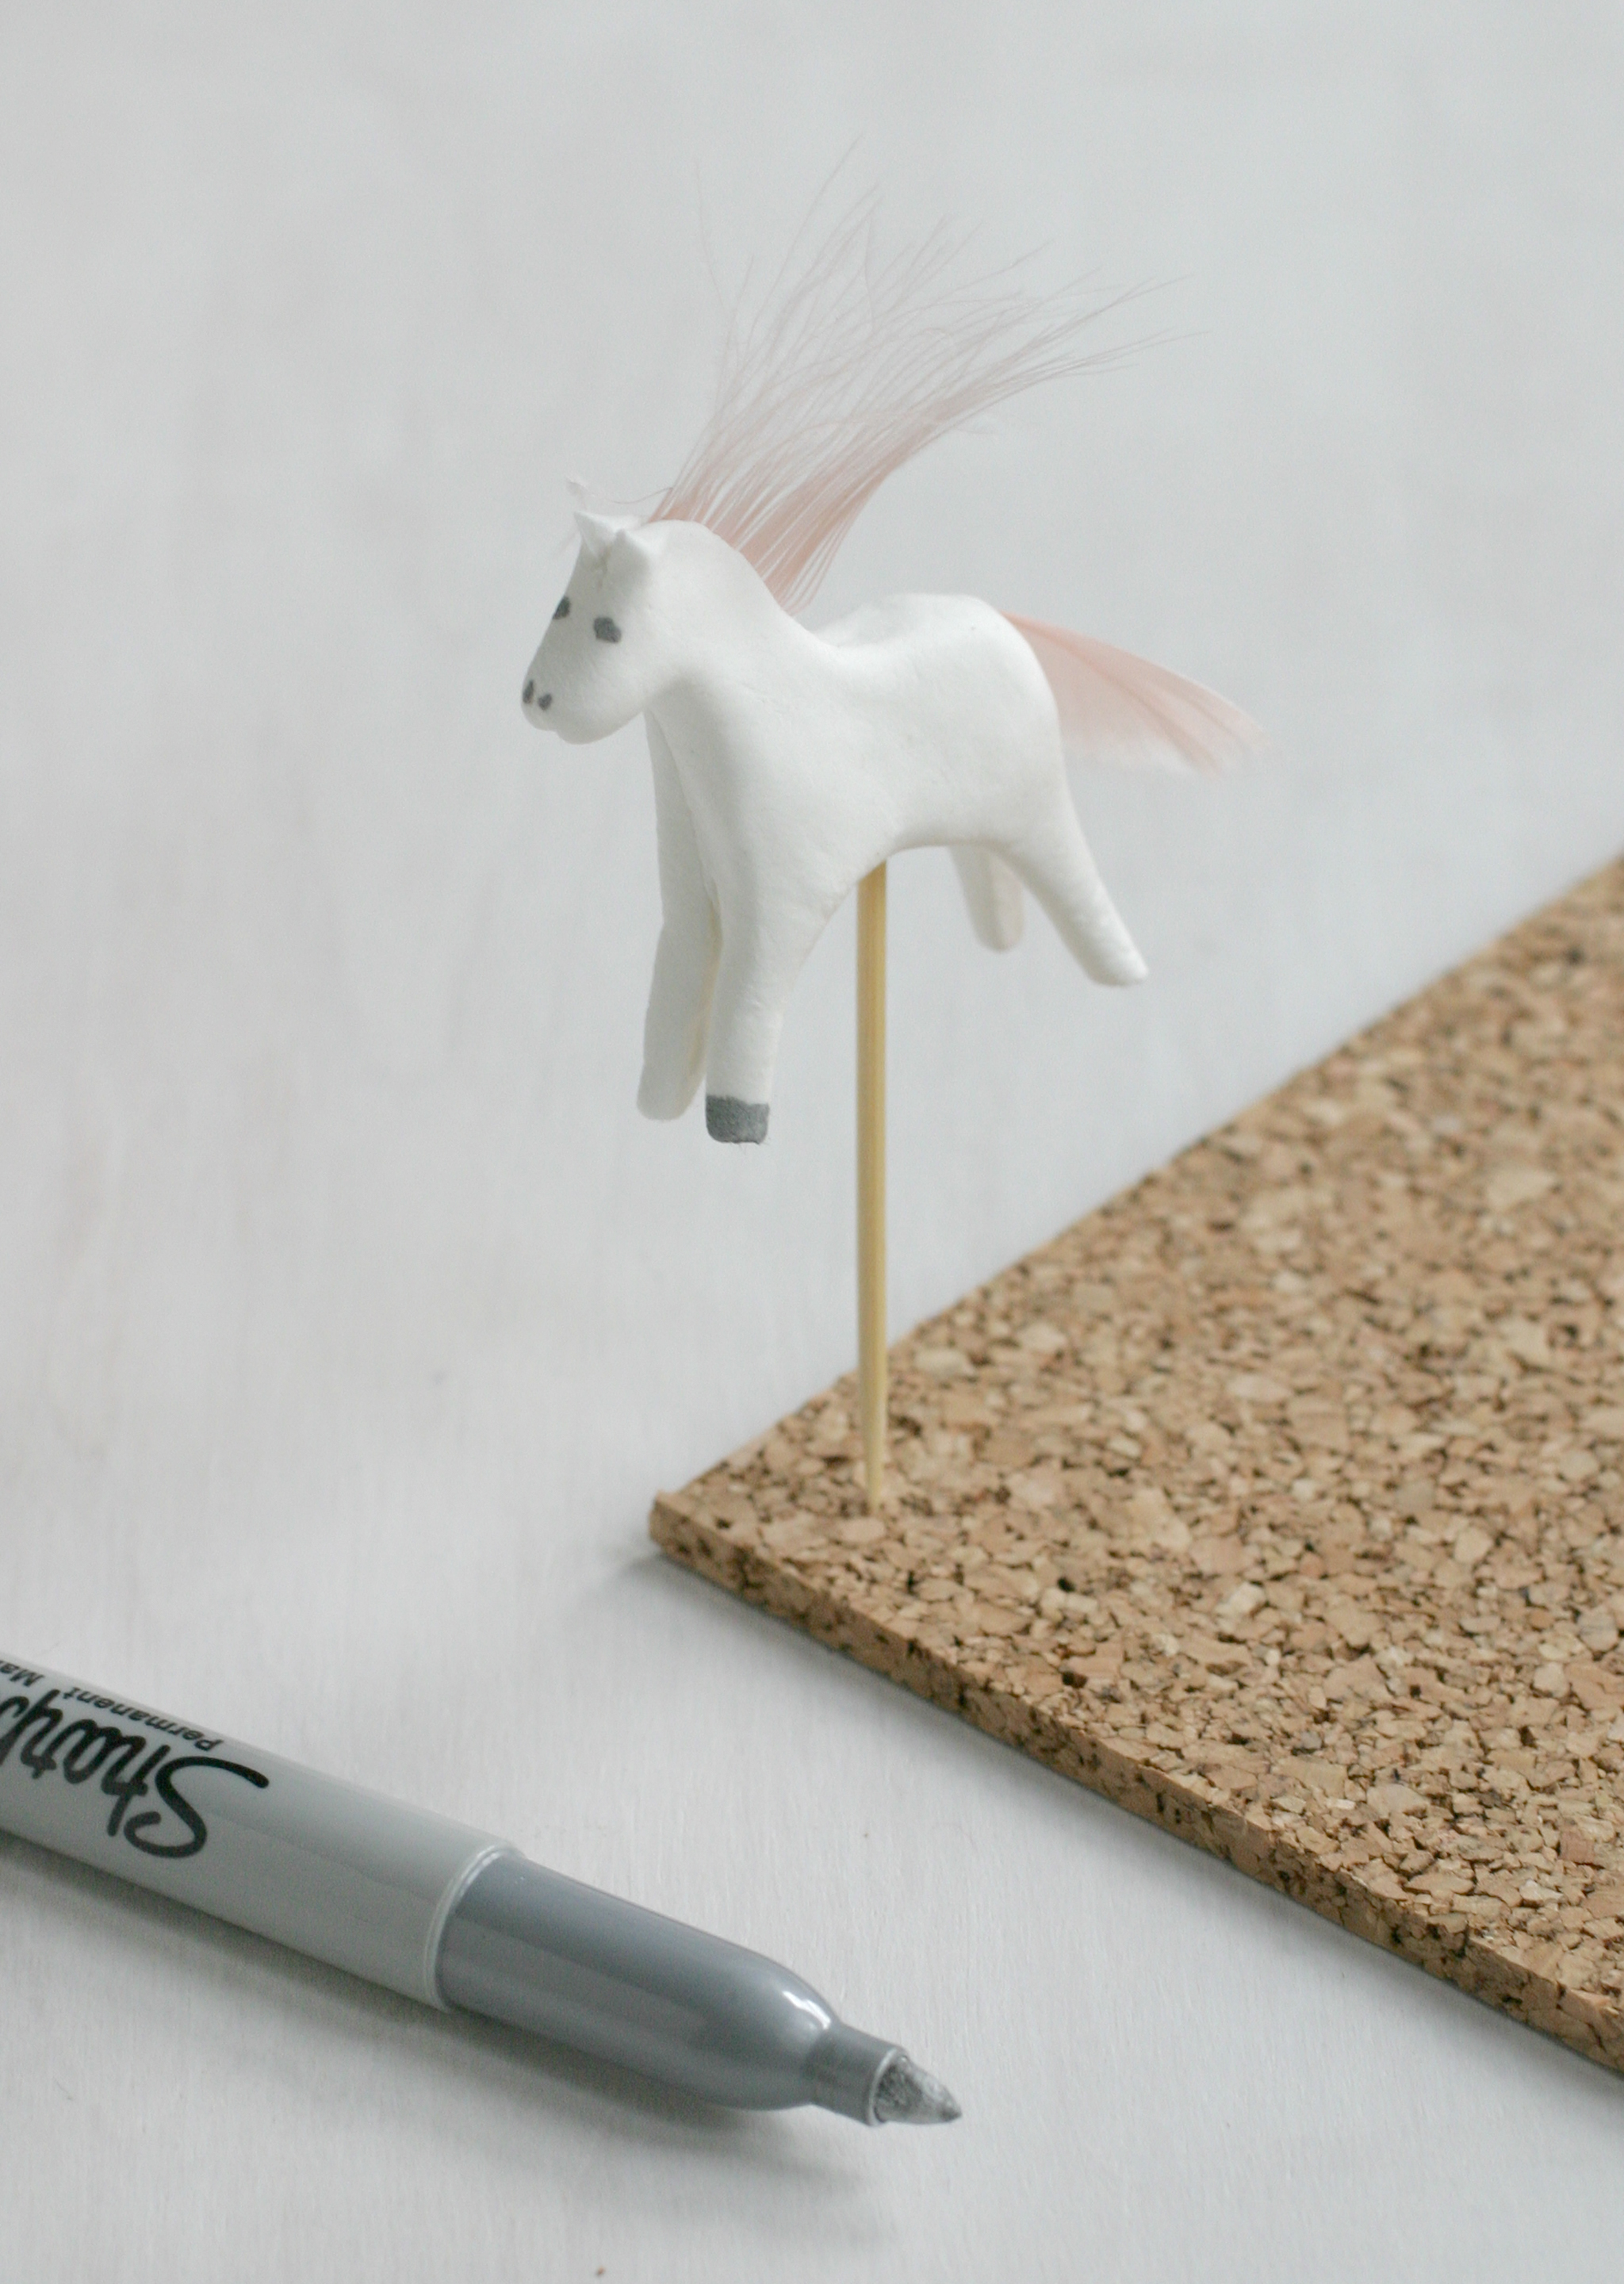
10. Use the Sharpie to draw eyes, nostrils, and color the hooves.
Let the horses dry overnight before using.
