• WASHLI SHOP
  • Work
  • Blog
  • About
Menu

HELLO ASHLEY TOTH

  • WASHLI SHOP
  • Work
  • Blog
  • About
IMG_7108.jpeg

DIY: PUZZLE BABY SHOWER

July 10, 2021

For my friends’ second baby, we picked a date for the shower last minute so I didn’t have too much time to put it together. So I focused on making a few special things they could keep if they wanted and some decorations to brighten up the space (our summer rental home). For the theme I was inspired by their son Eli who is super into puzzles these days - I wanted to make sure he had fun at the party.

IMG_7101.jpeg

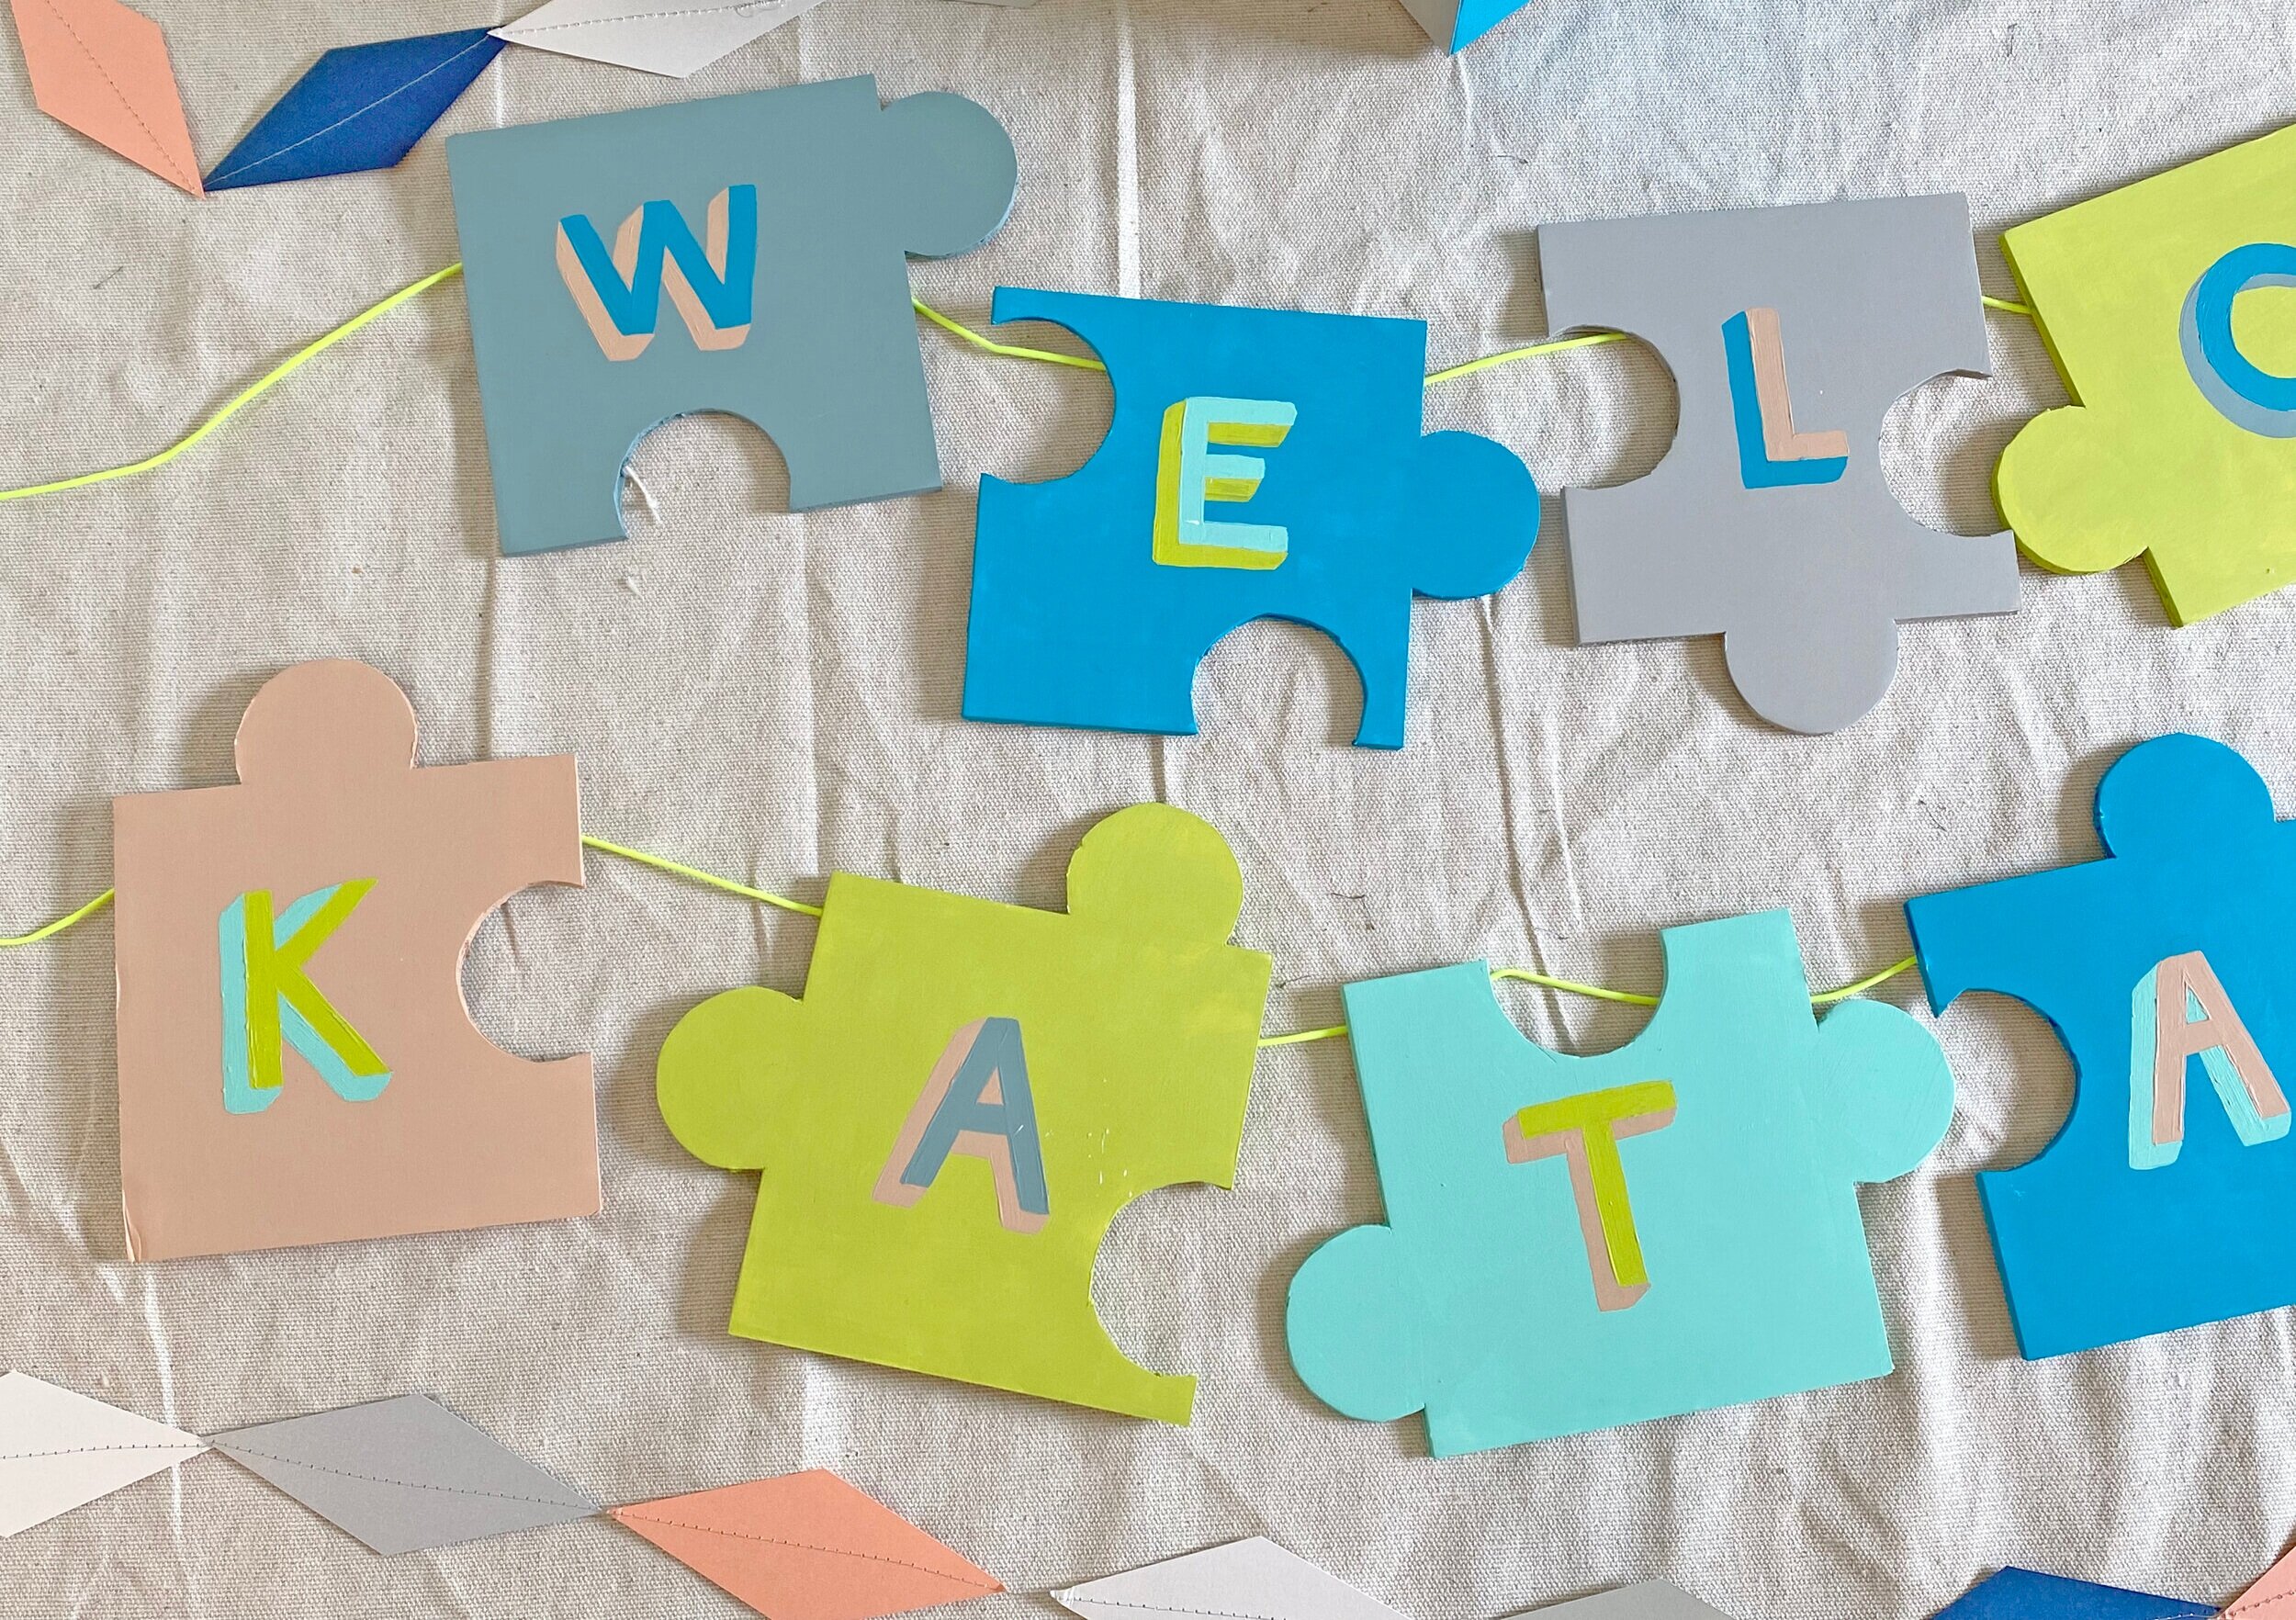
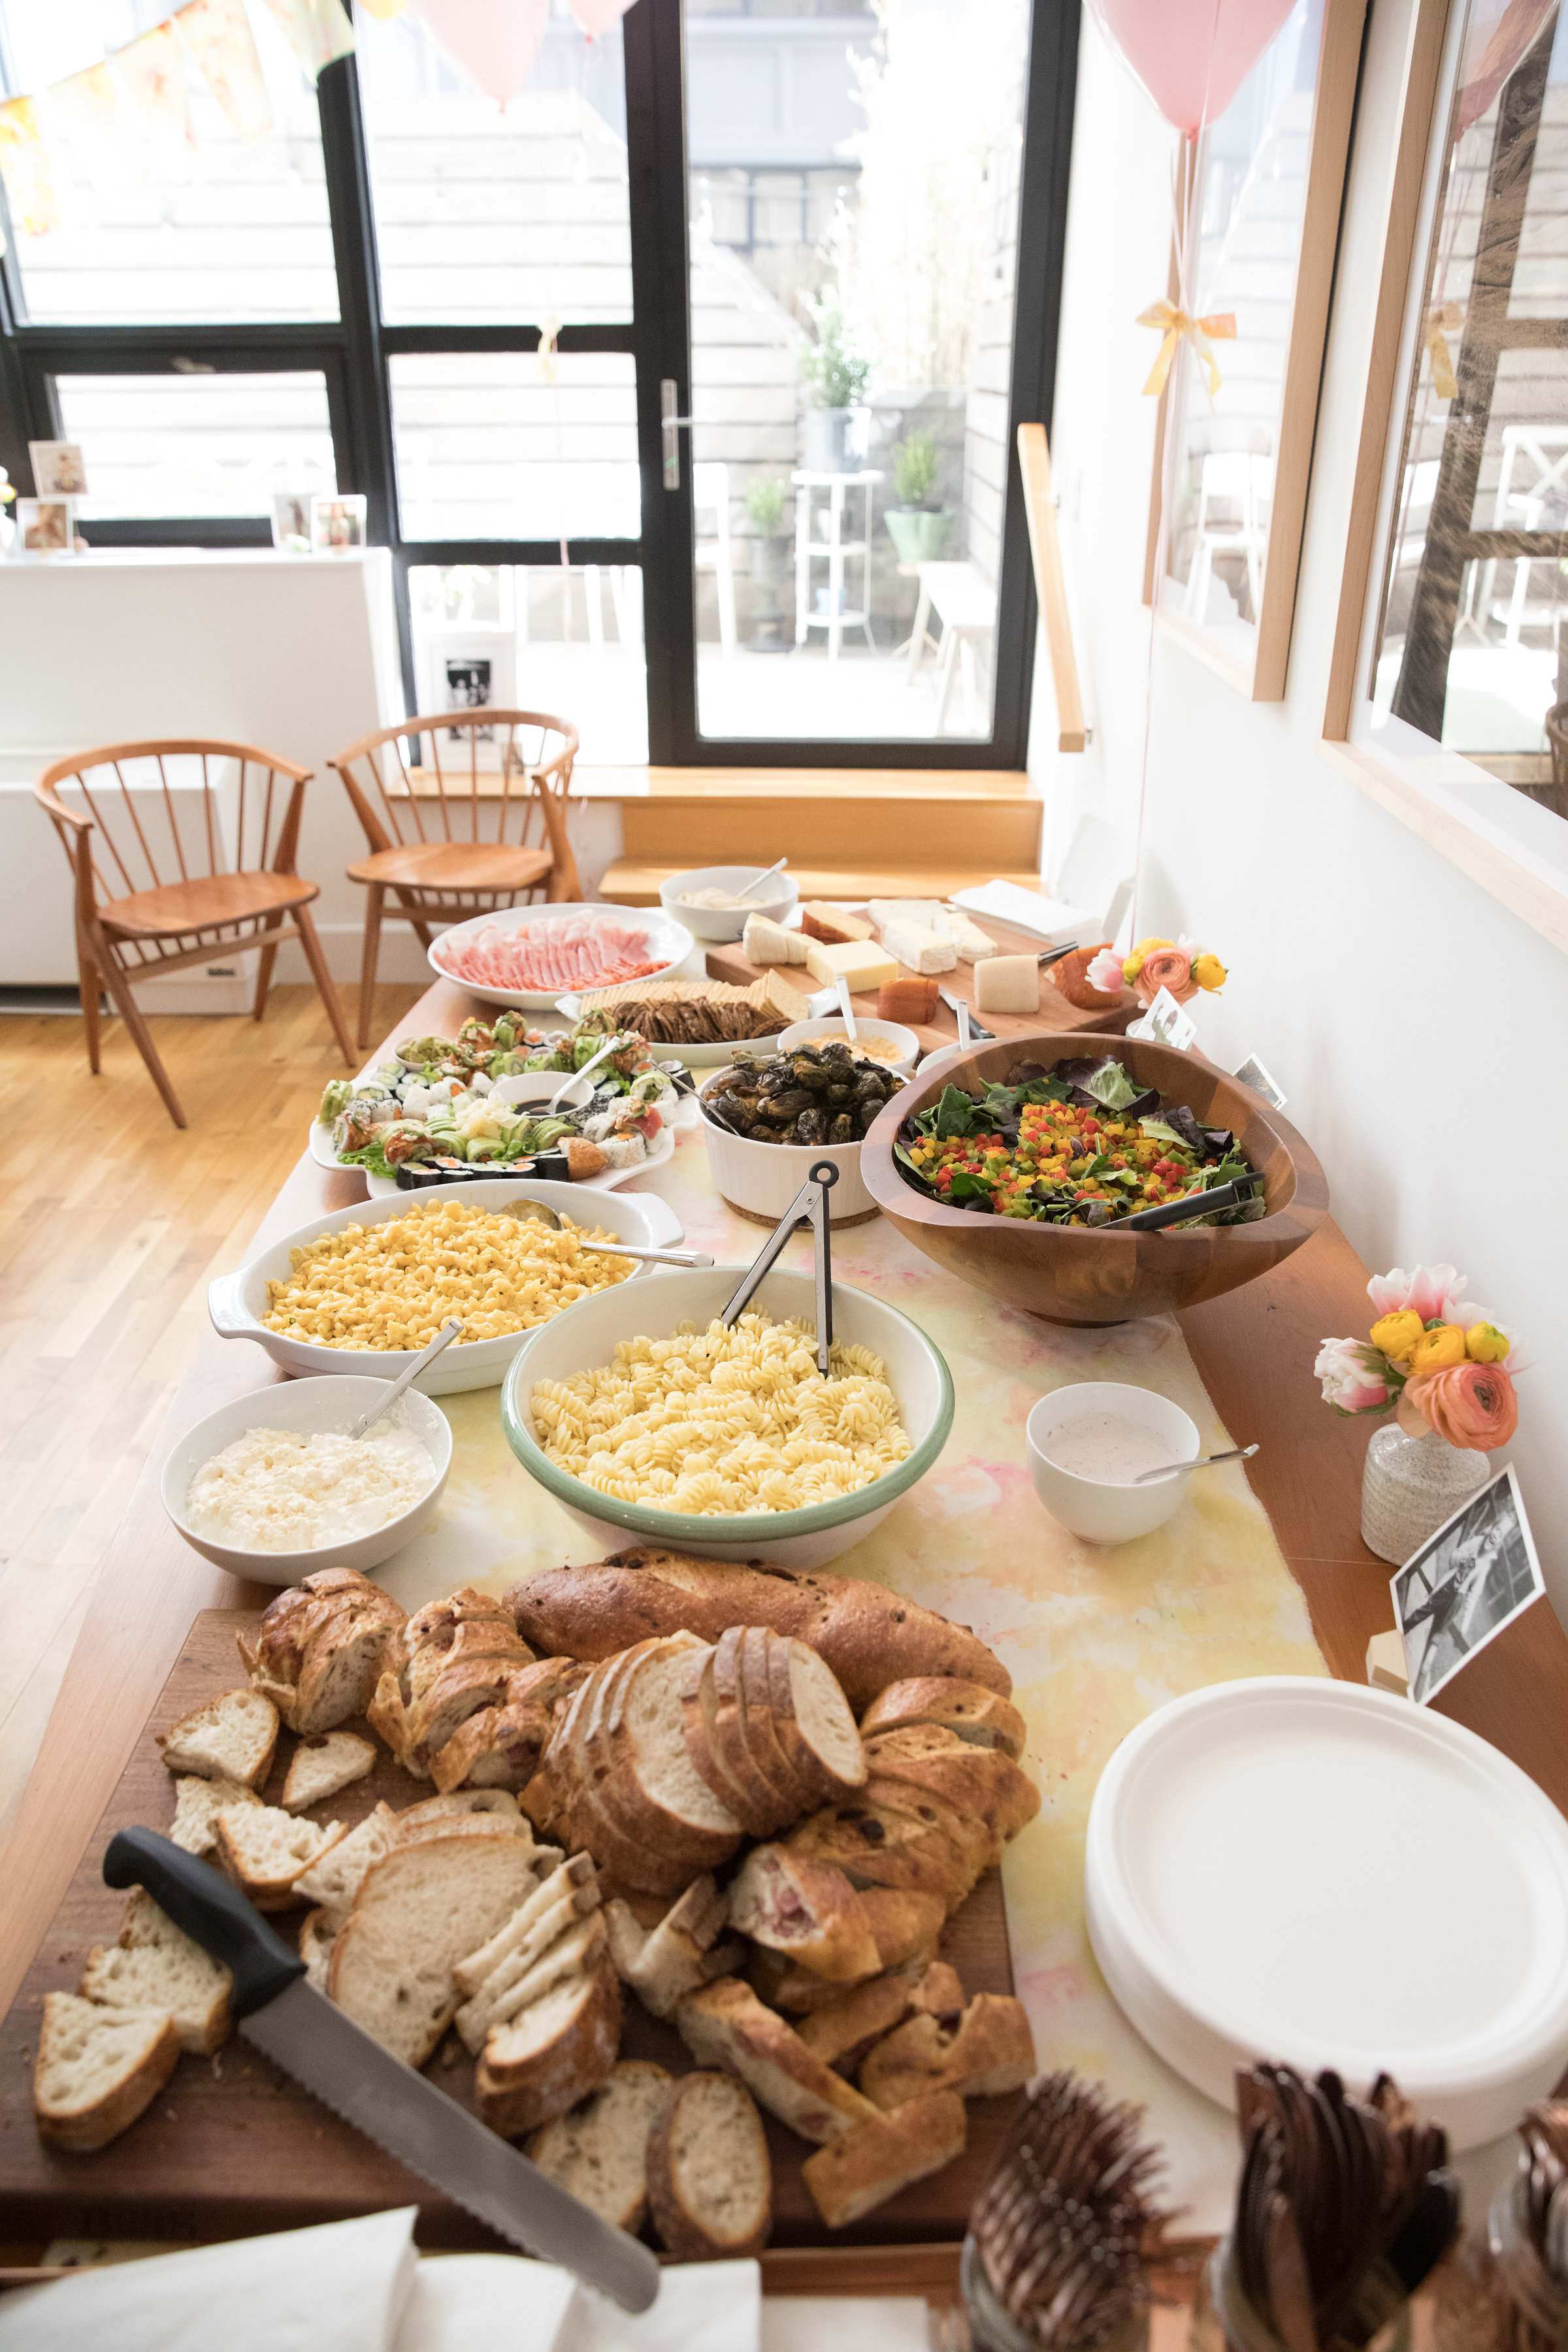
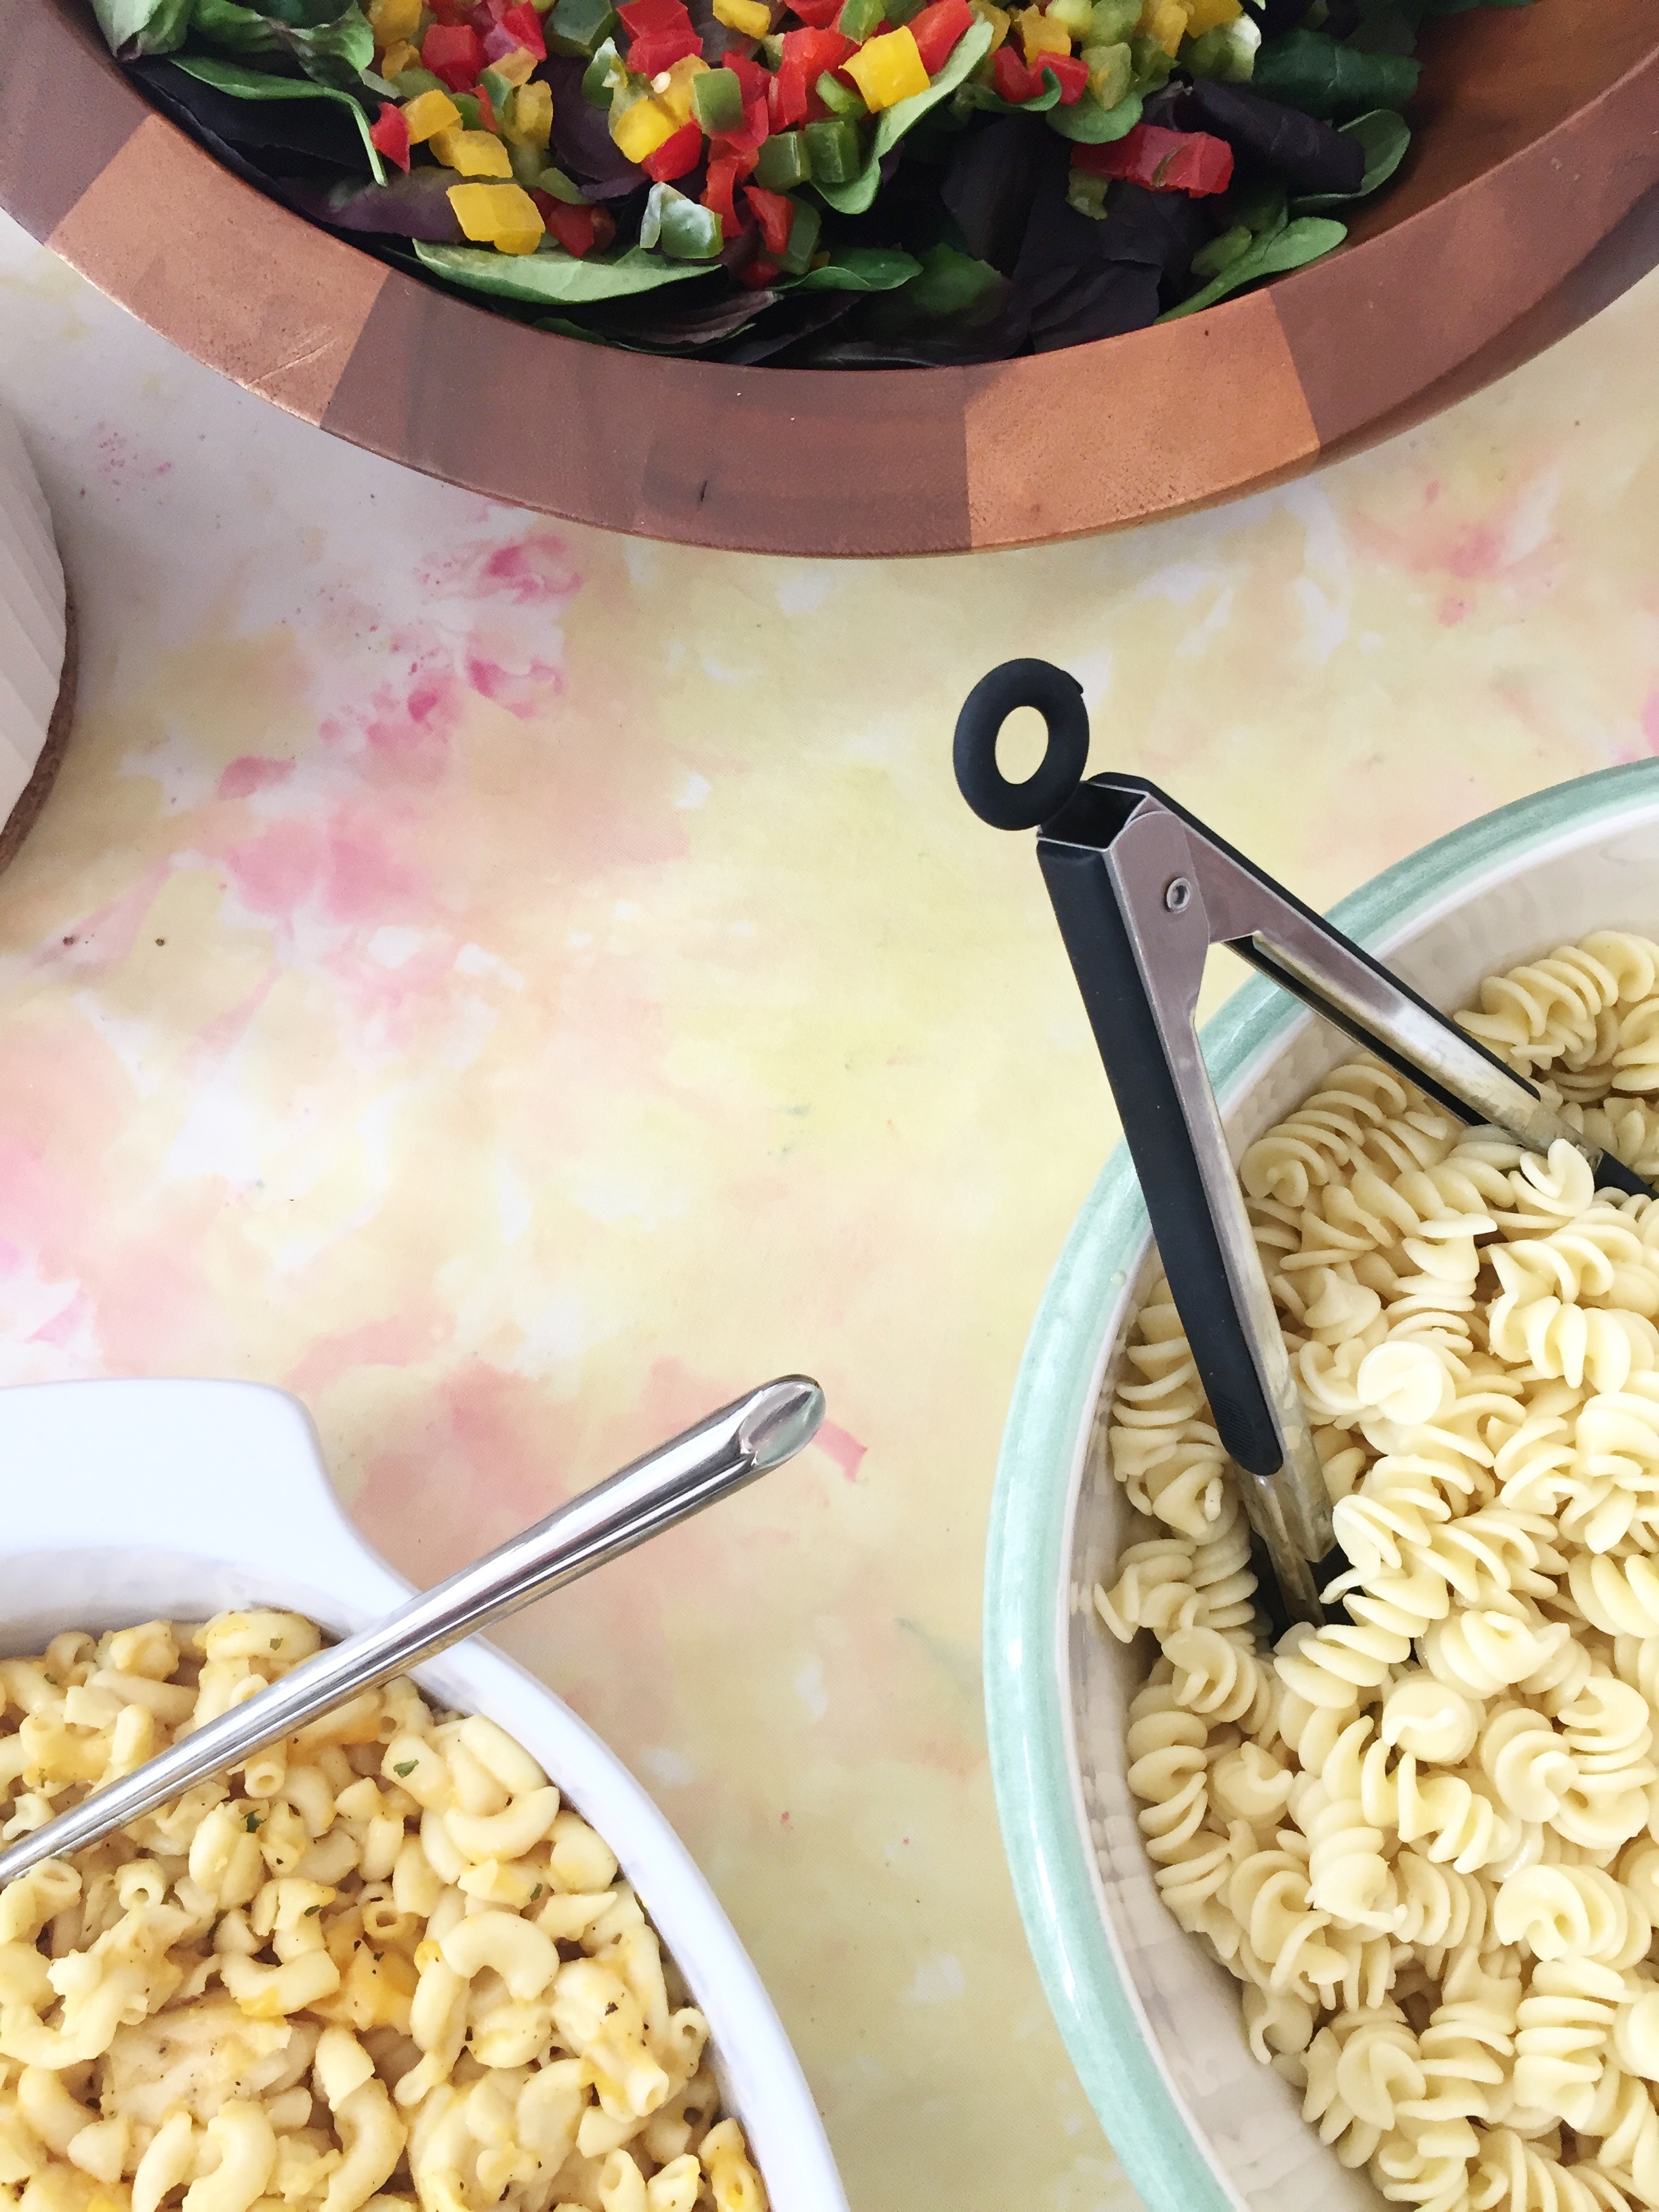
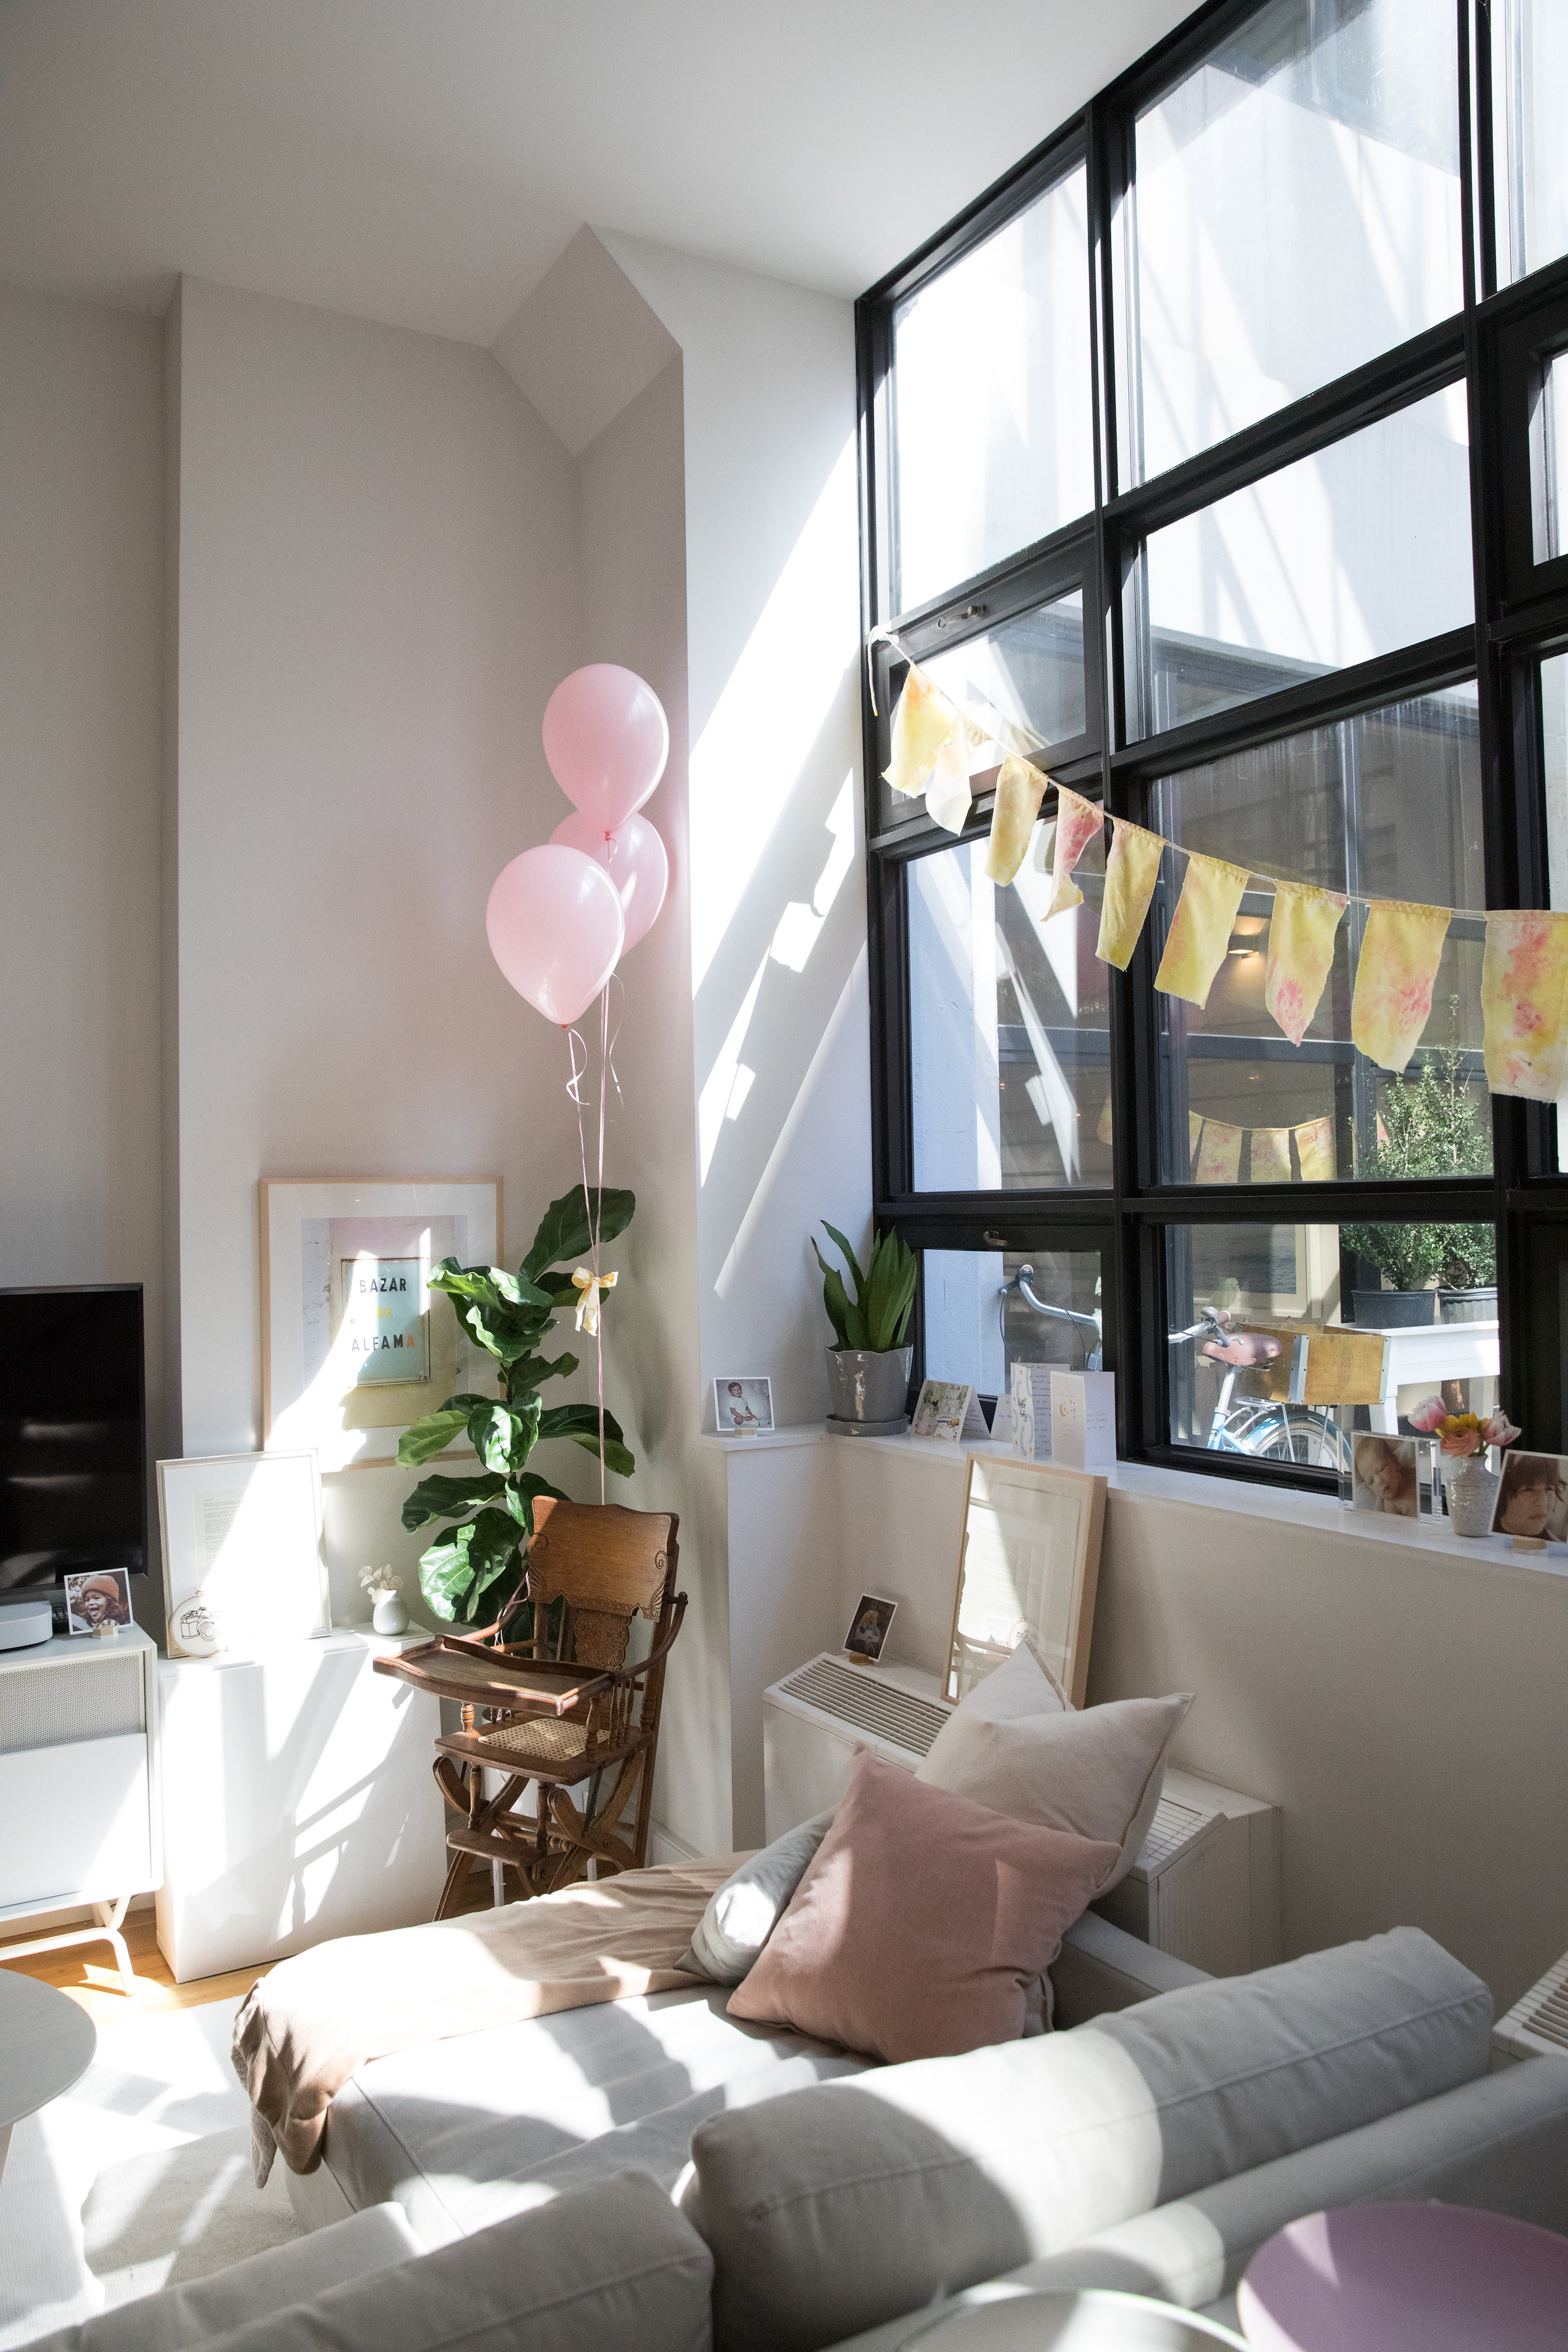
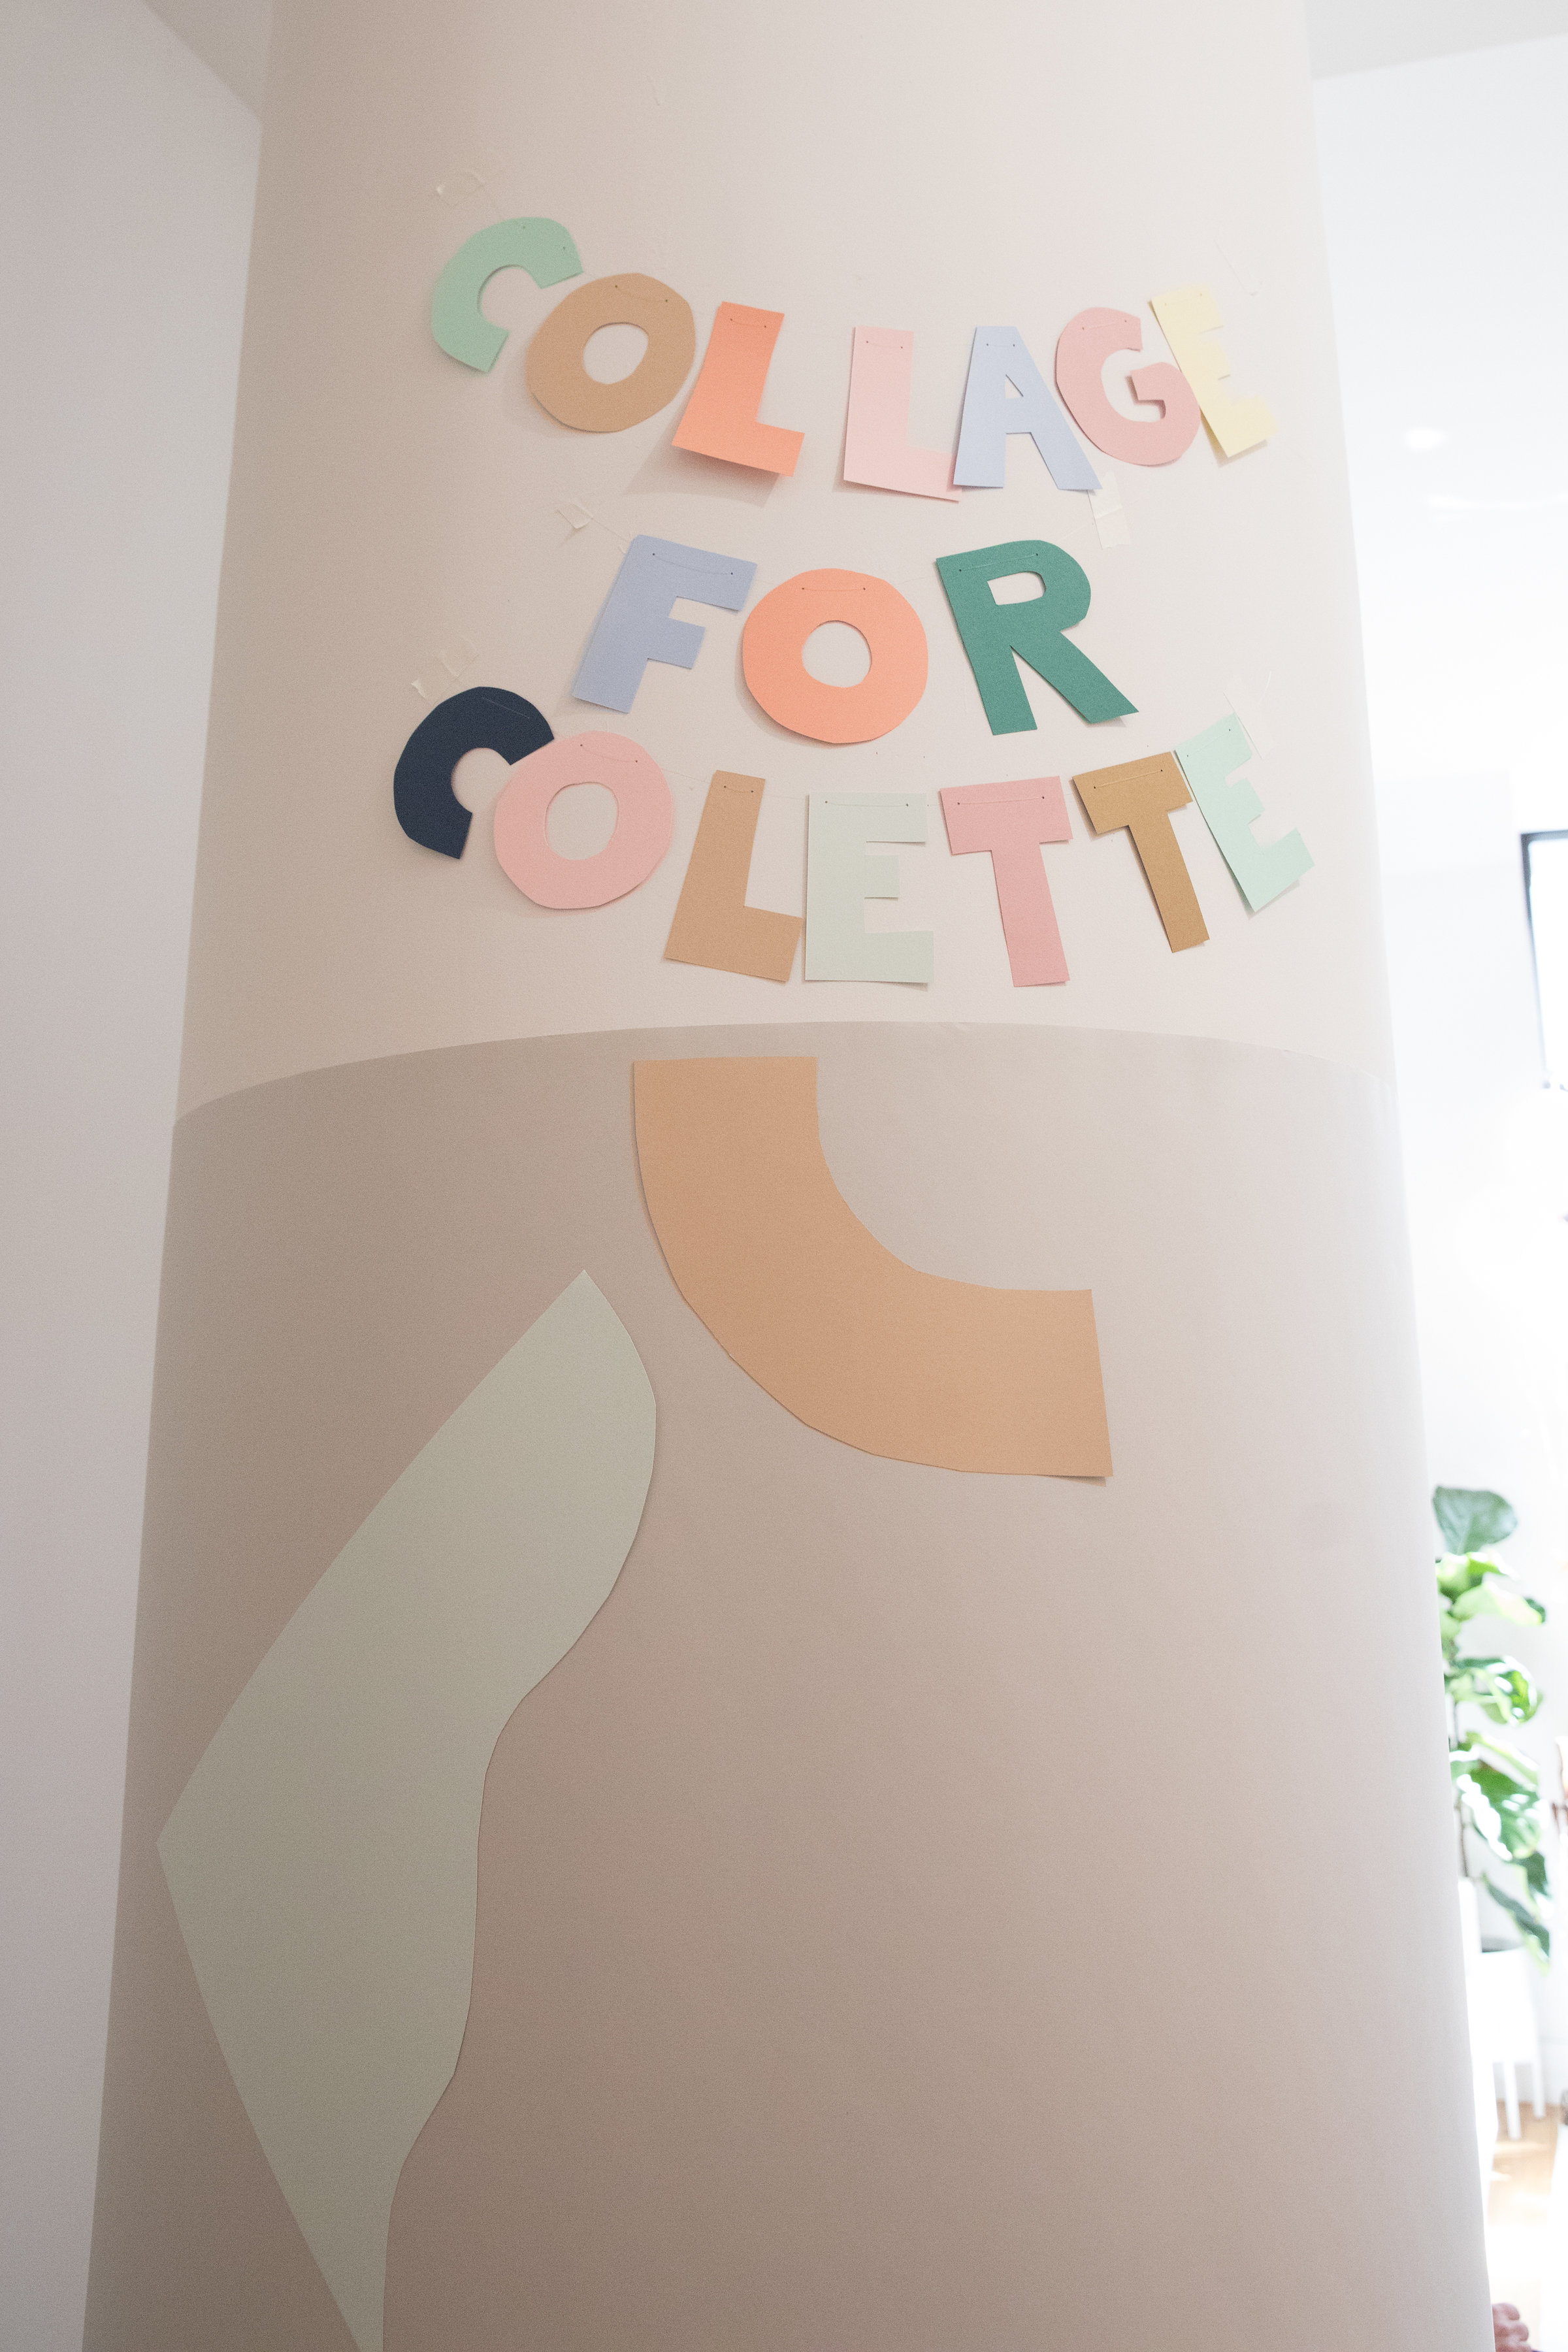
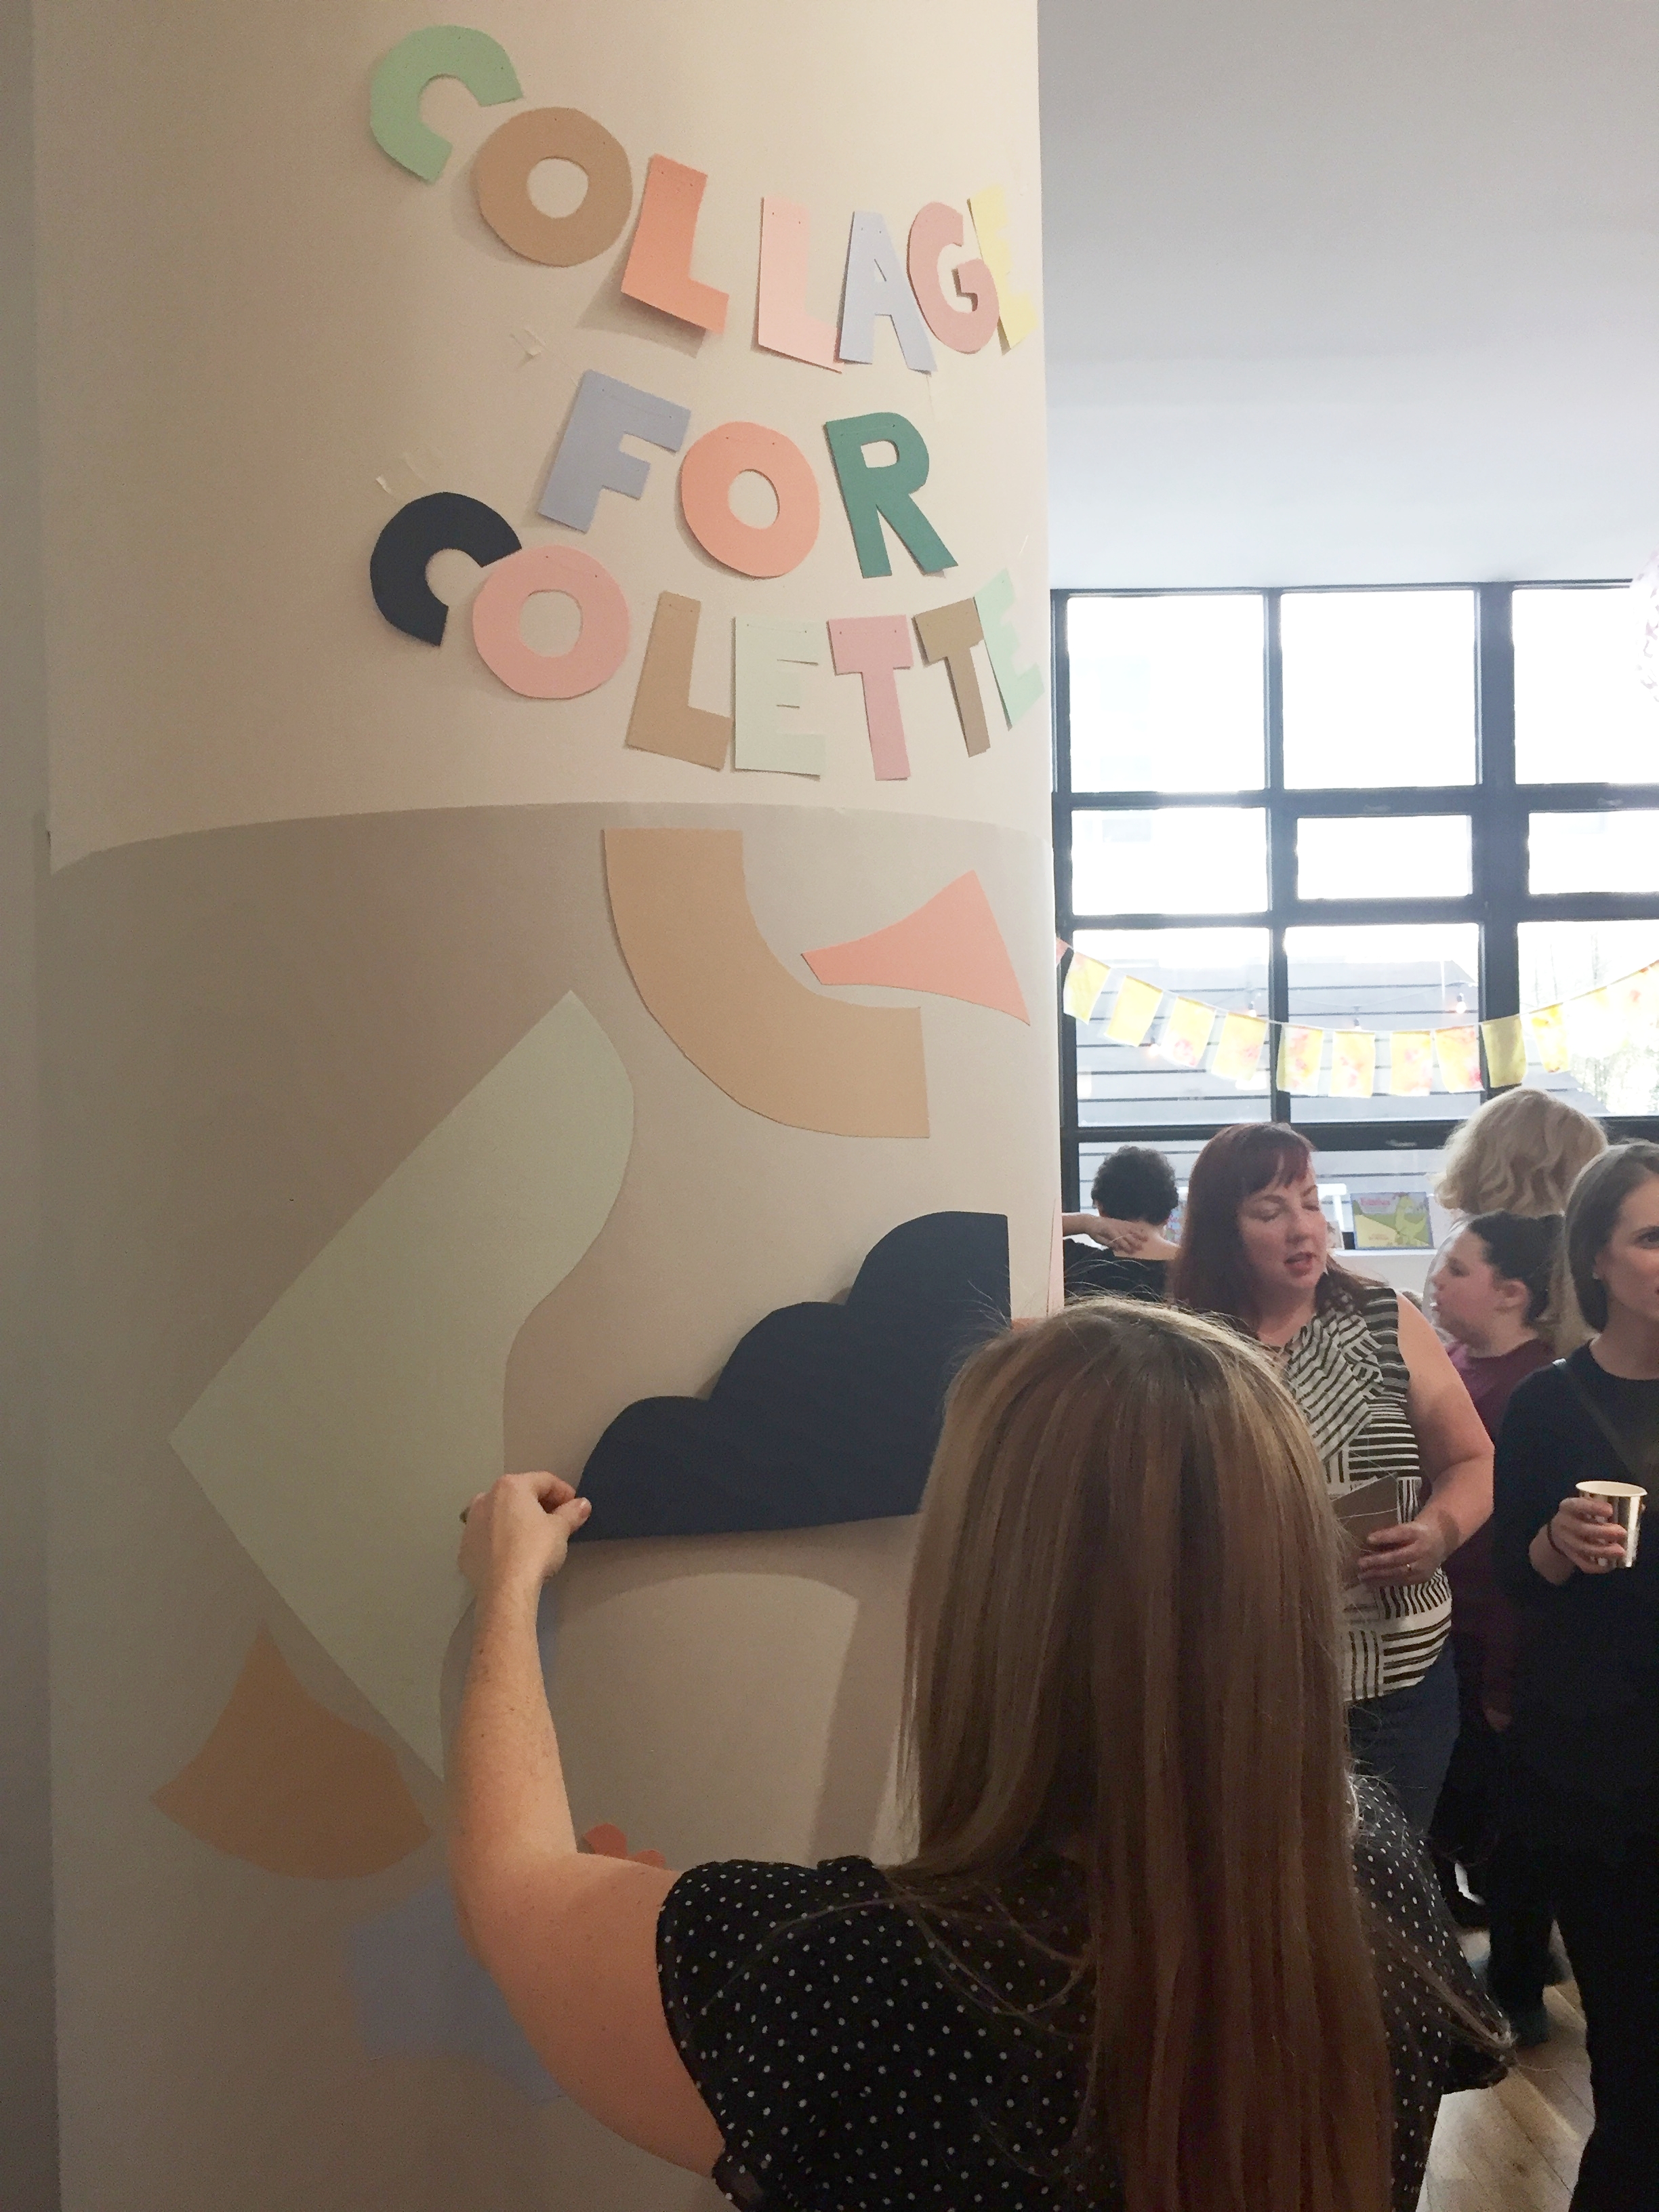
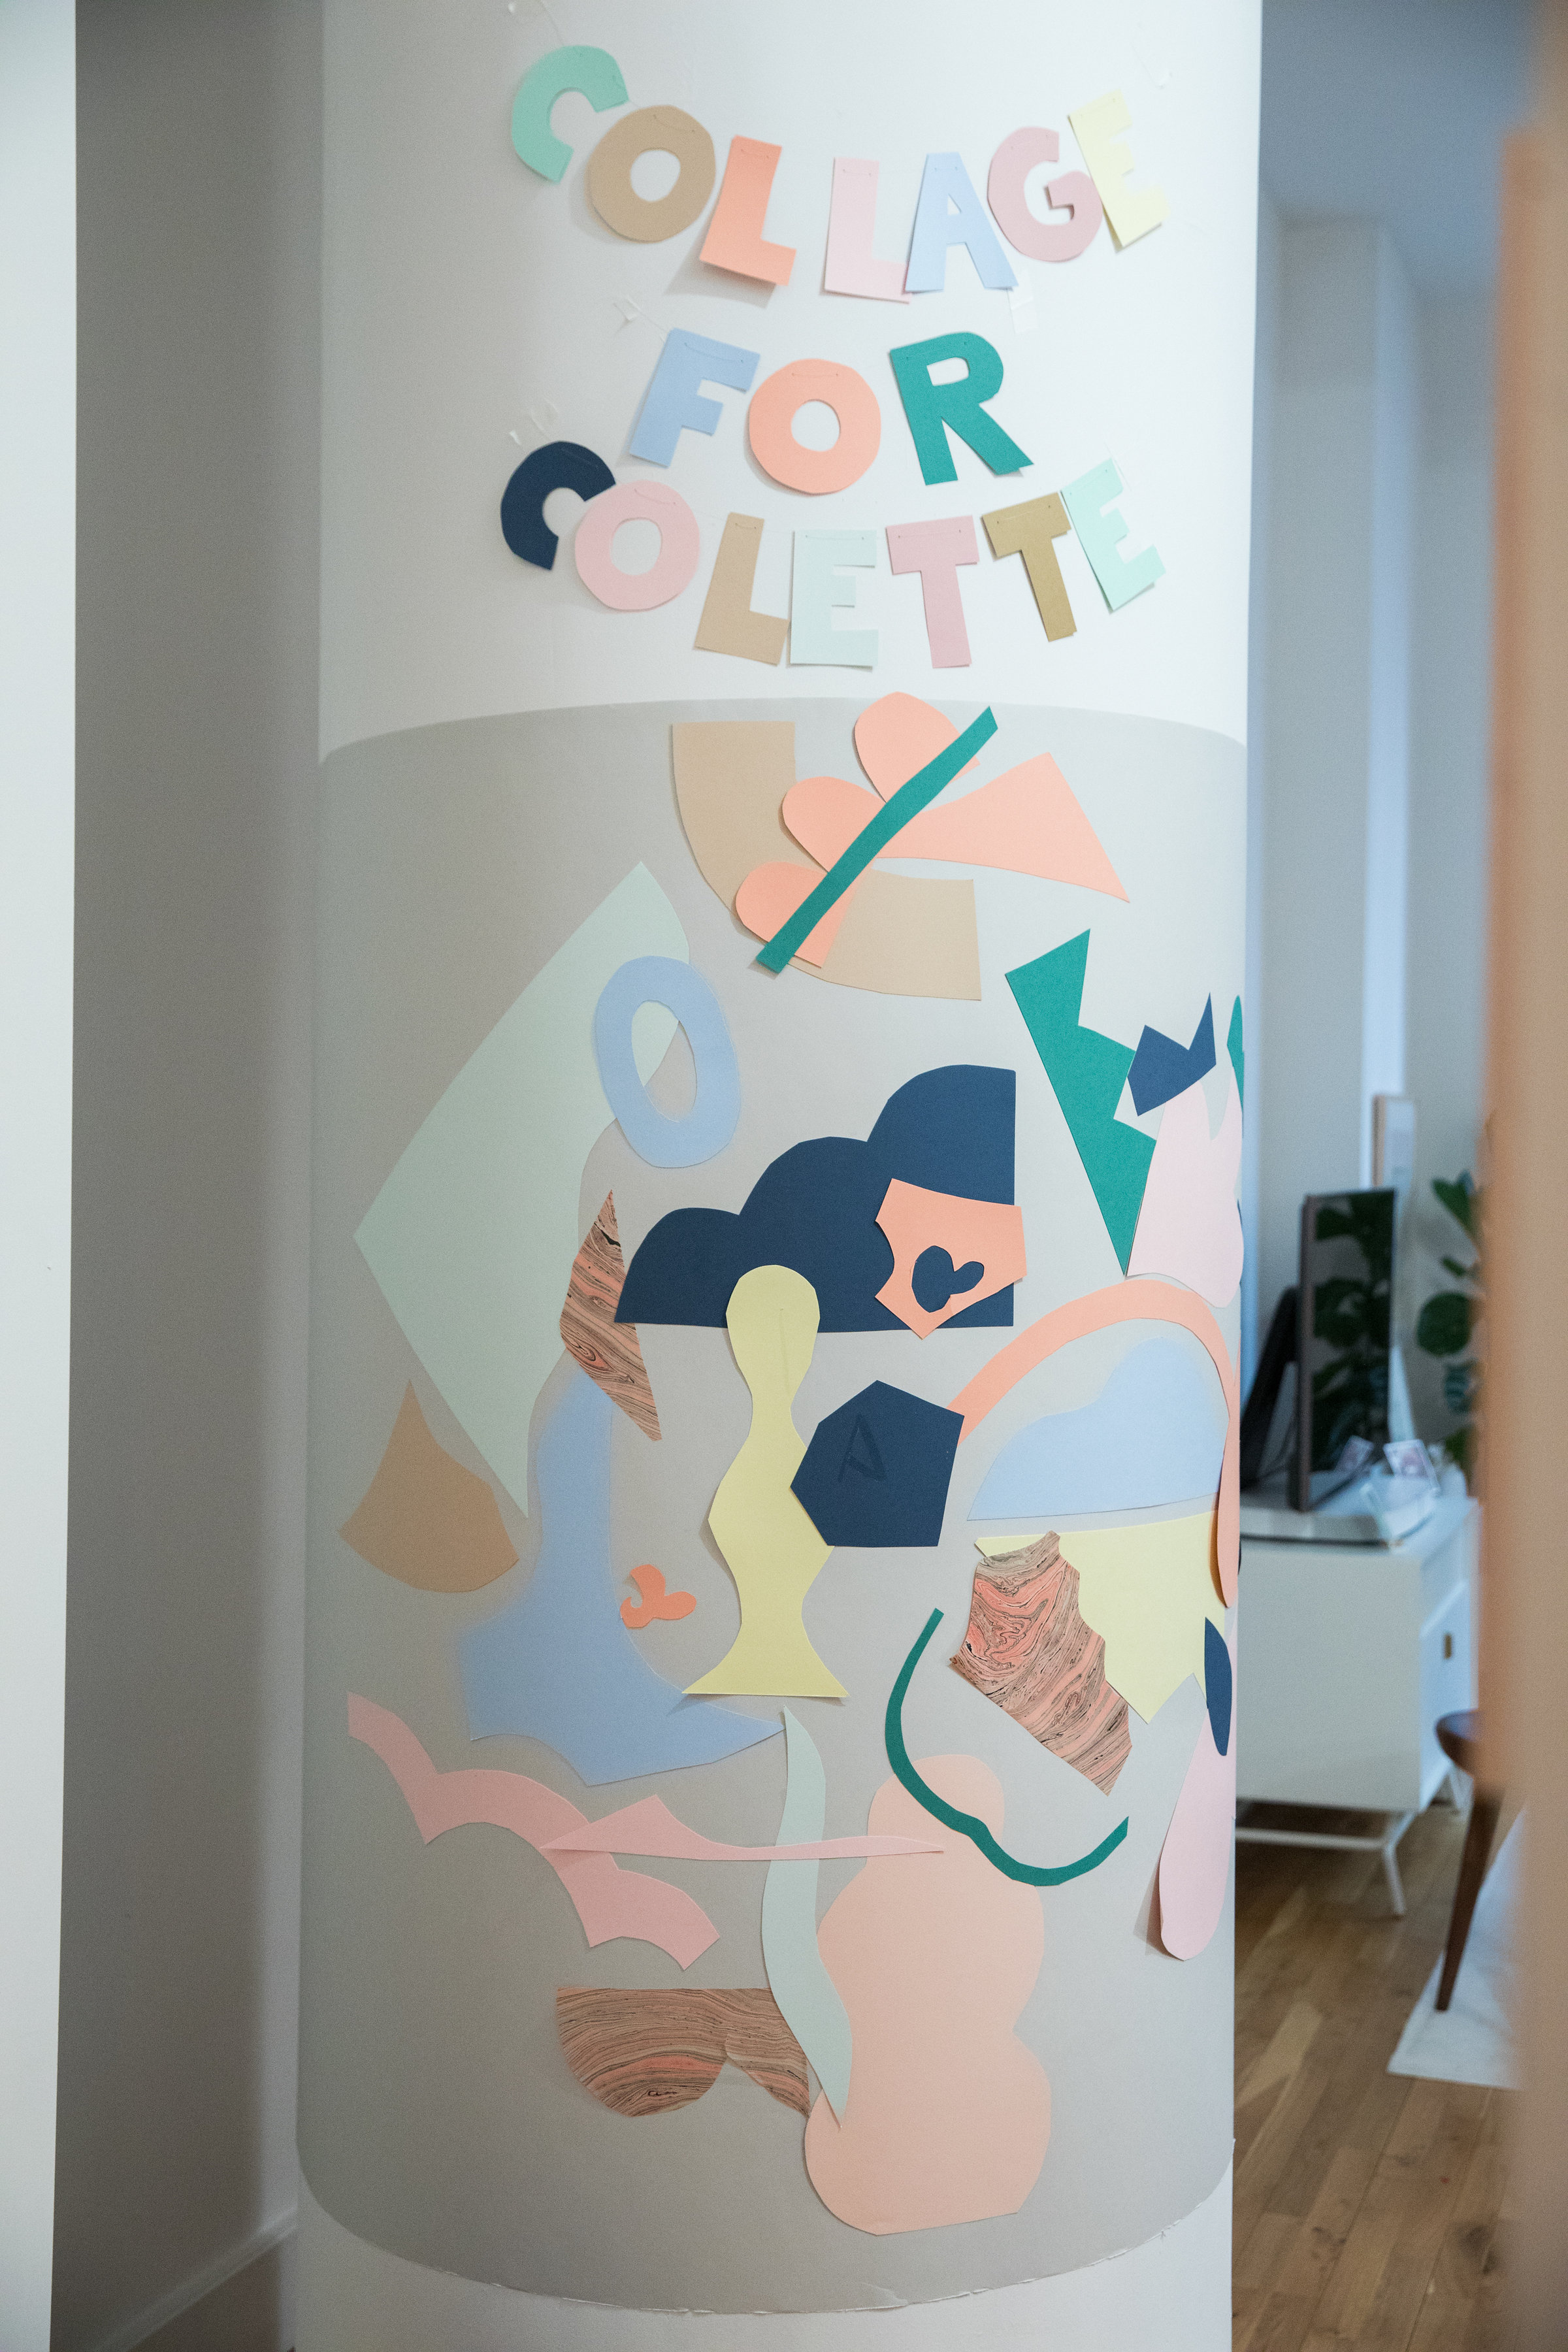
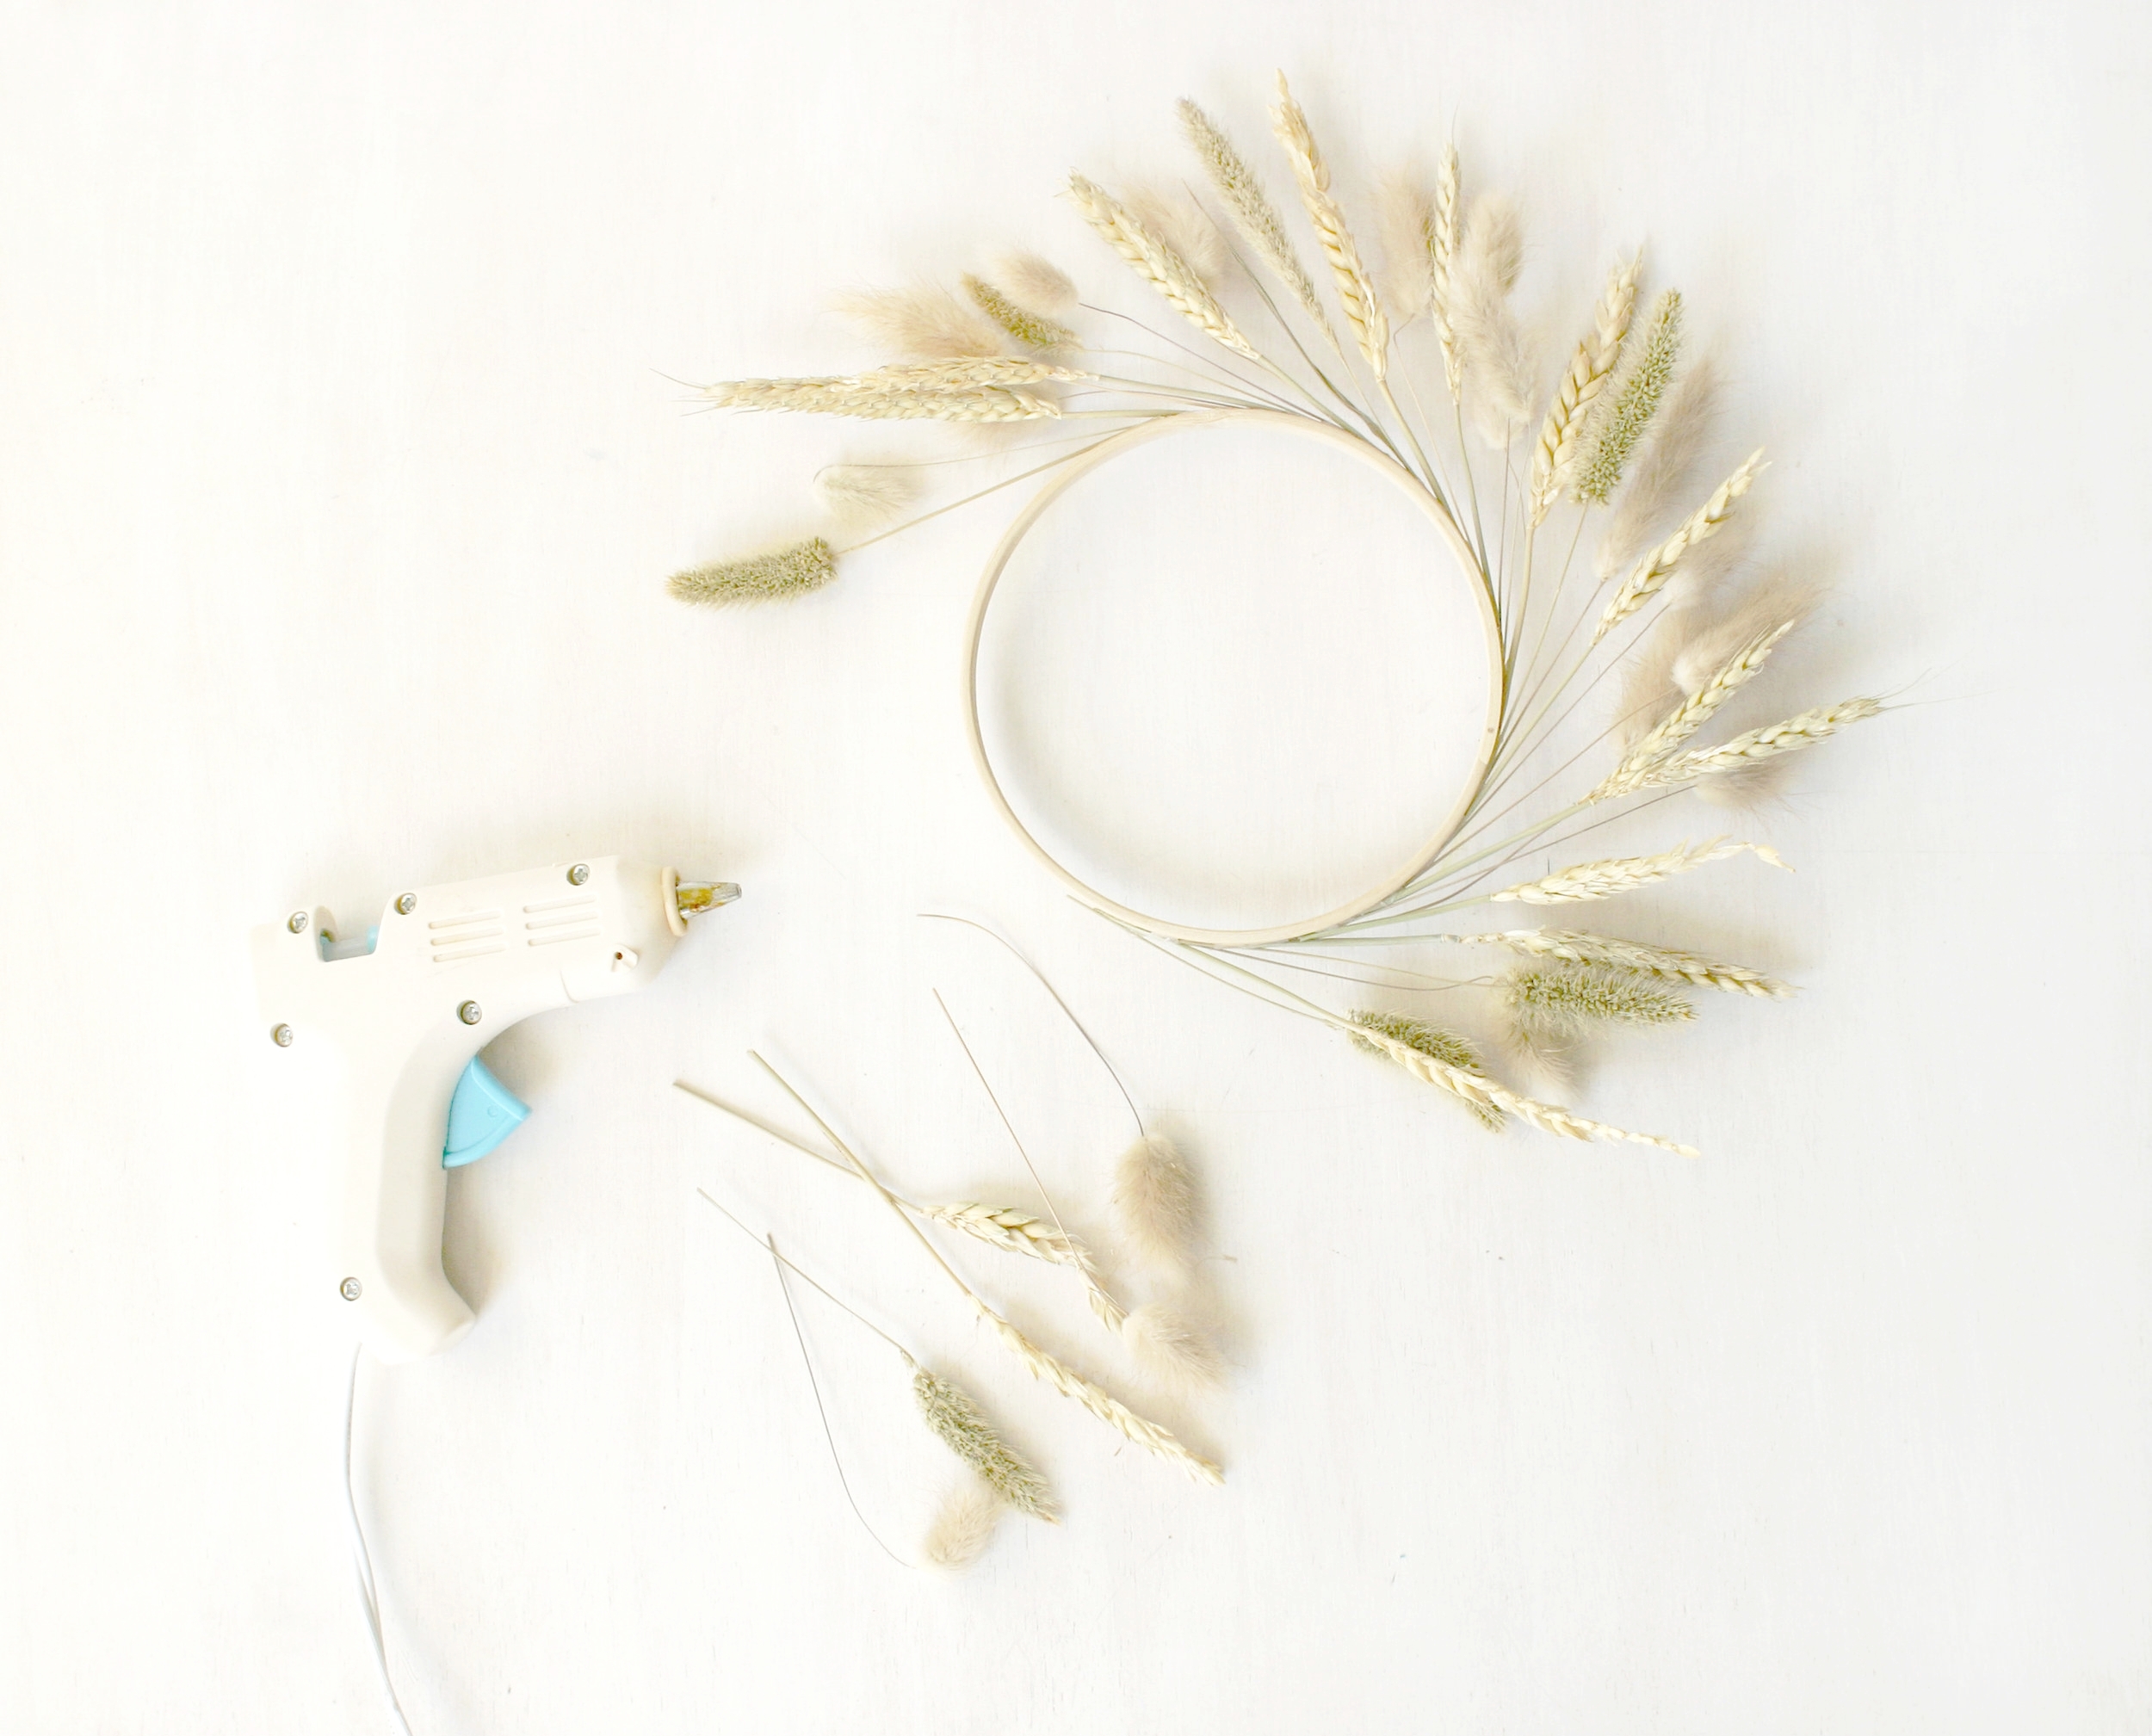
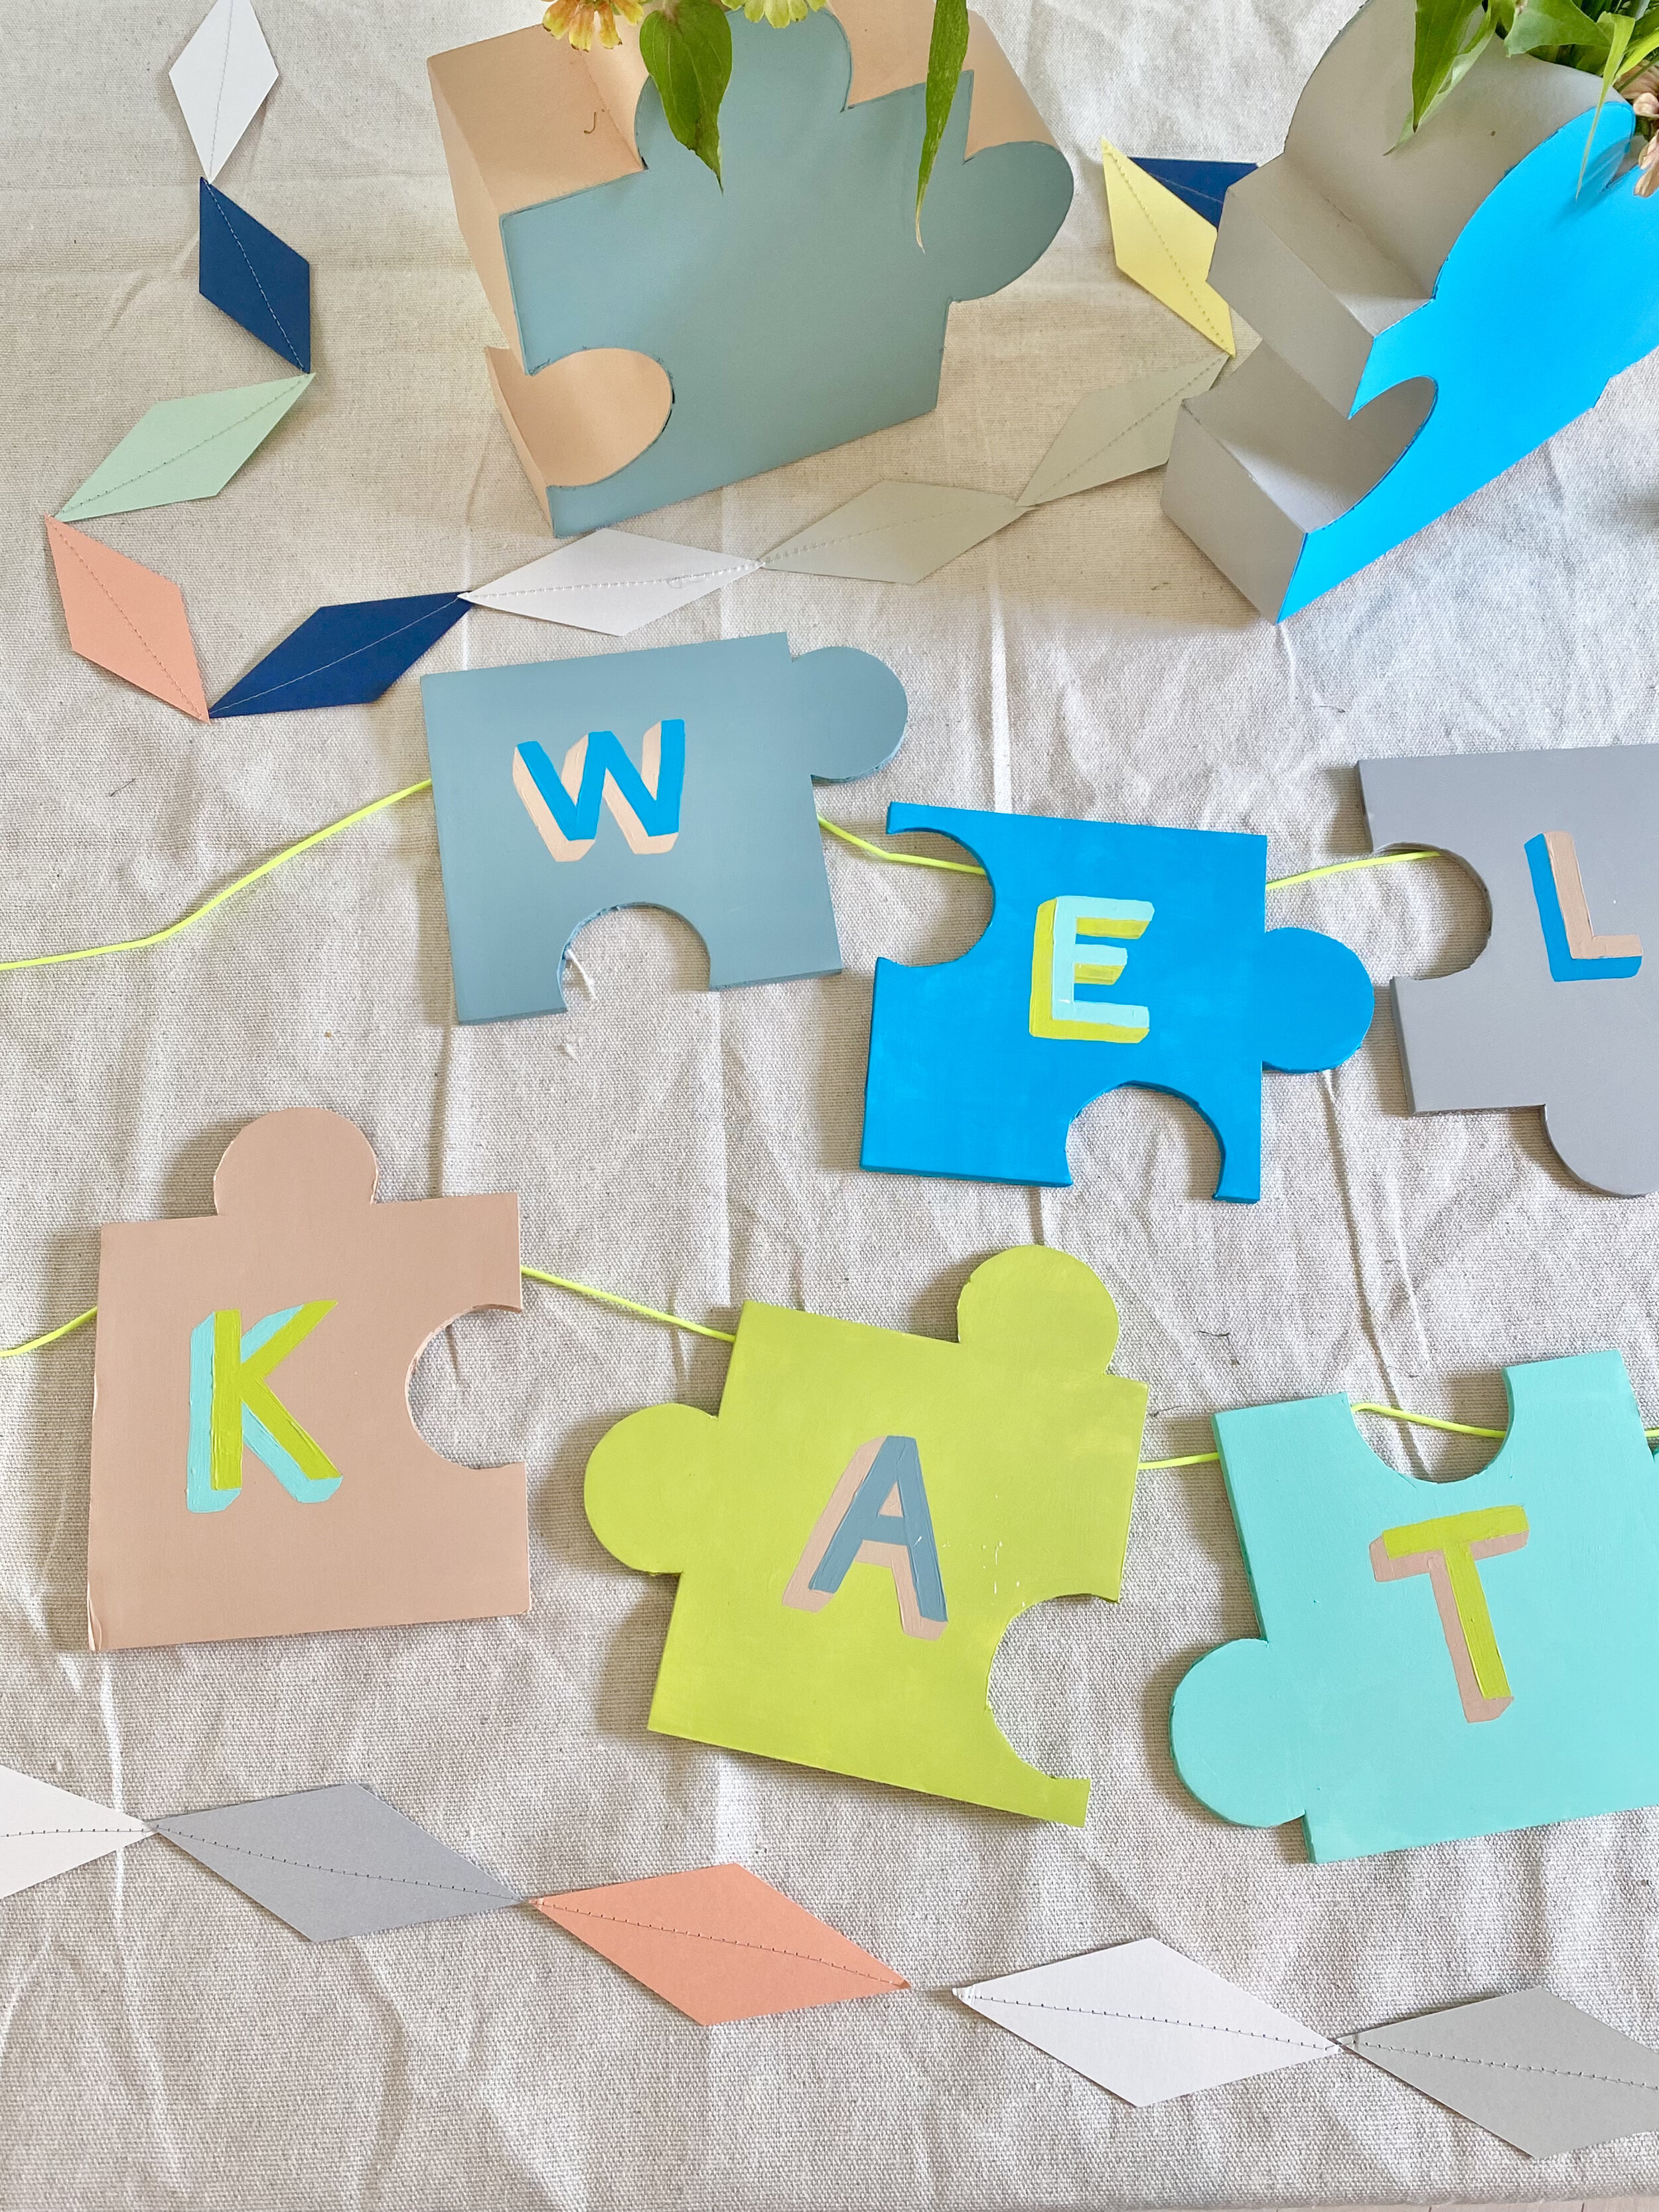
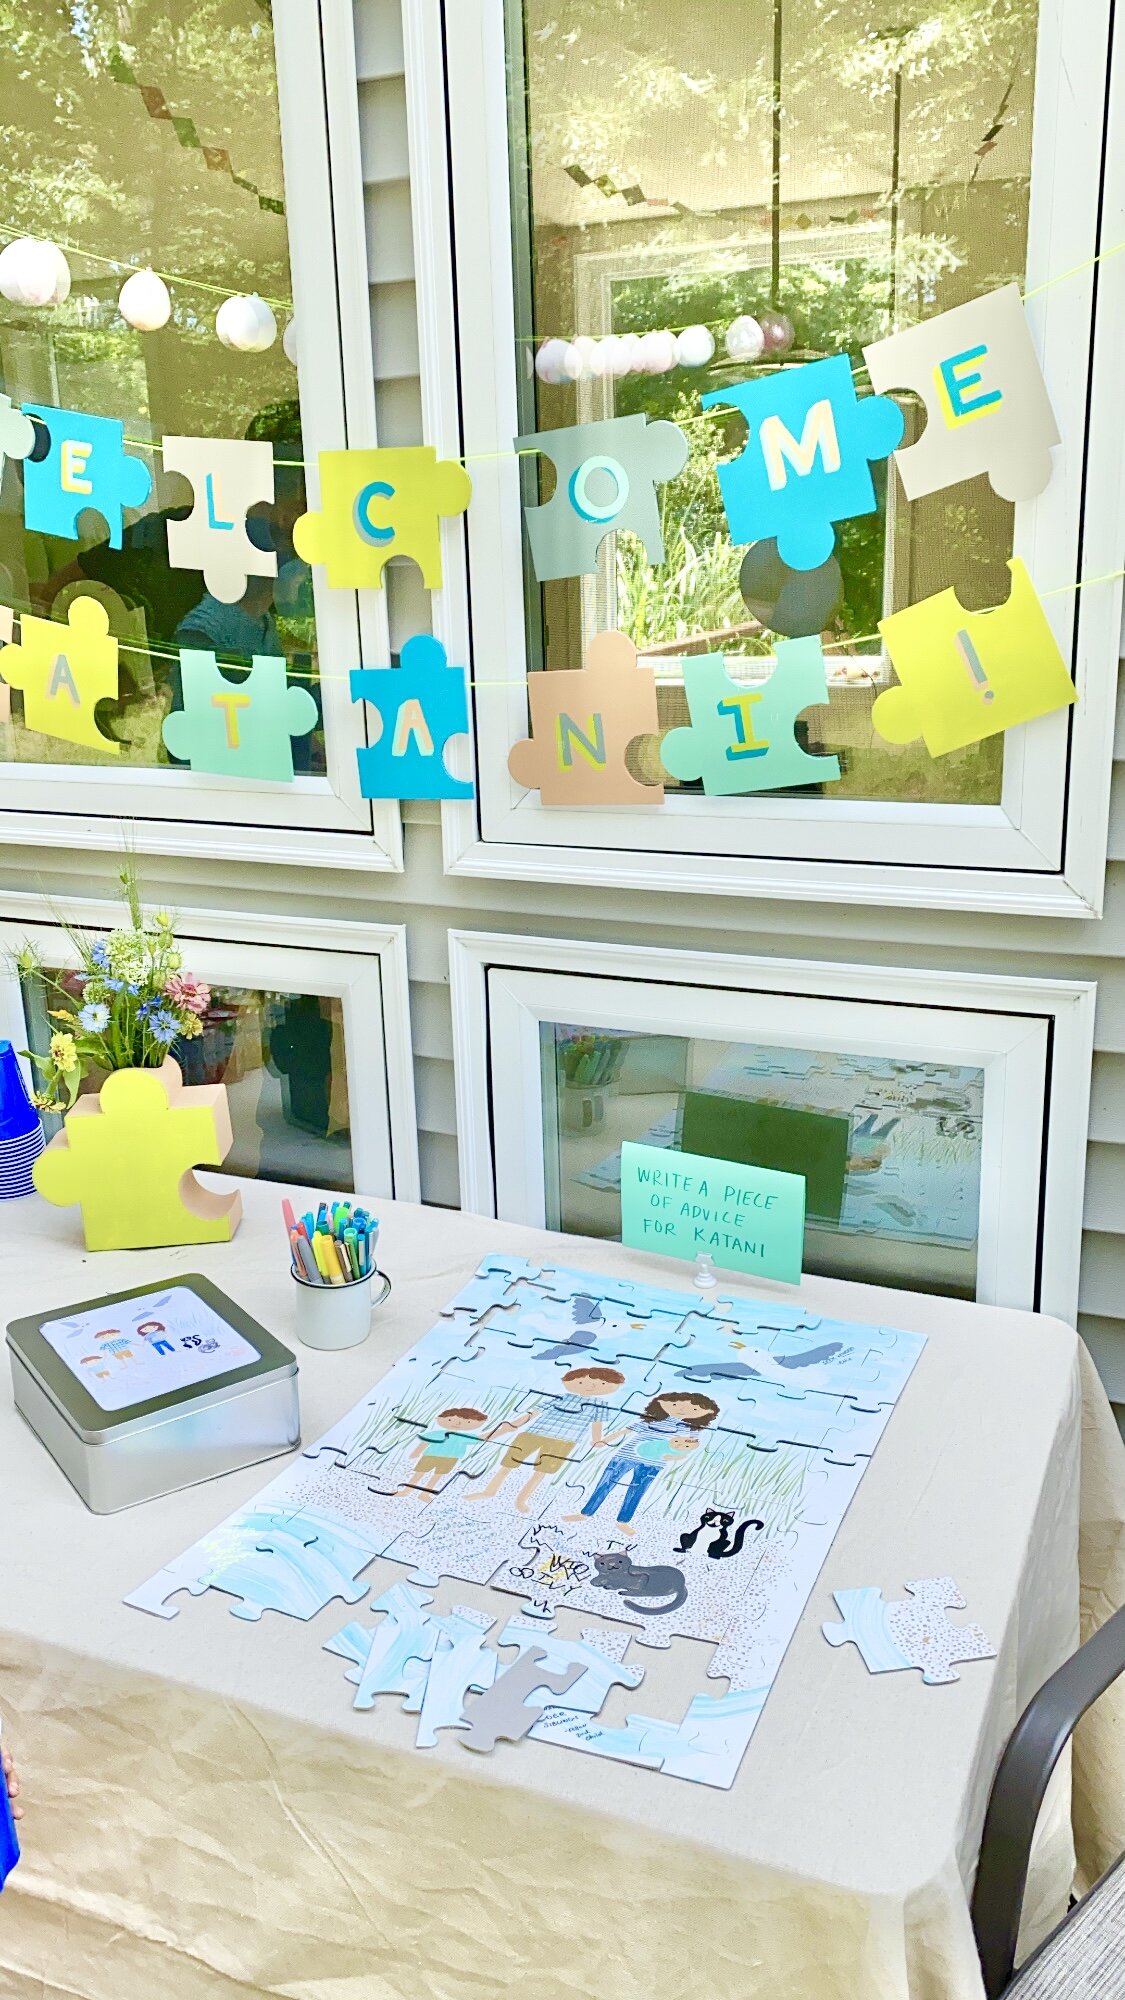
For the decor I aimed to use supplies I already had leftover from other projects or something already around the house. To make this puzzle garland I cut out shapes from foam core that I’ve been hoarding and used my stash of craft paint to add the color and letters. The cord is a neon one from Studio Carta and it’s on sale! I hung a diamond shaped paper garland I’d made for a previous shower inside the house and used drop cloths as tablecloths. I probably should have ironed them!

0CB24CA7-0F9F-42A0-B1B4-B1A56C07ABDD.jpg

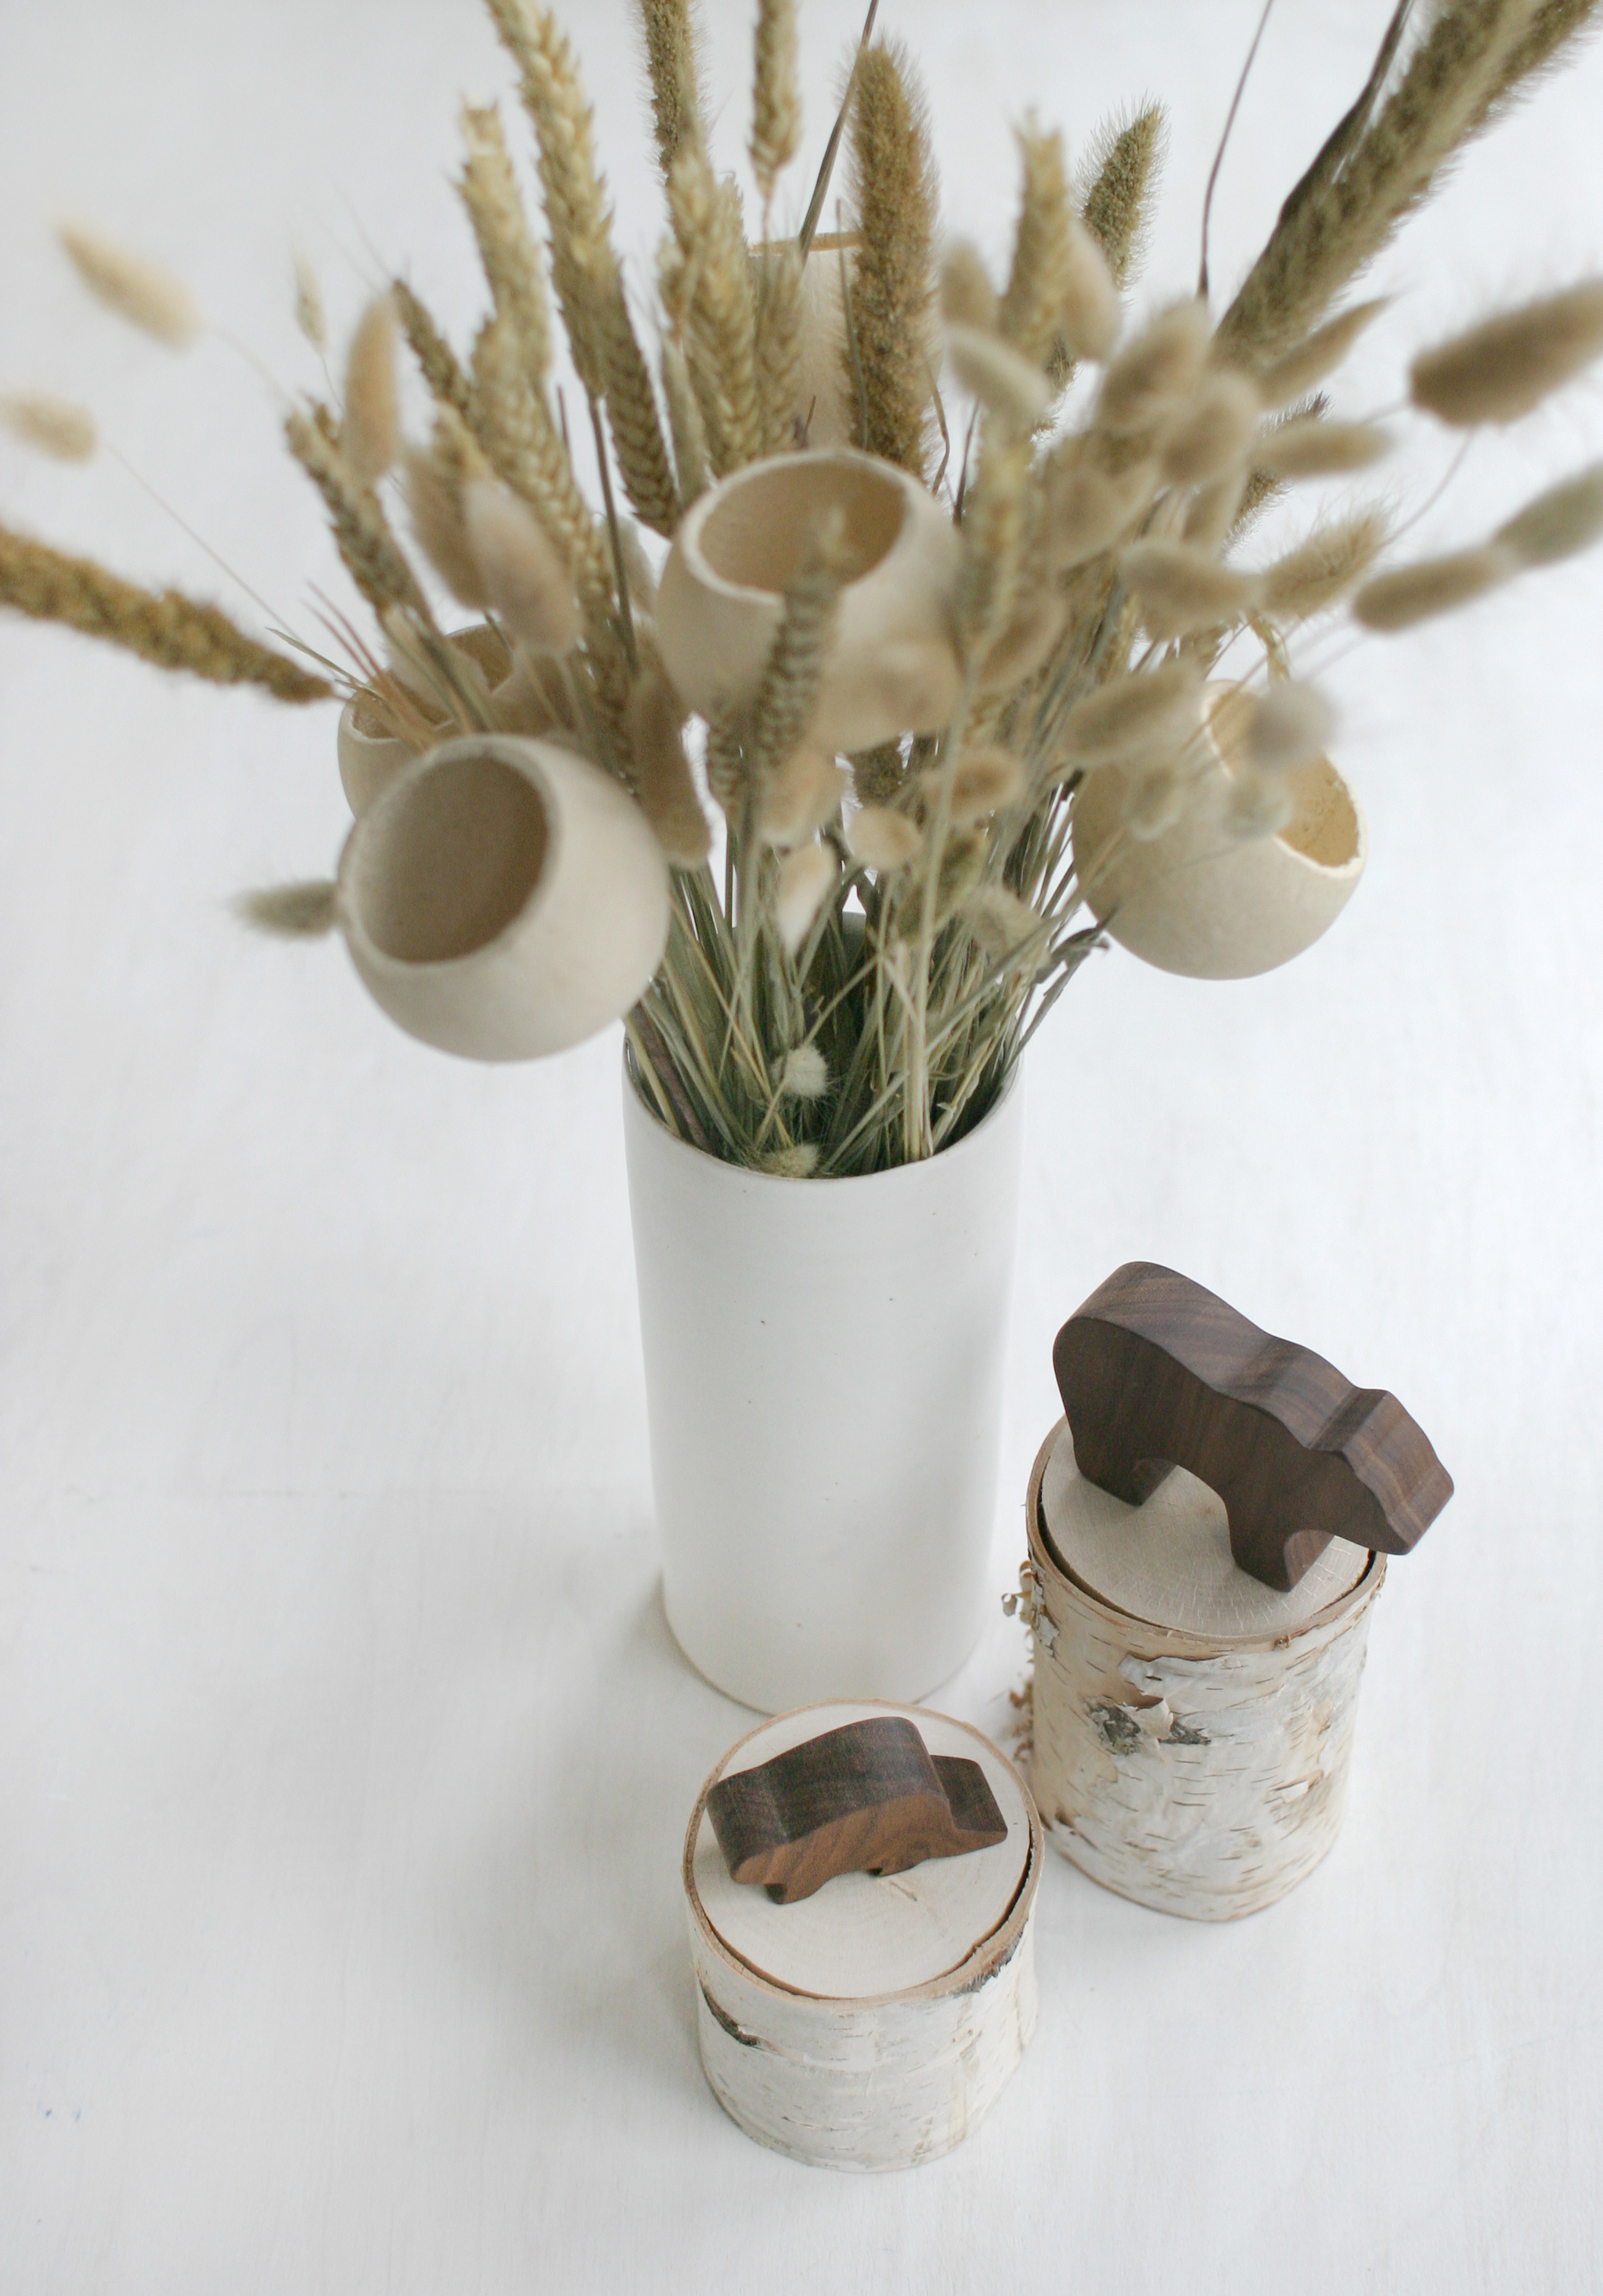
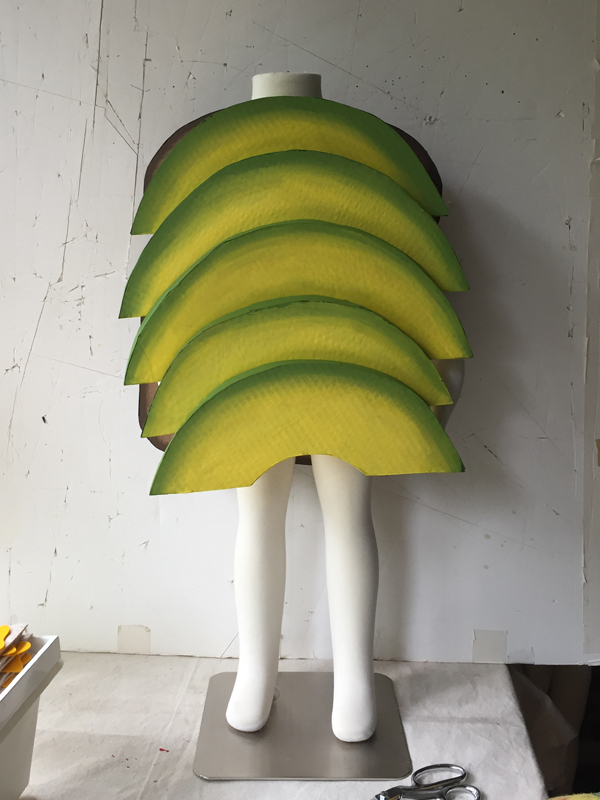
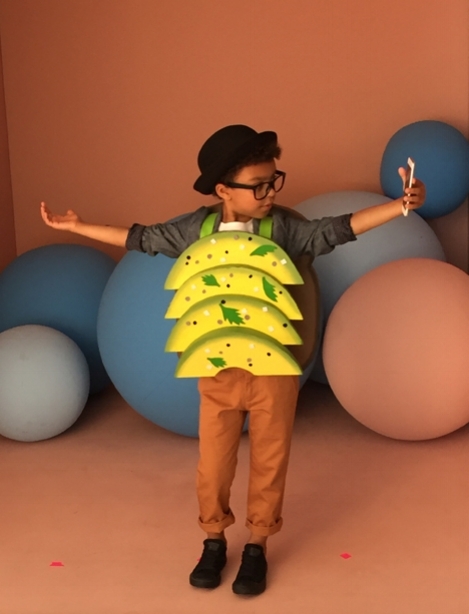
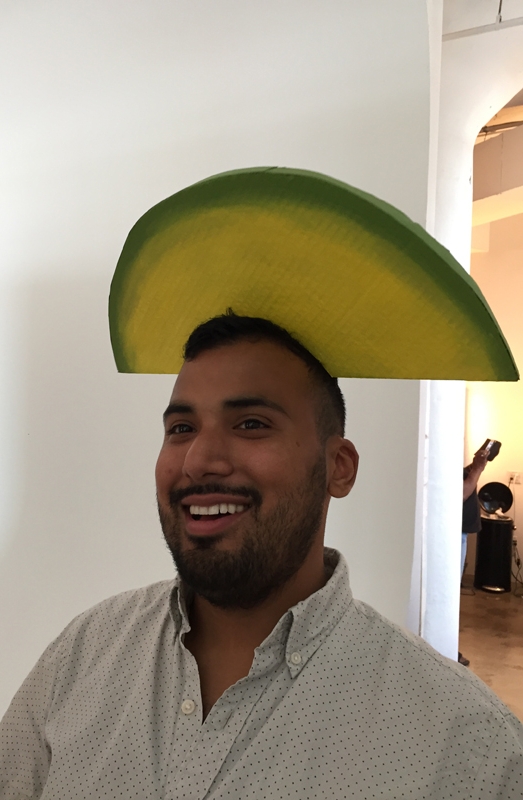
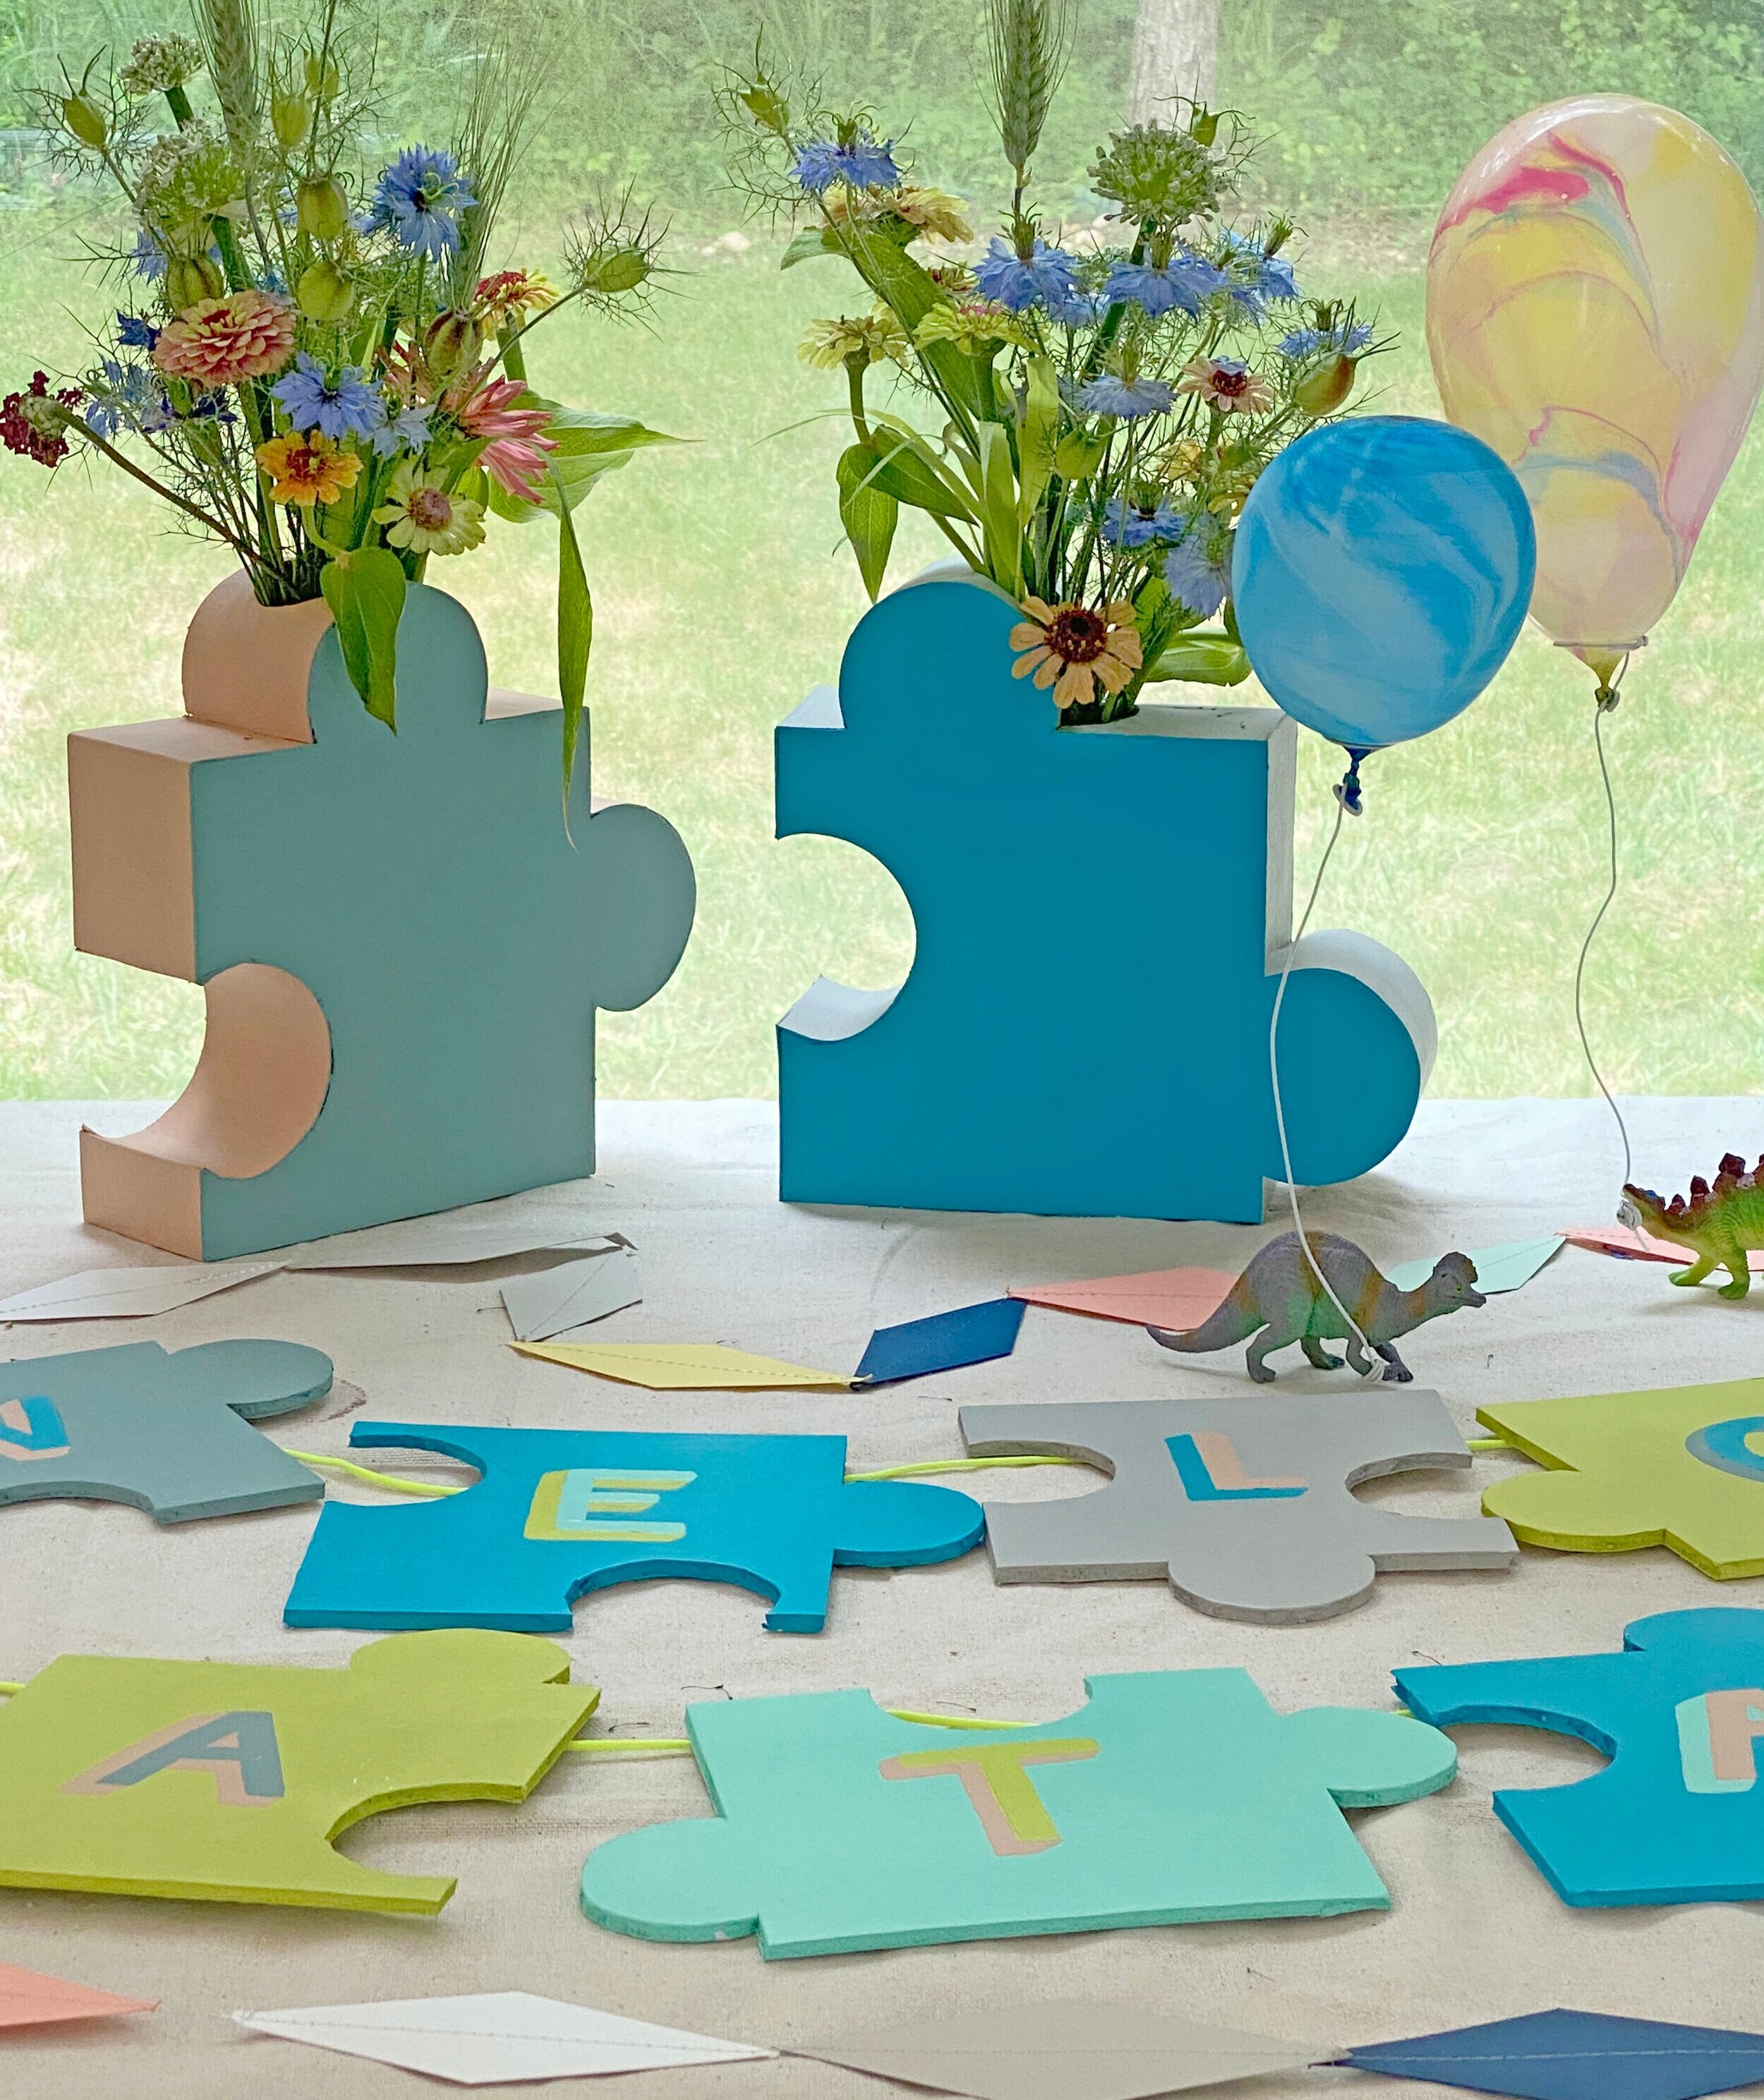
Since our rental house doesn’t have any vases, I used a favorite technique of mine: making a decorative paper sleeve to fit over a plastic water bottle. You can use this technique to make a “vase” basically any shape you want. I cut out two of each puzzle shape and then used thin cardboard in 3” wide stripes, glueing around the edges of the puzzle pieces to slide over a bottle. I glued them together with hot glue and painted them in the same palette as the garland.

IMG_7120.jpeg
IMG_8794.jpeg

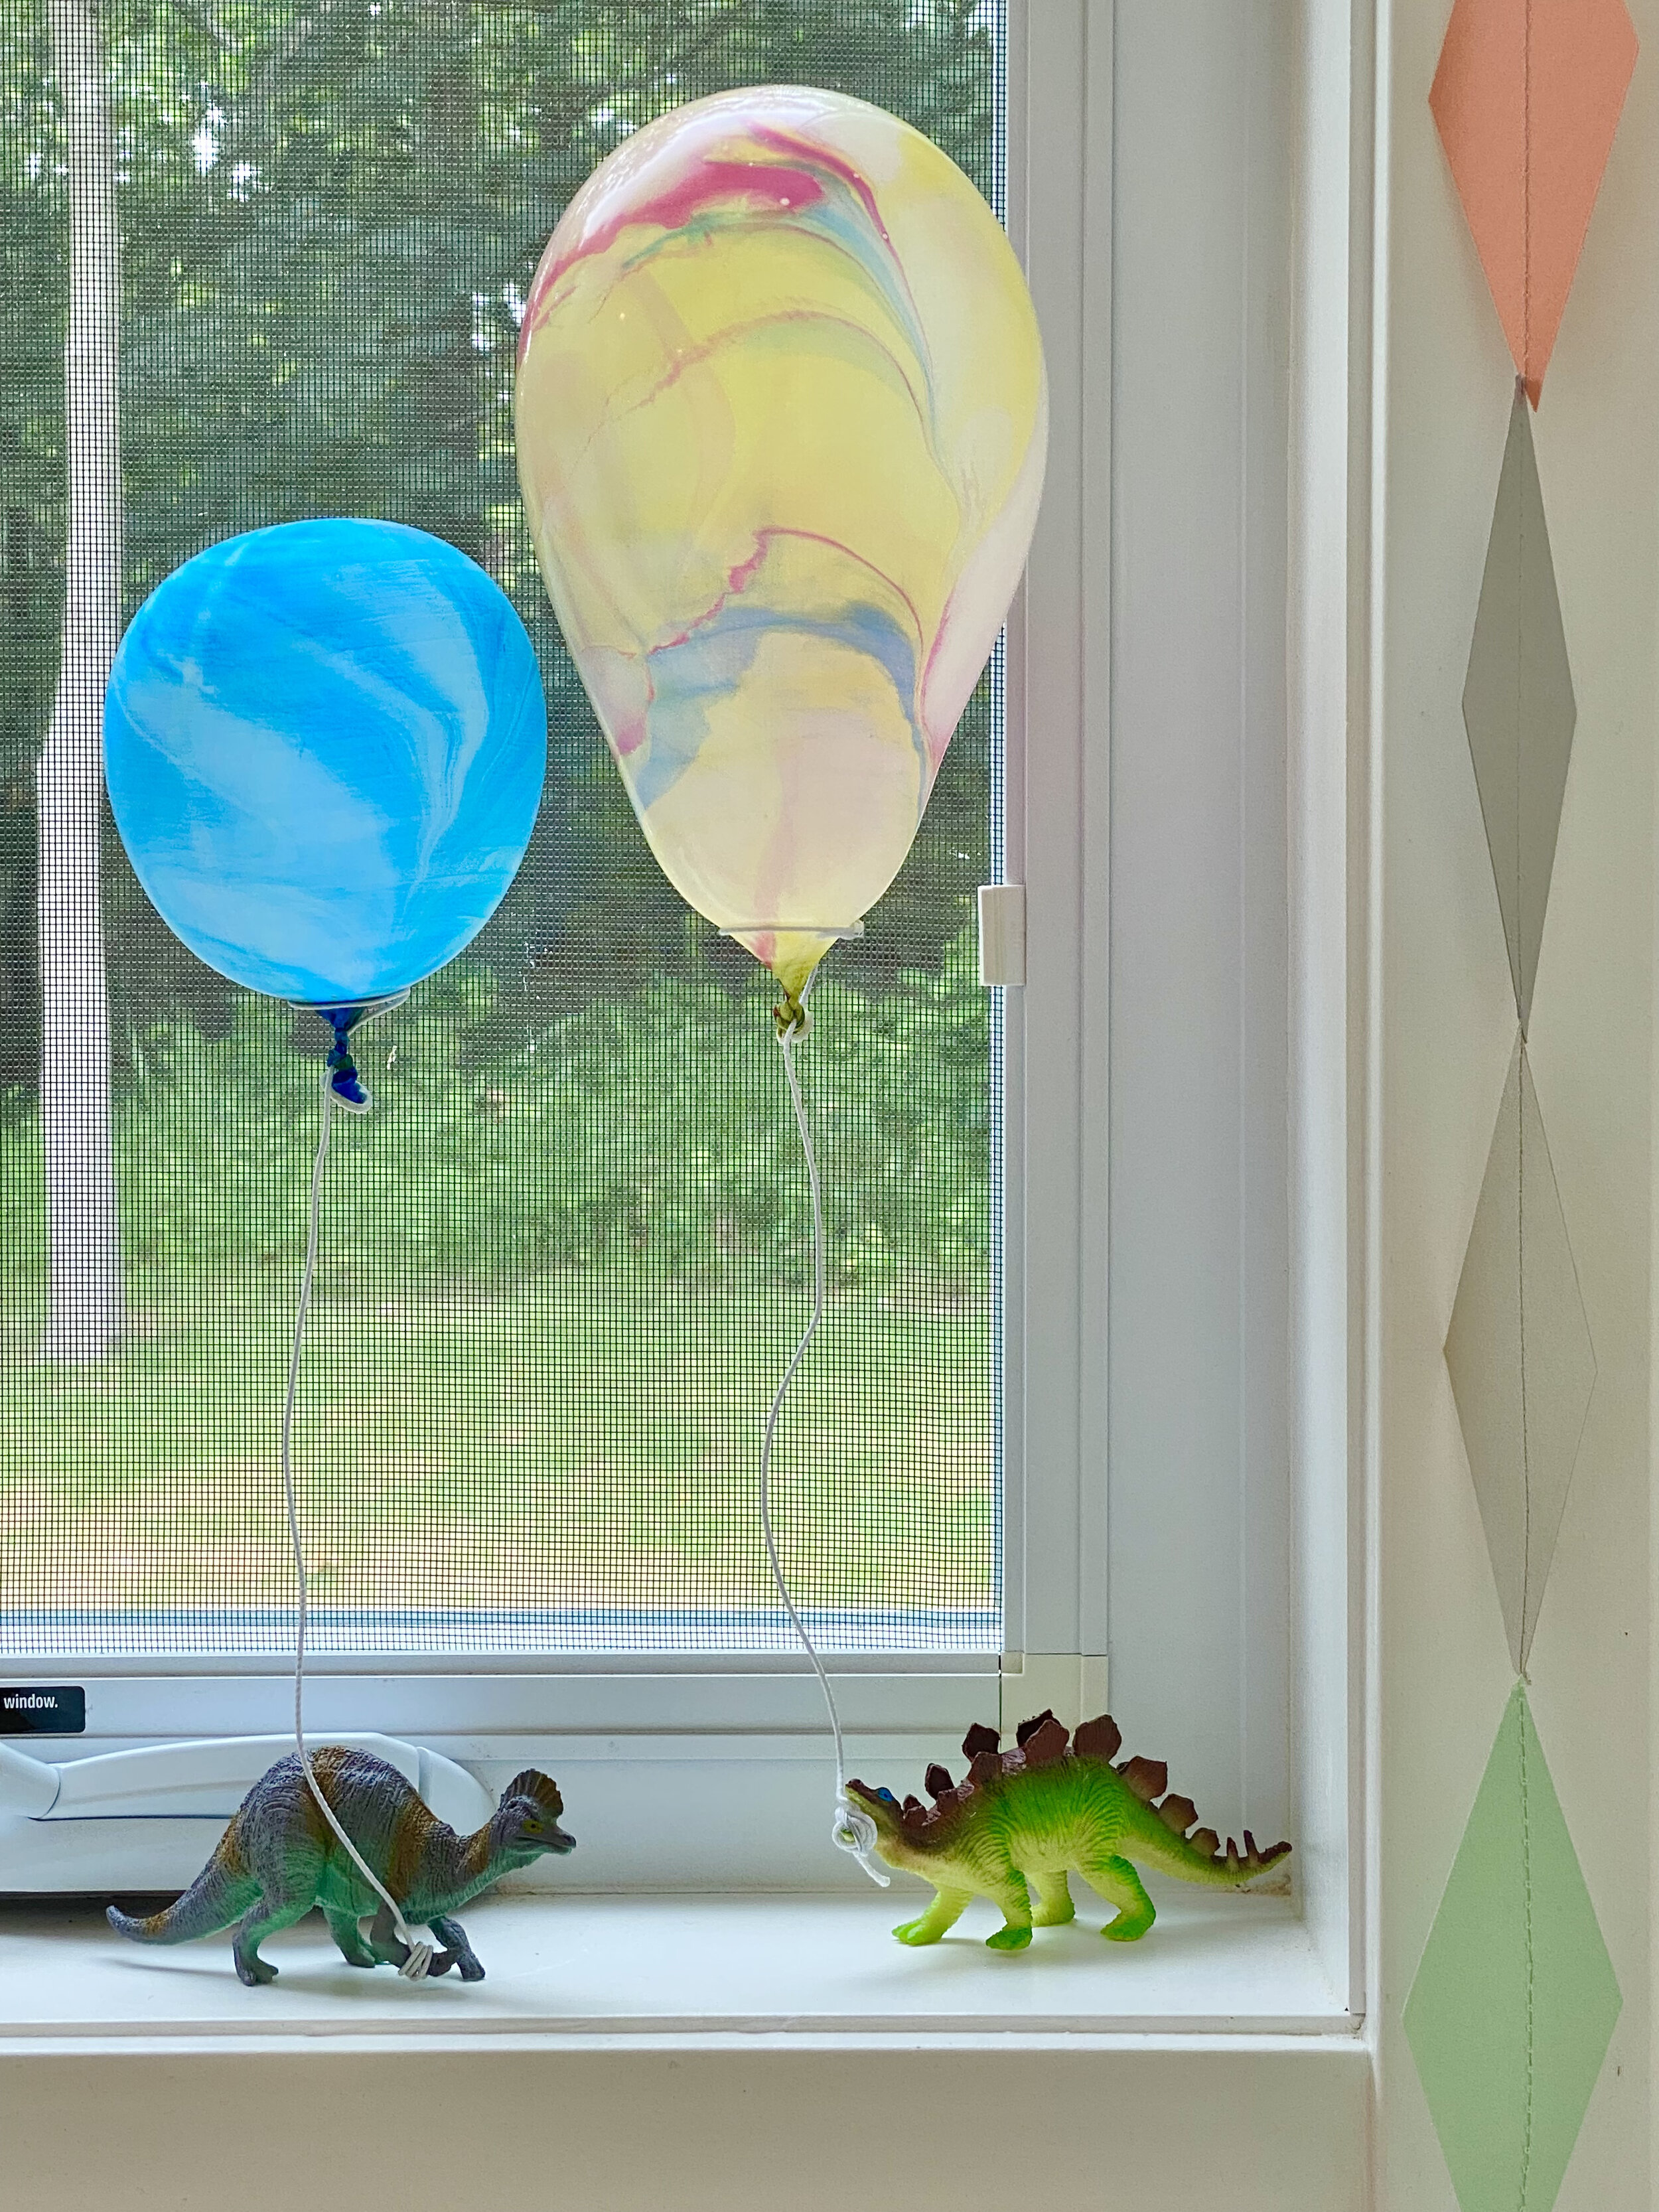
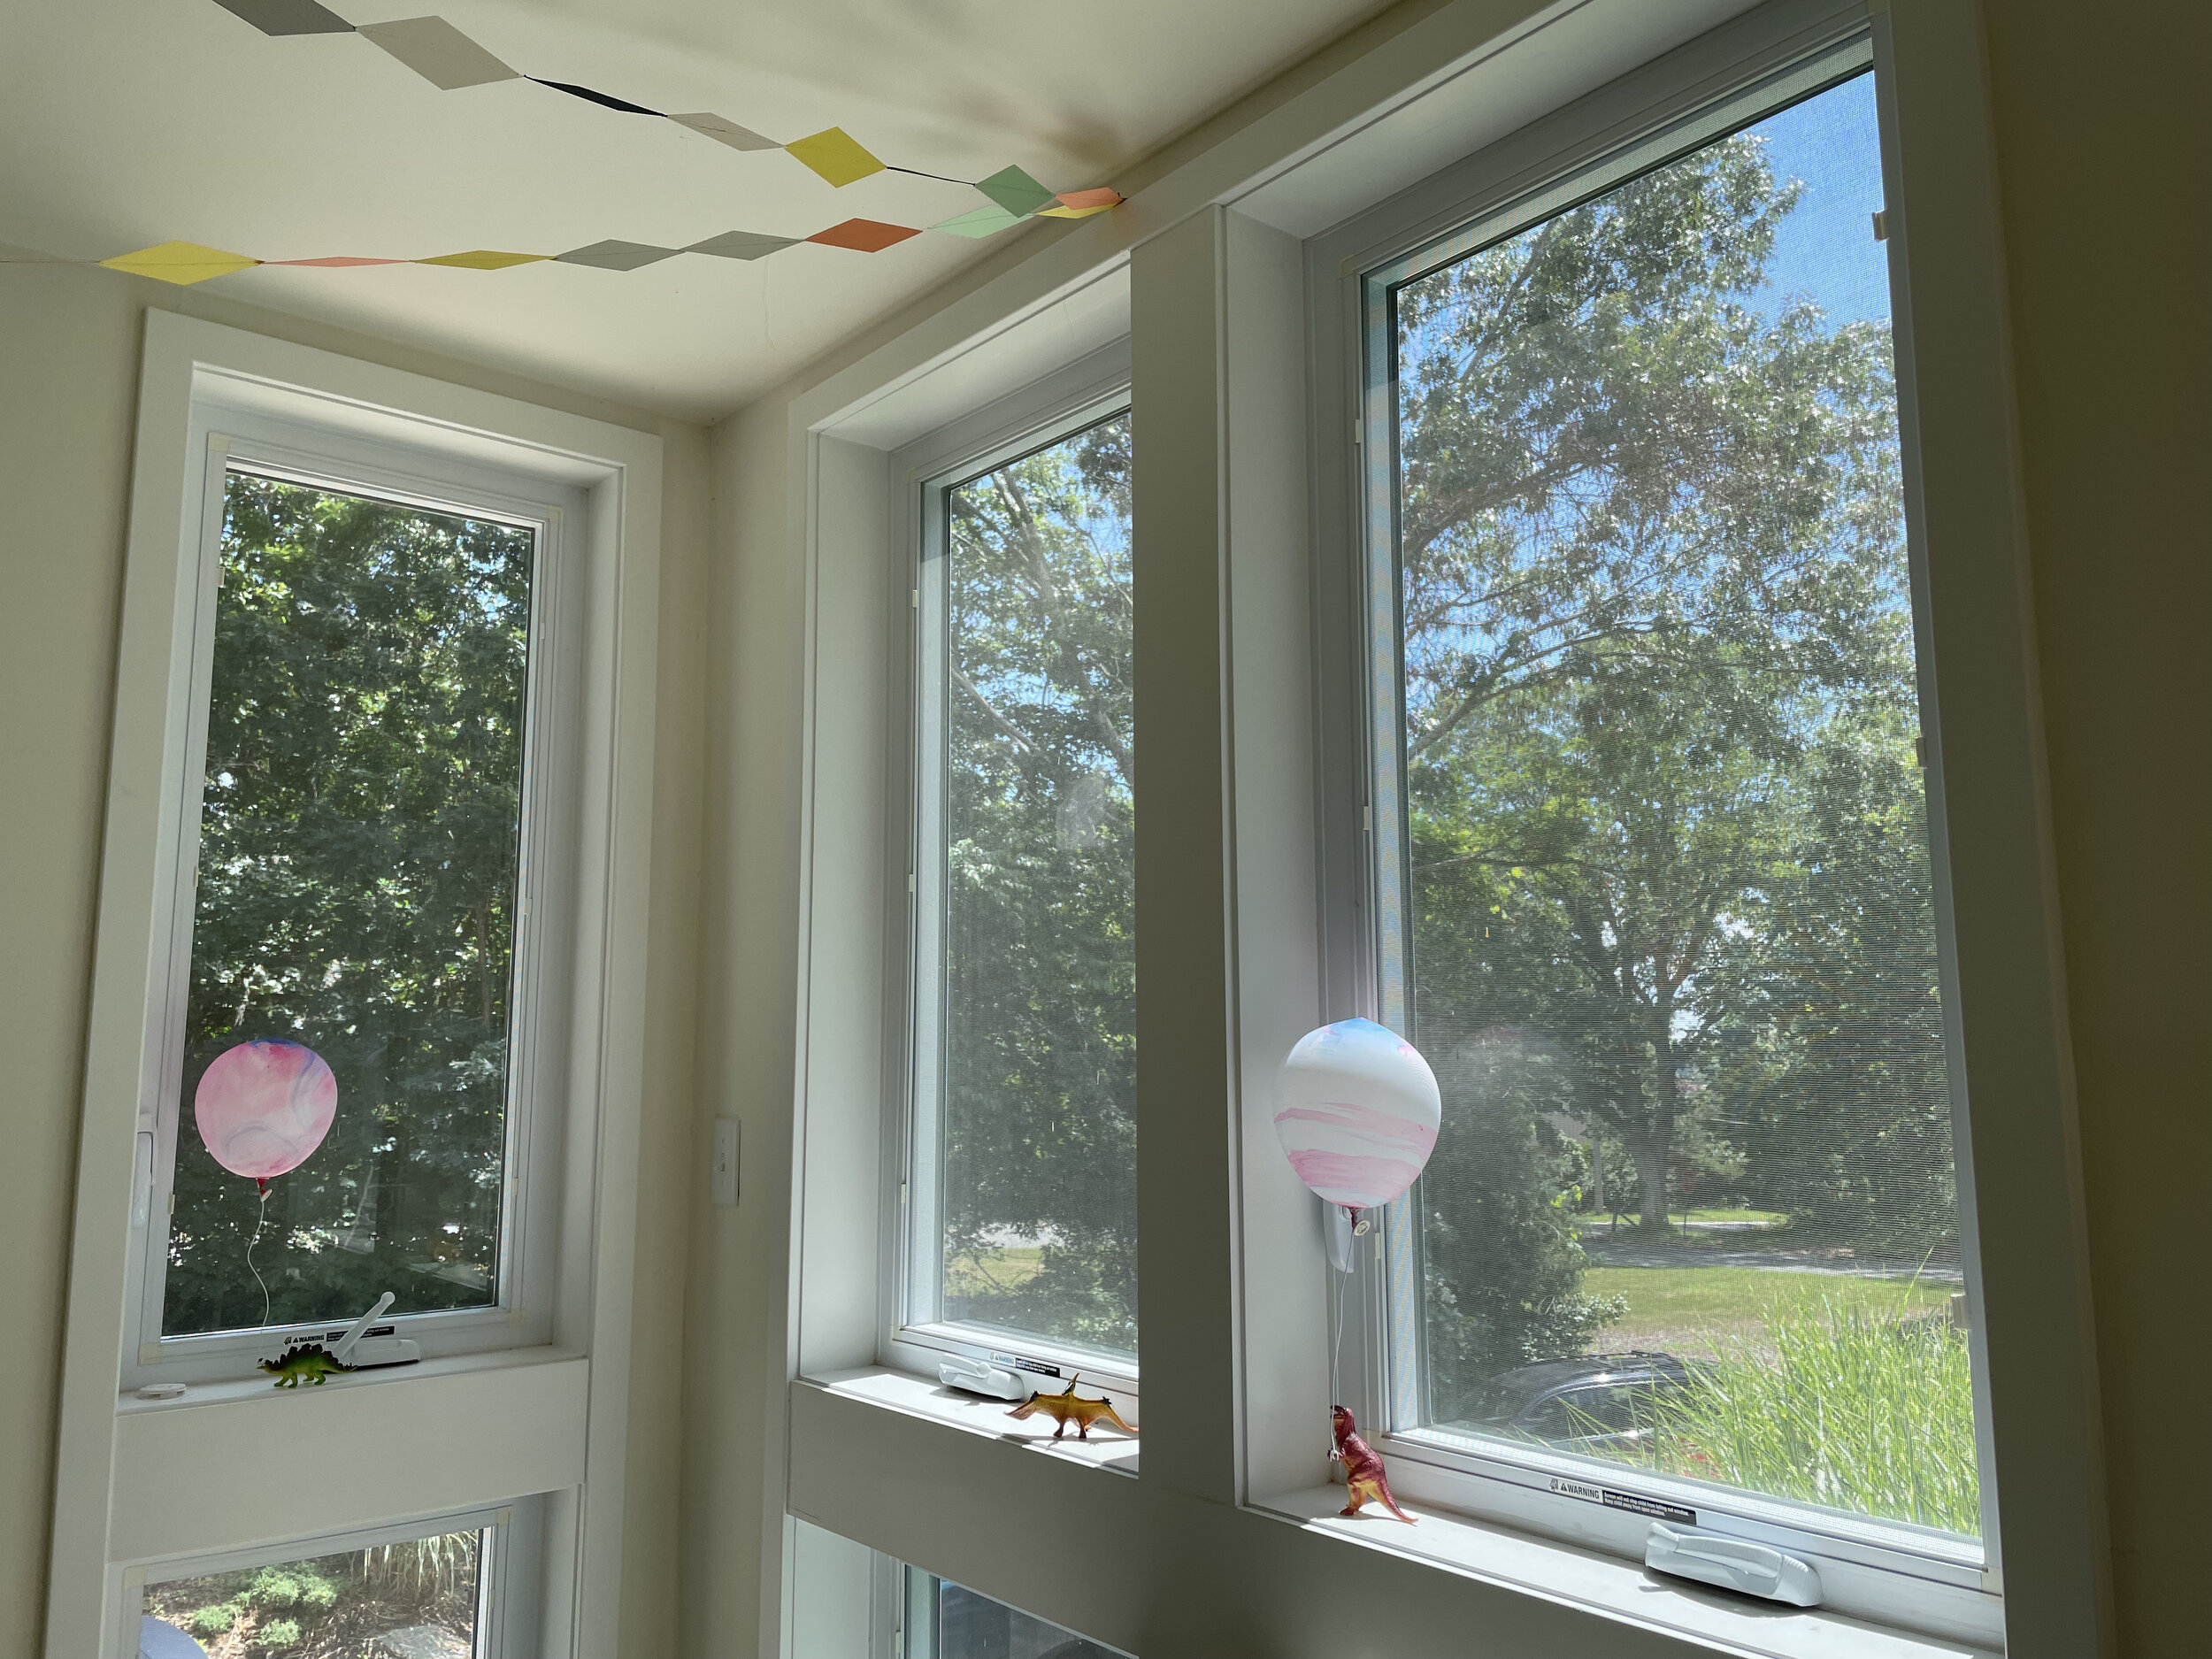
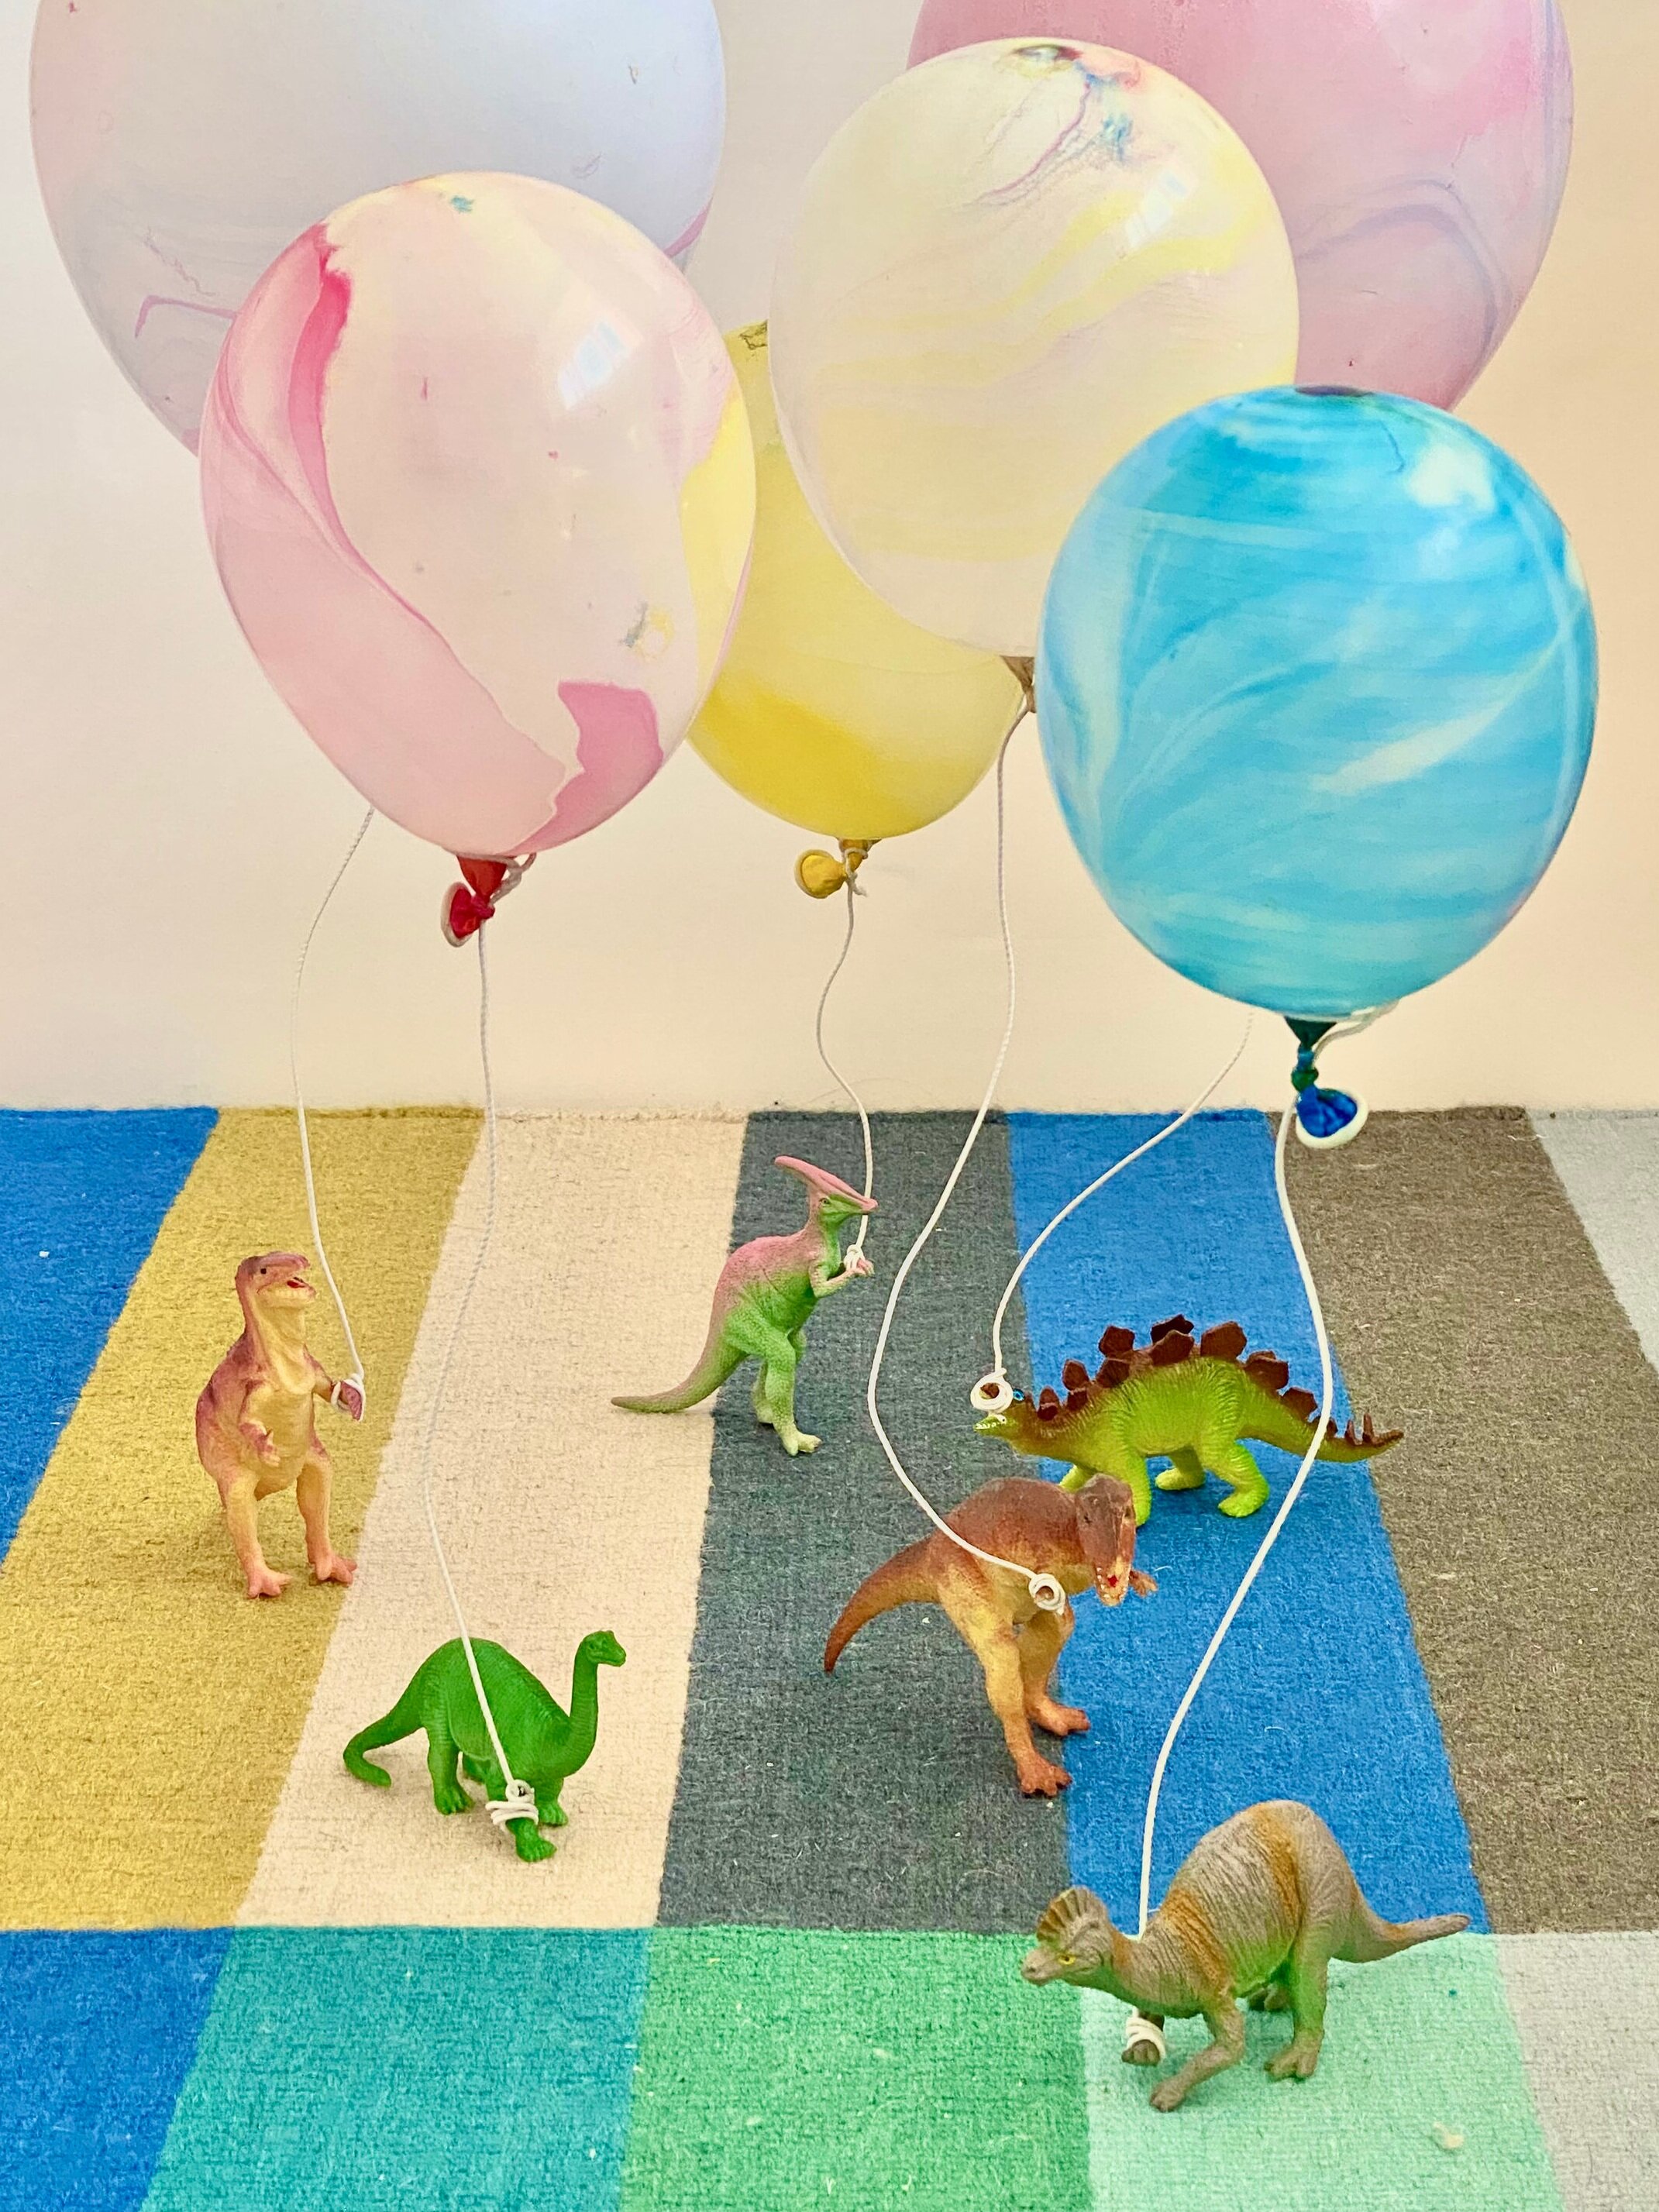
I always have a bin of random balloons and had some plastic dinos leftover from a recent Parents shoot so I turned these into decor for our windowsills. Instead of using helium I attached the balloons to a piece of white floral wire so they stood up. Eli really likes dinos too so he was into these.

Katani_invite_web-01.jpg

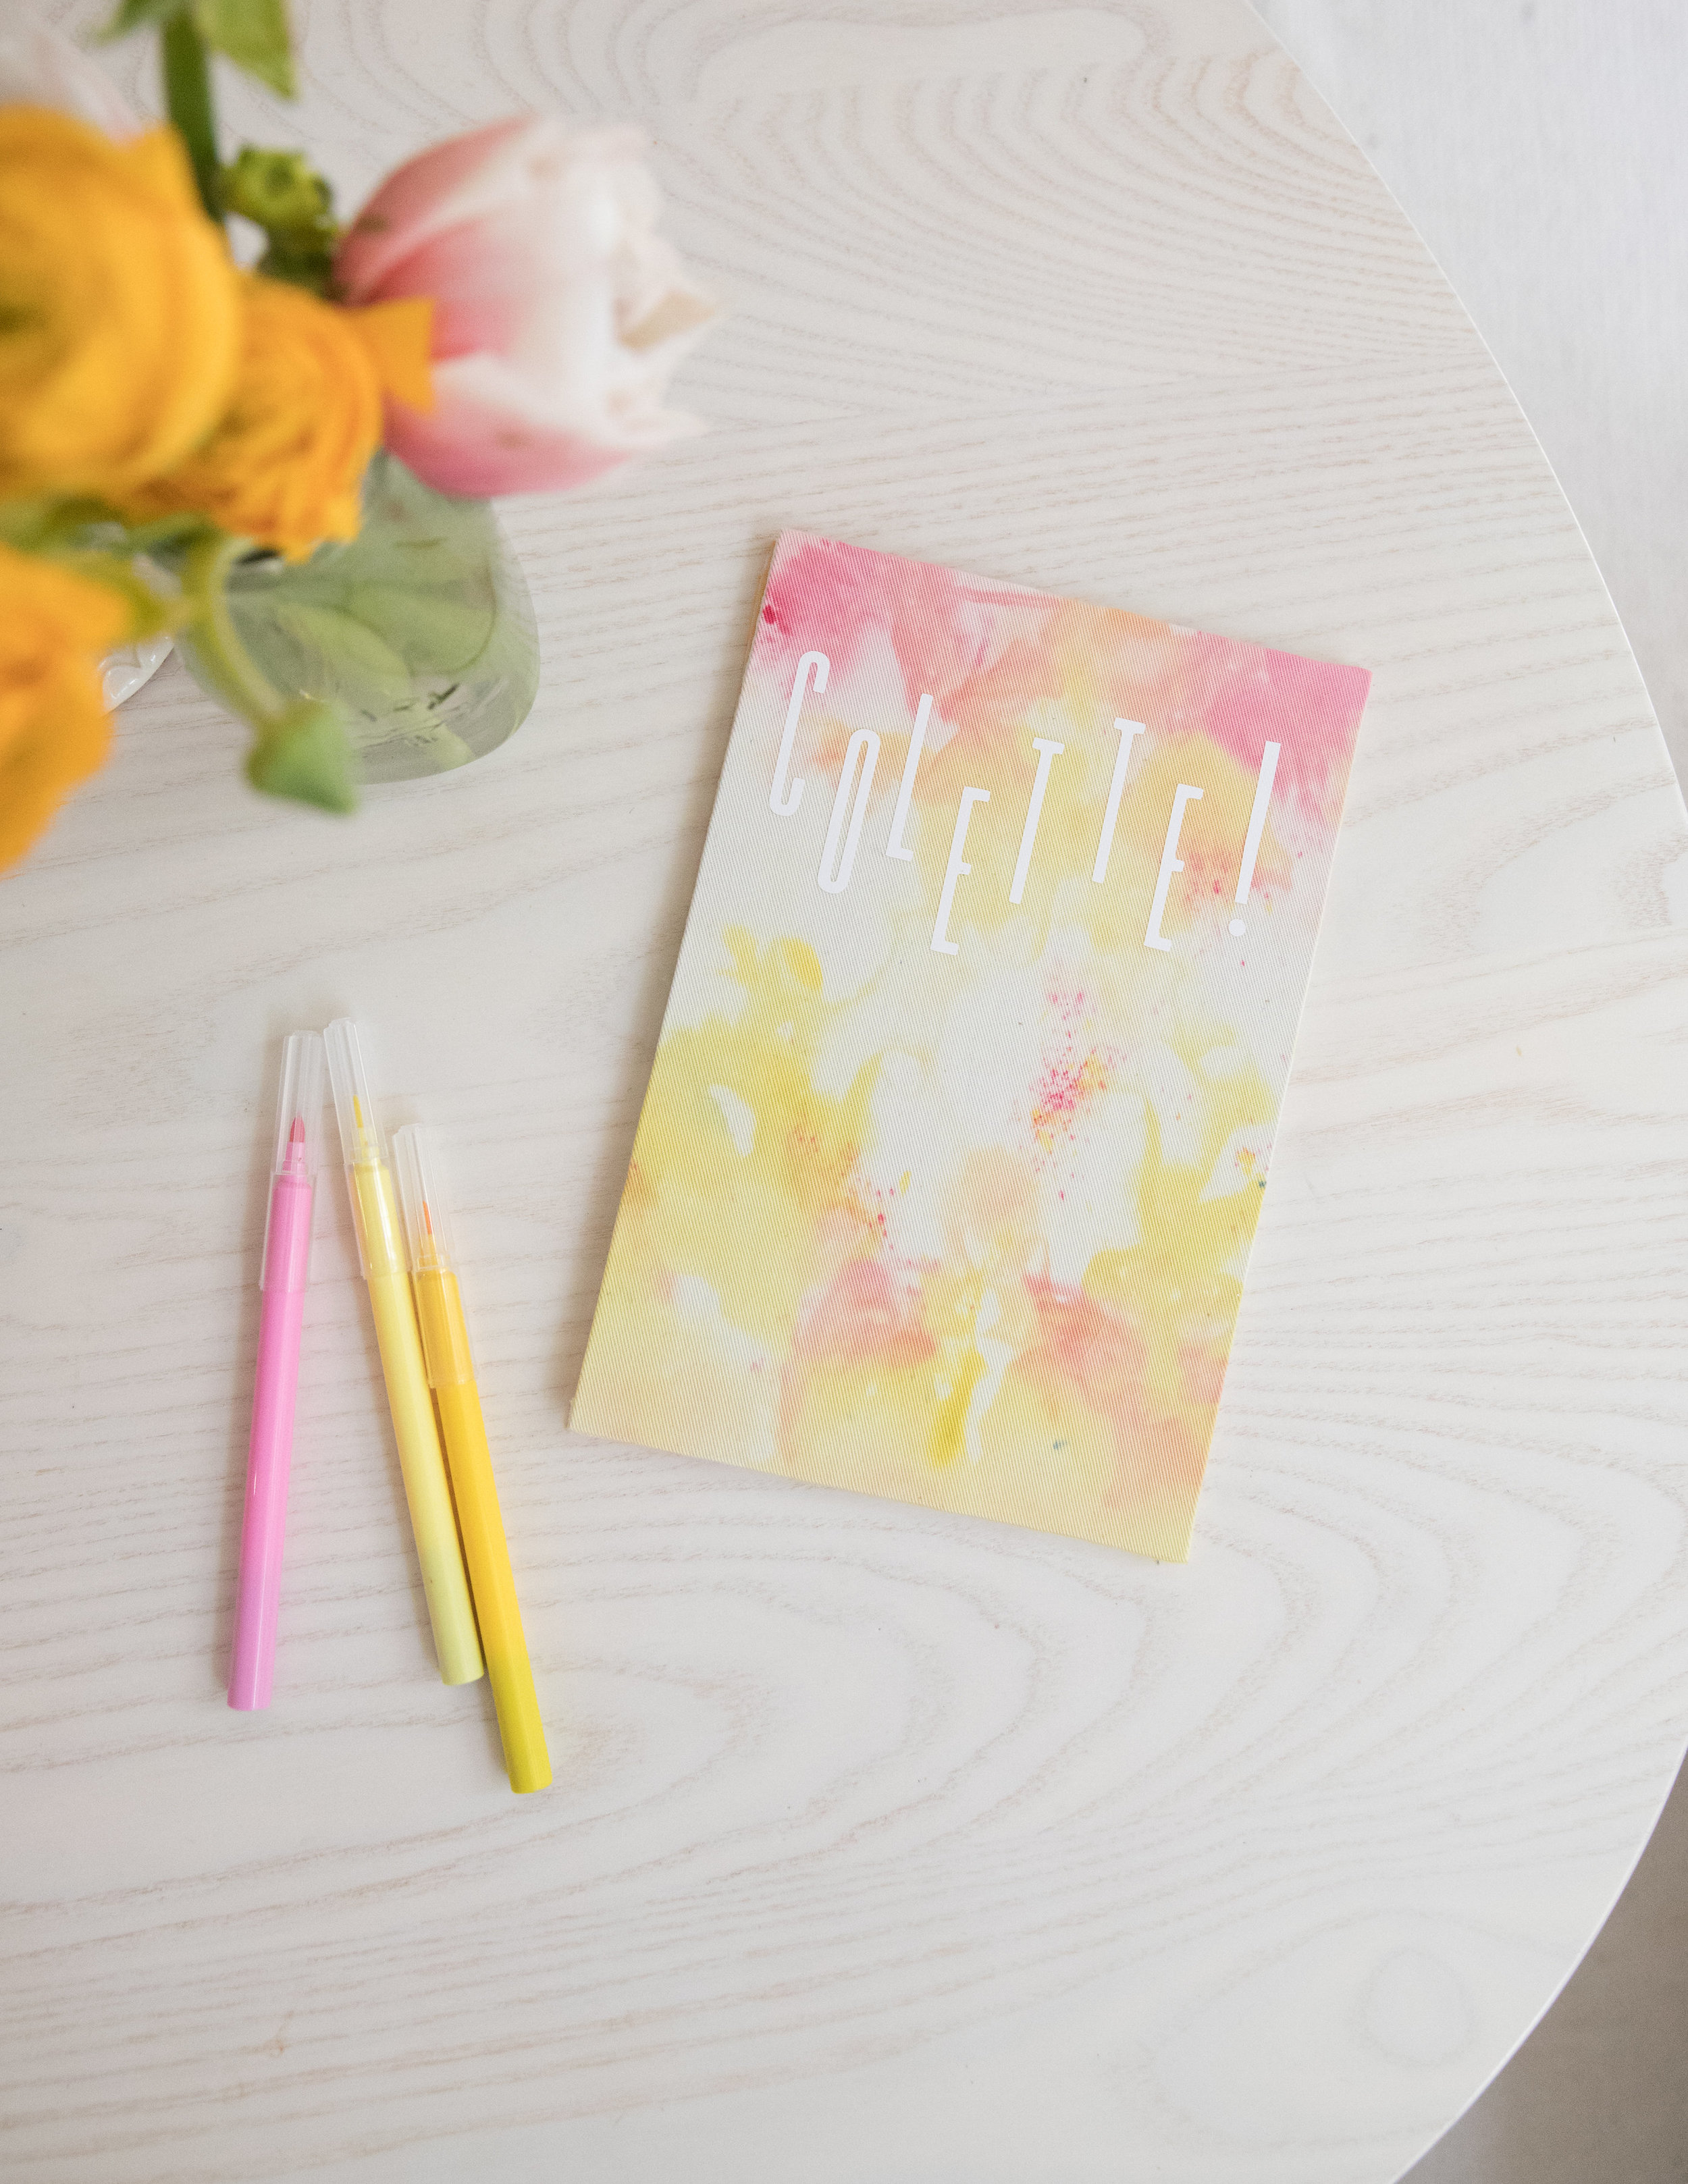
I painted an illustration of their family for the invite, with them on the beach on Shelter Island where they spend every summer.

A13C6E77-885B-477B-B792-108E706A174C.jpg
IMG_7097.jpg
IMG_7087.jpg

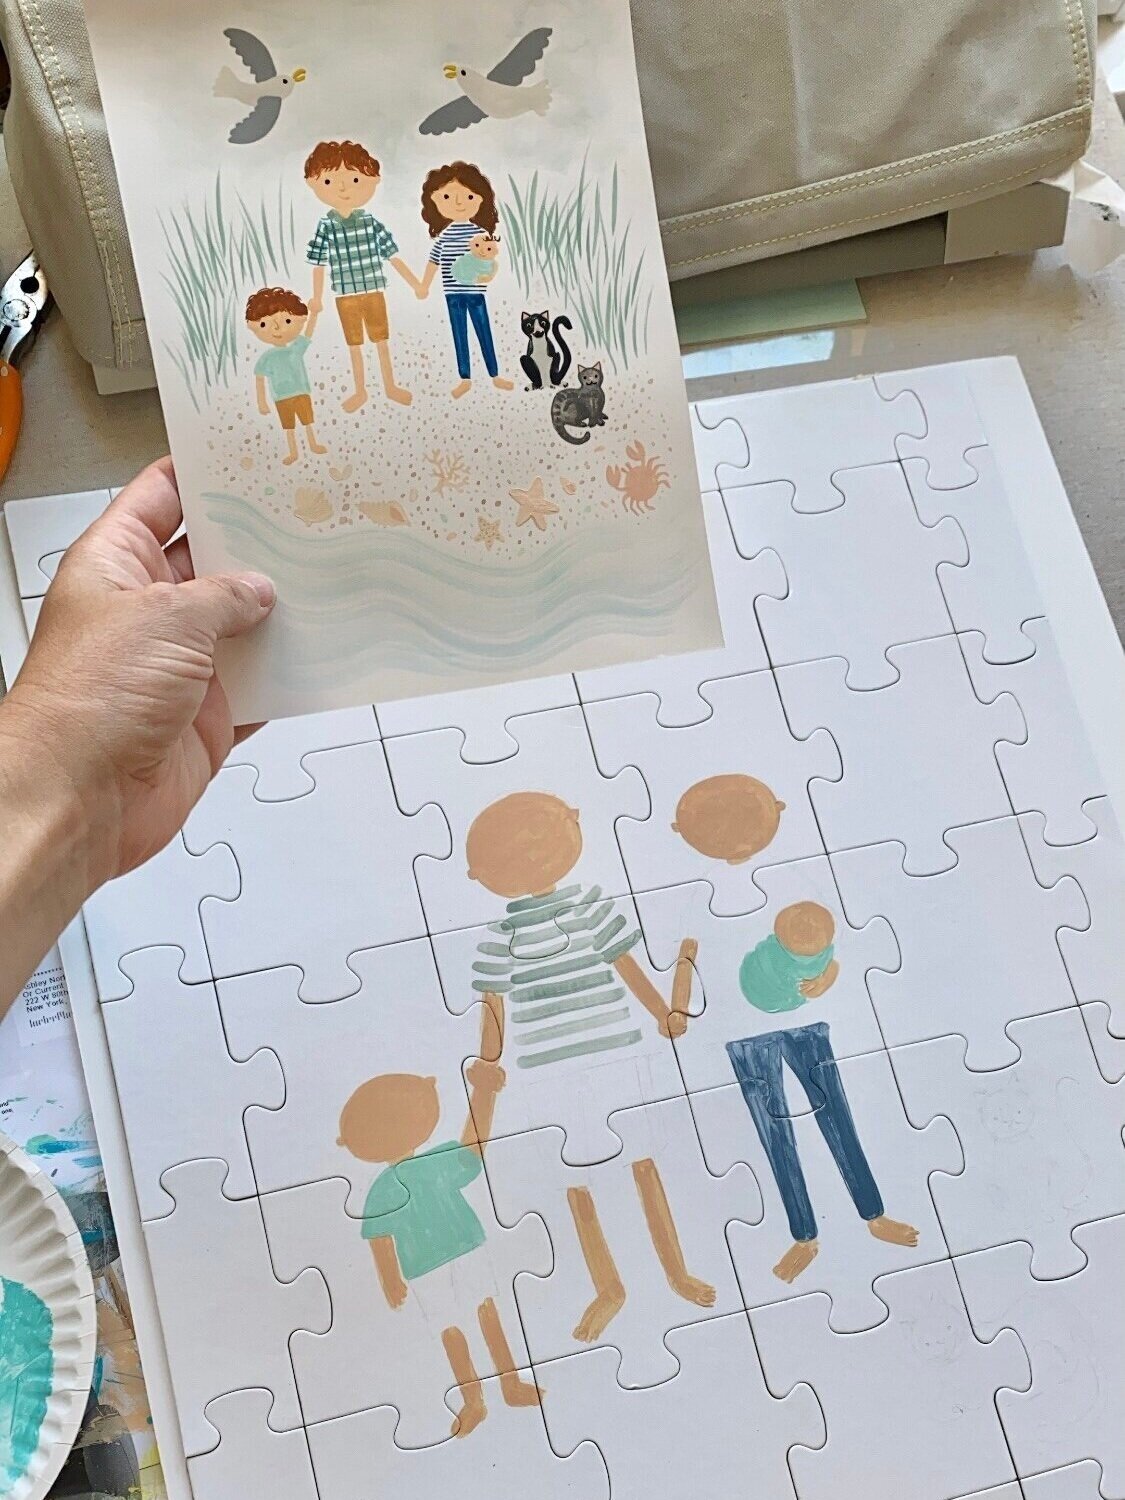
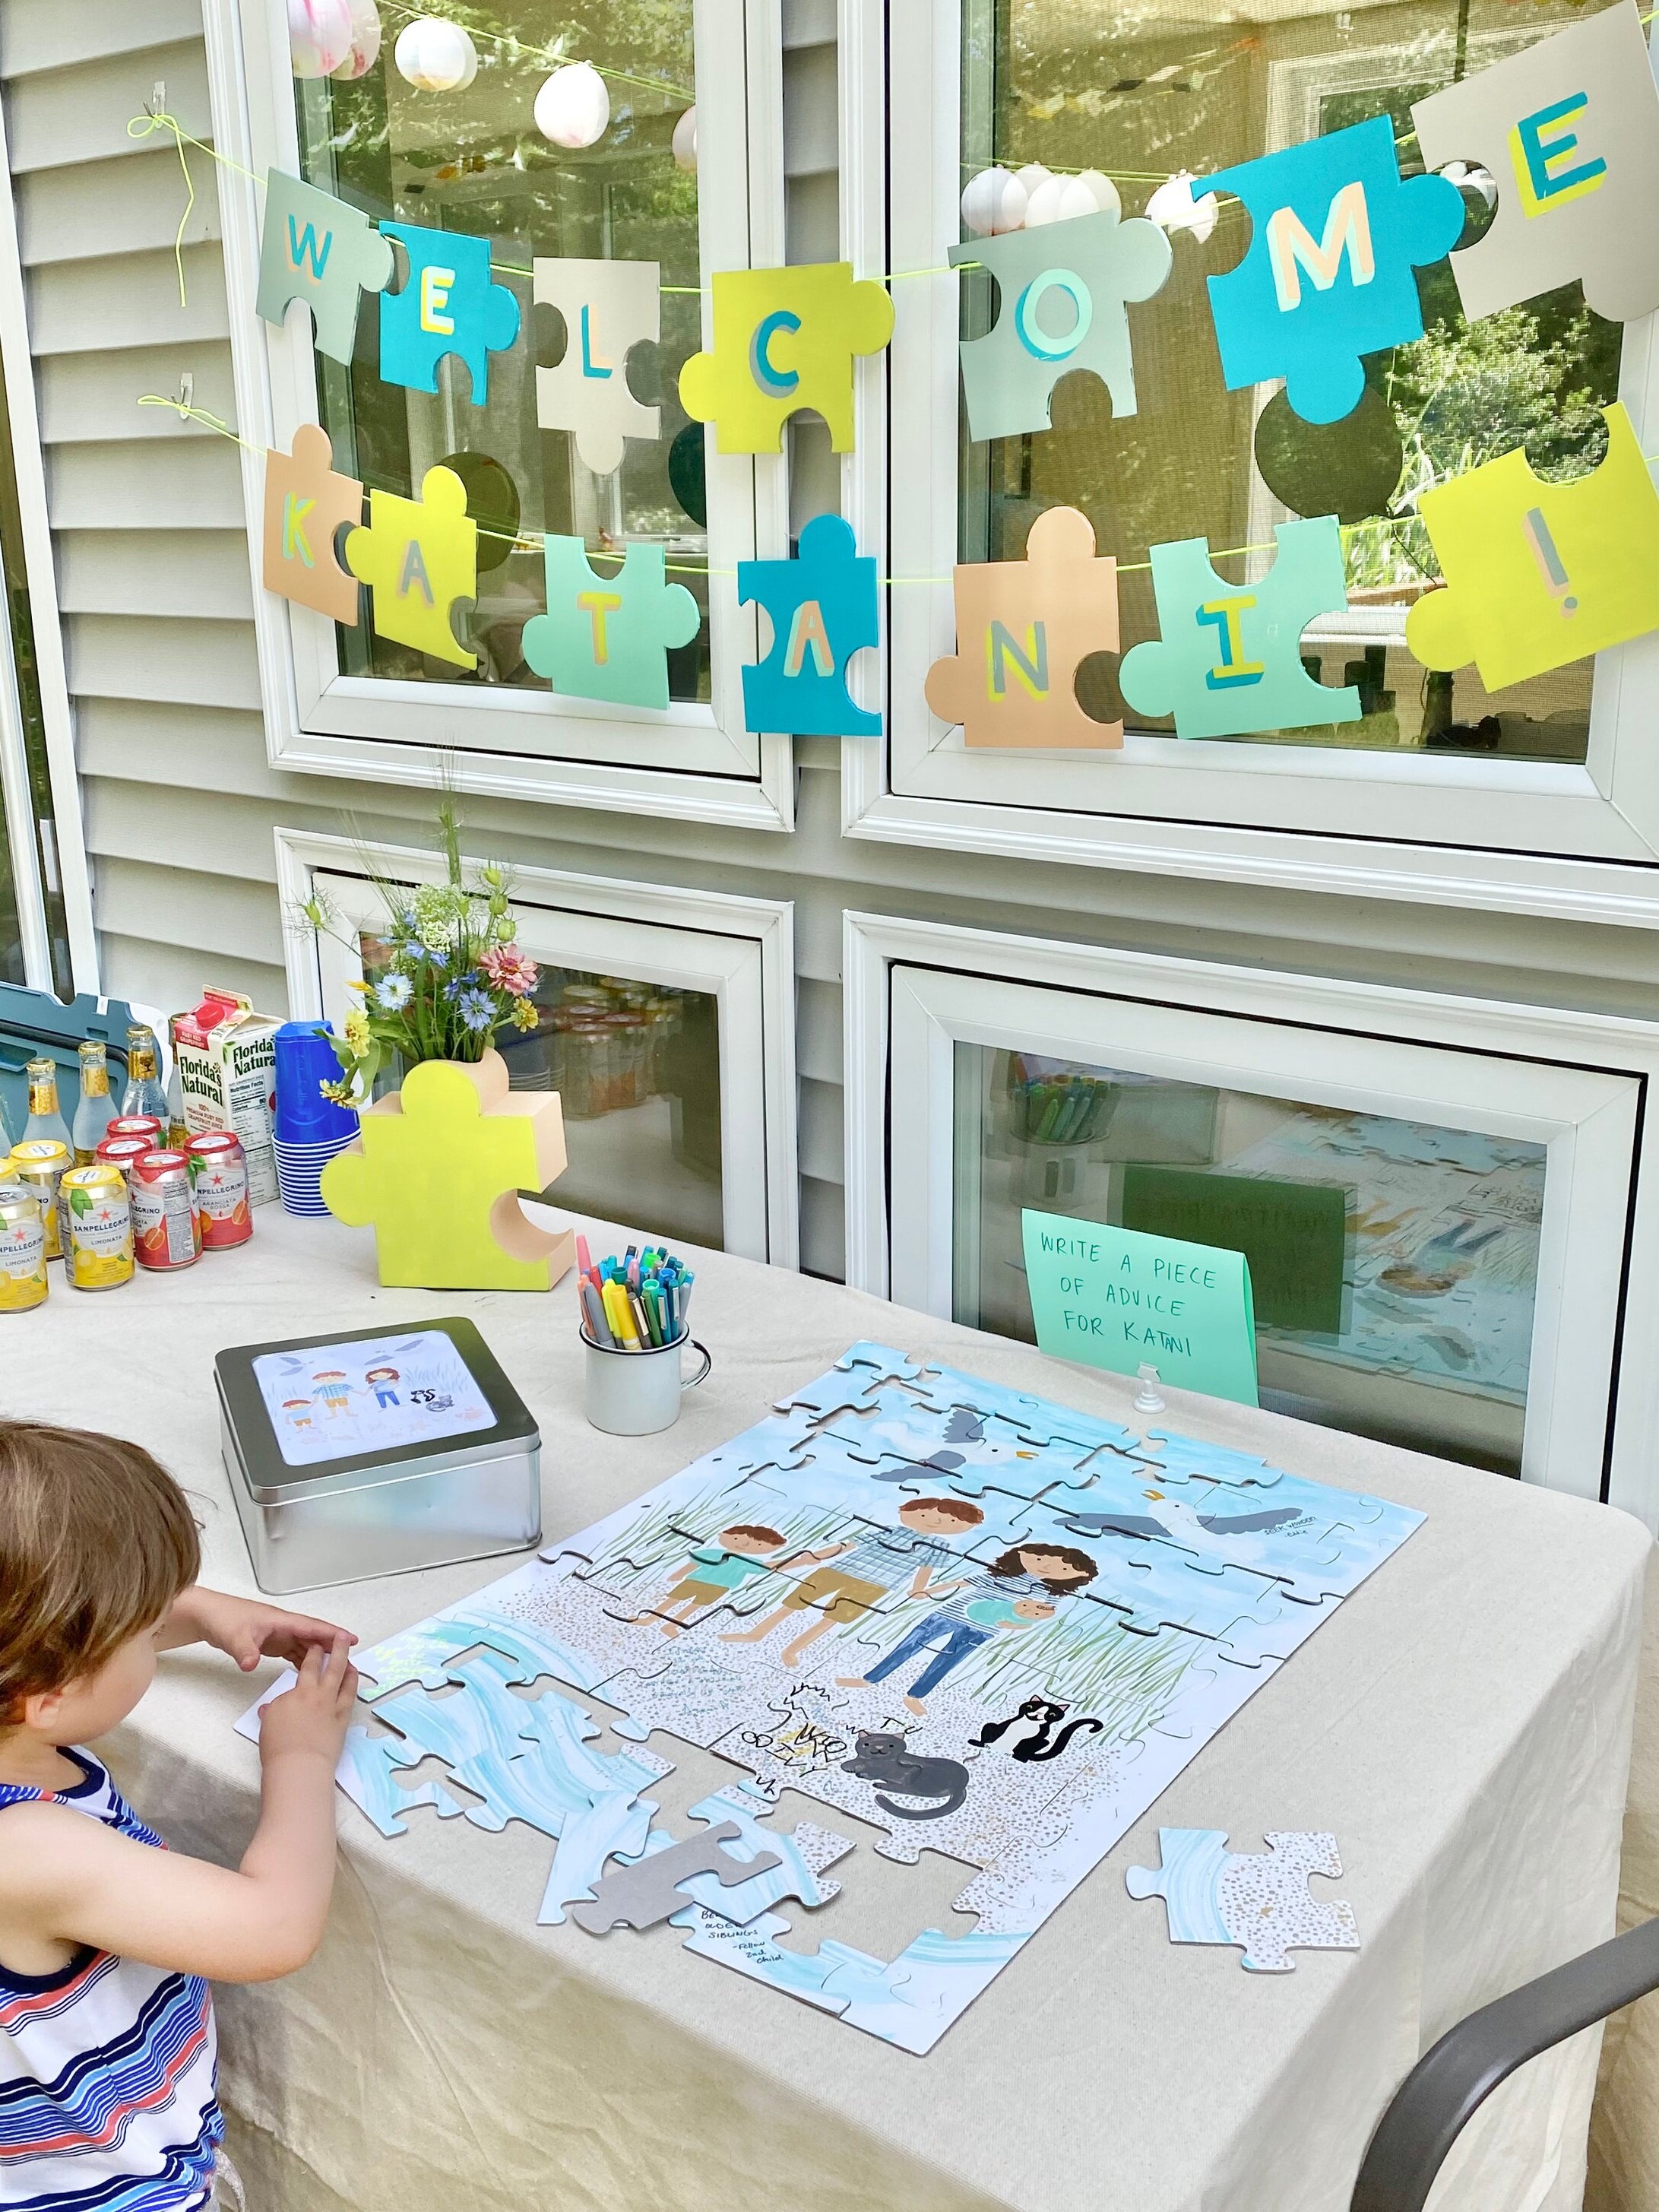
Instead of a guestbook I bought a big blank puzzle and painted the portrait on there as well. Then I put some markers out so guests could write the new baby a “piece of advice” on any puzzle piece they wanted. Eli went for the puzzle right away which was very cute. I got them a bin for the puzzle so they could keep it as a memory from the shower.

708BEDDC-FF80-47AC-9002-83515A77318D.jpg
C9296C1E-FC1B-4ABB-A85B-4E674D5FBA81.jpg

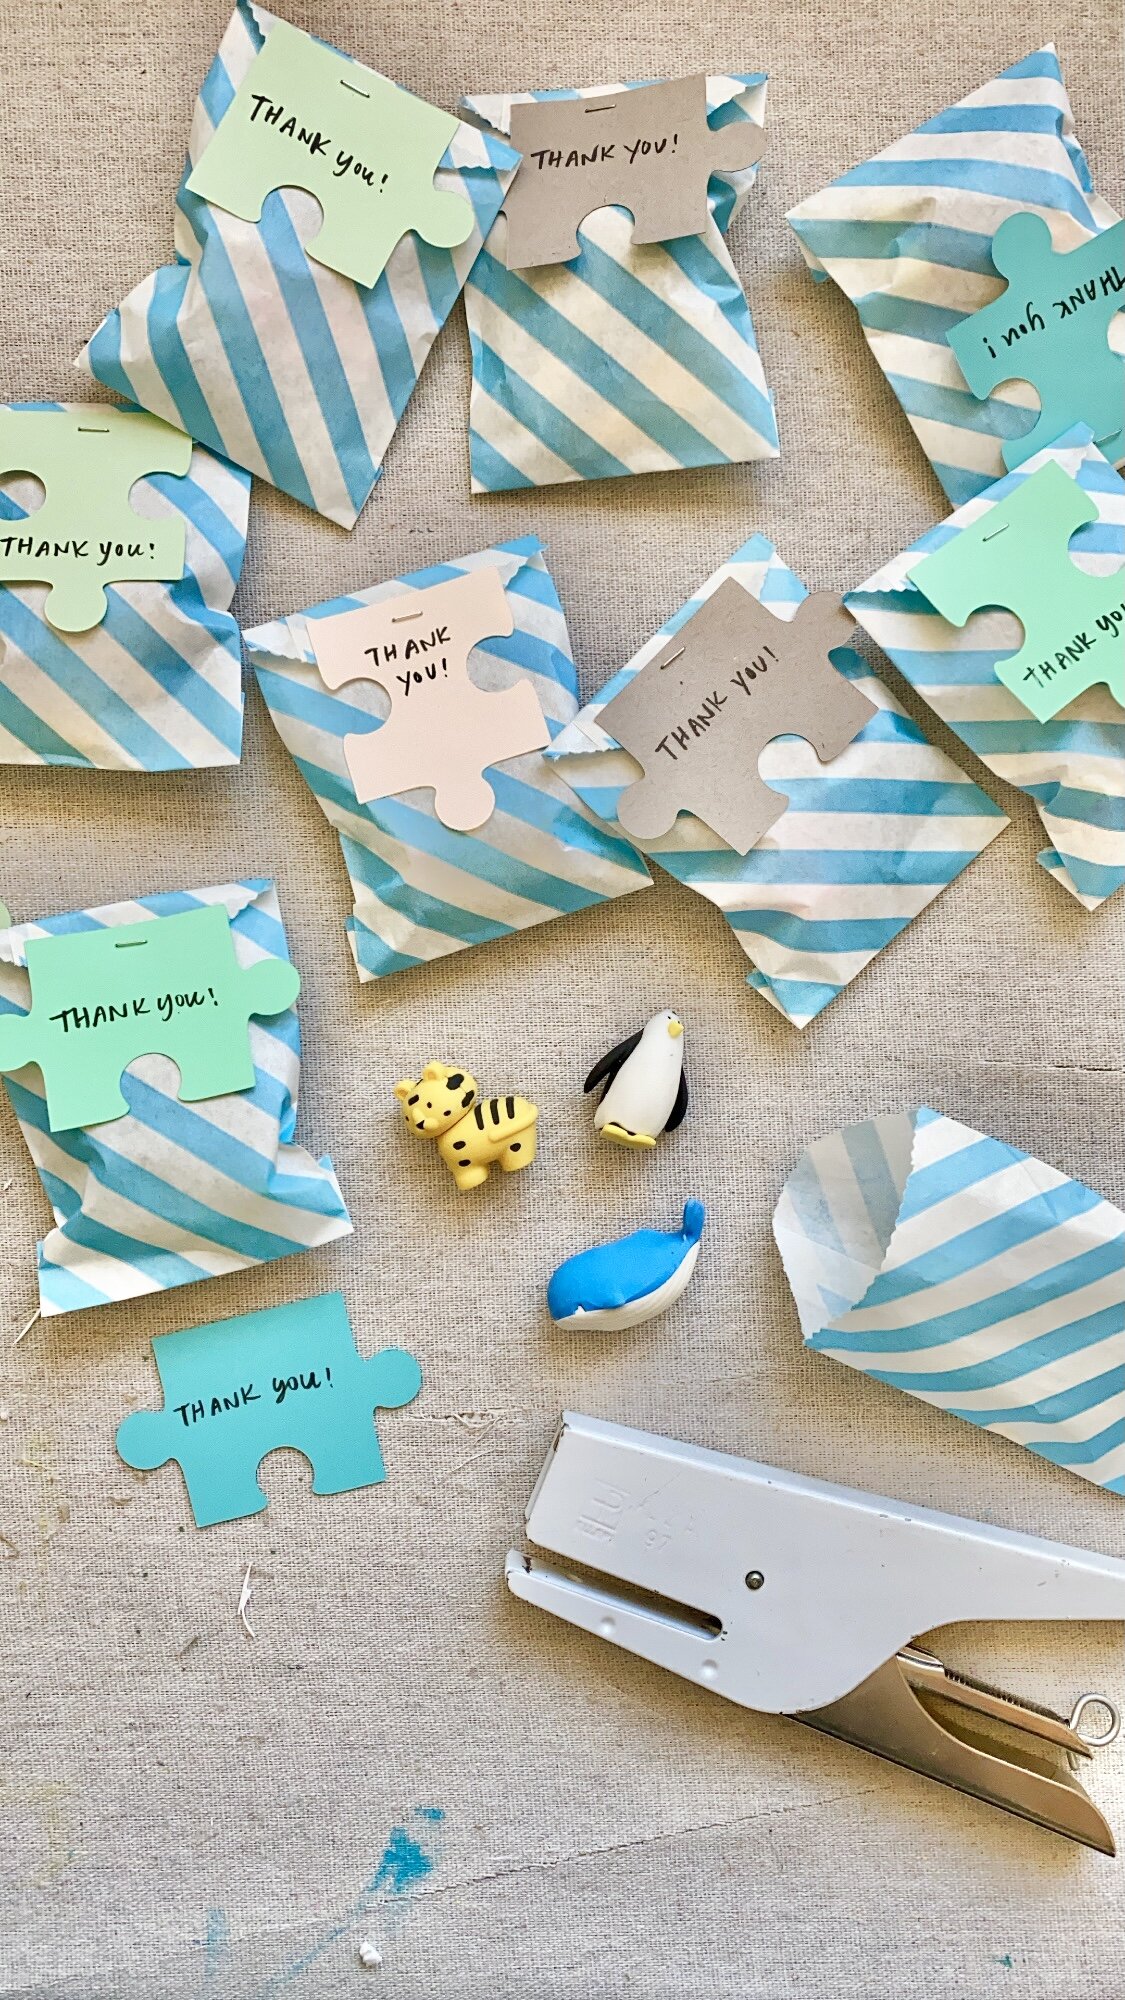
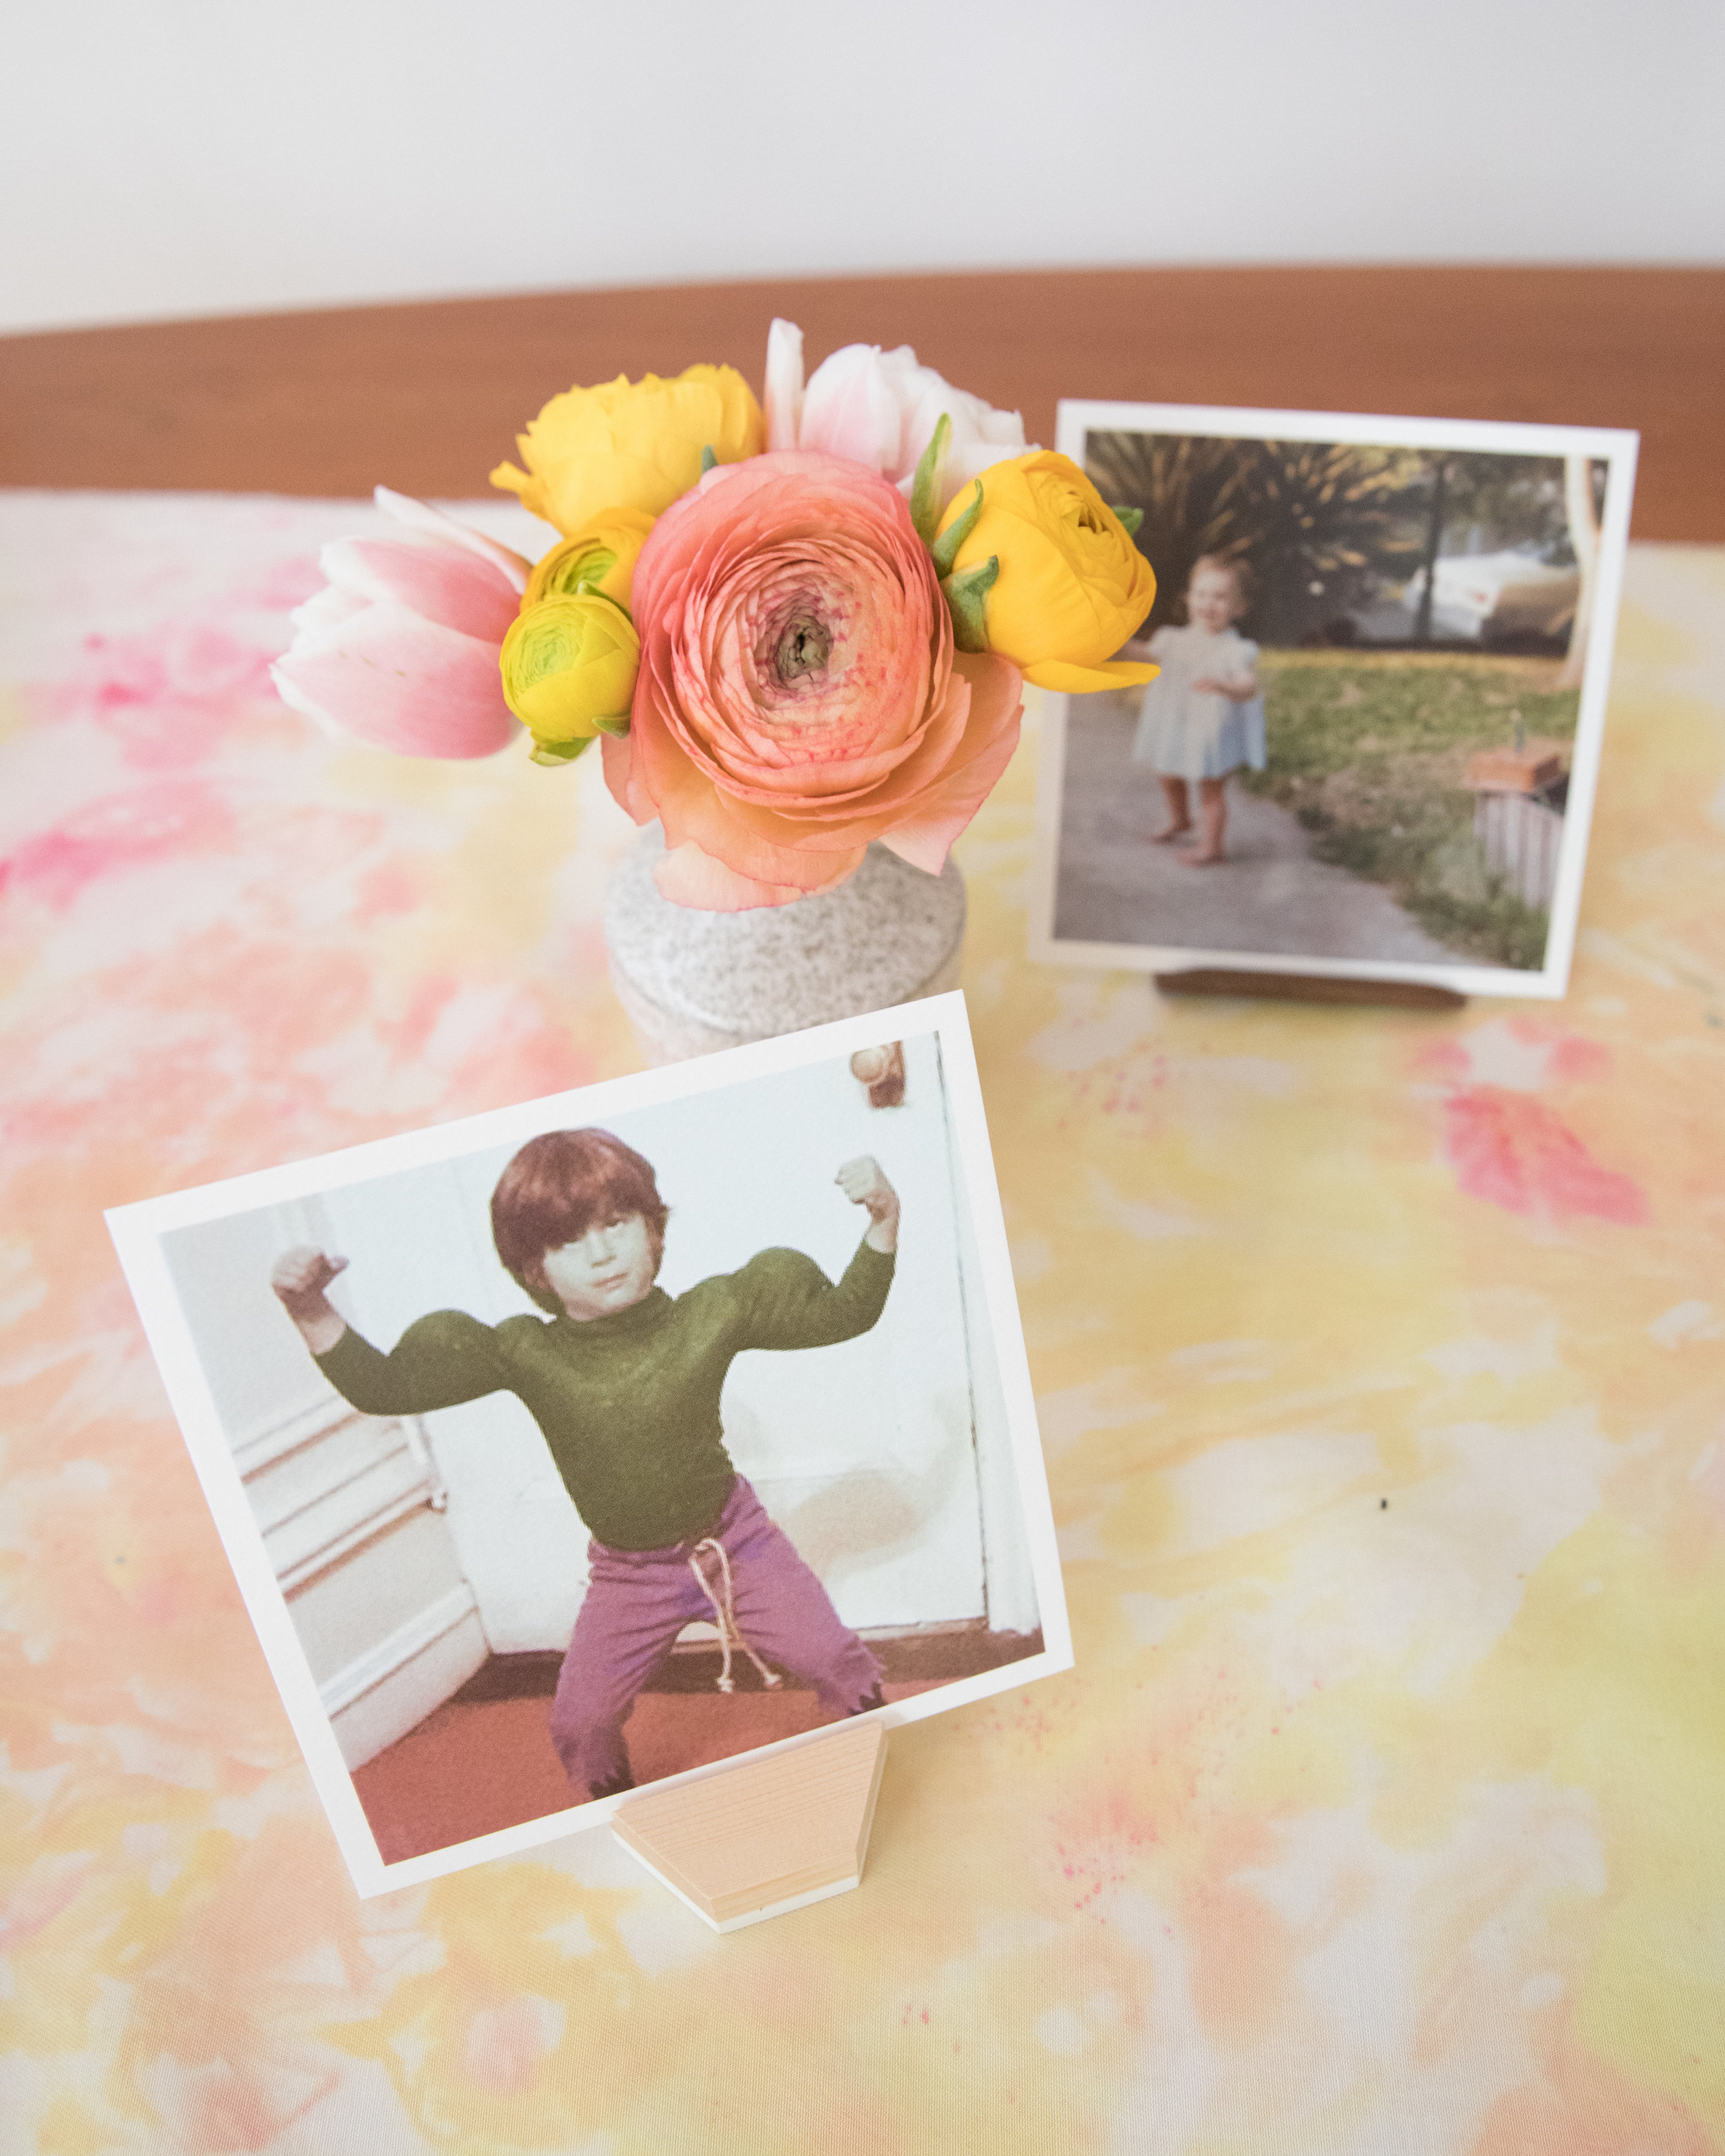
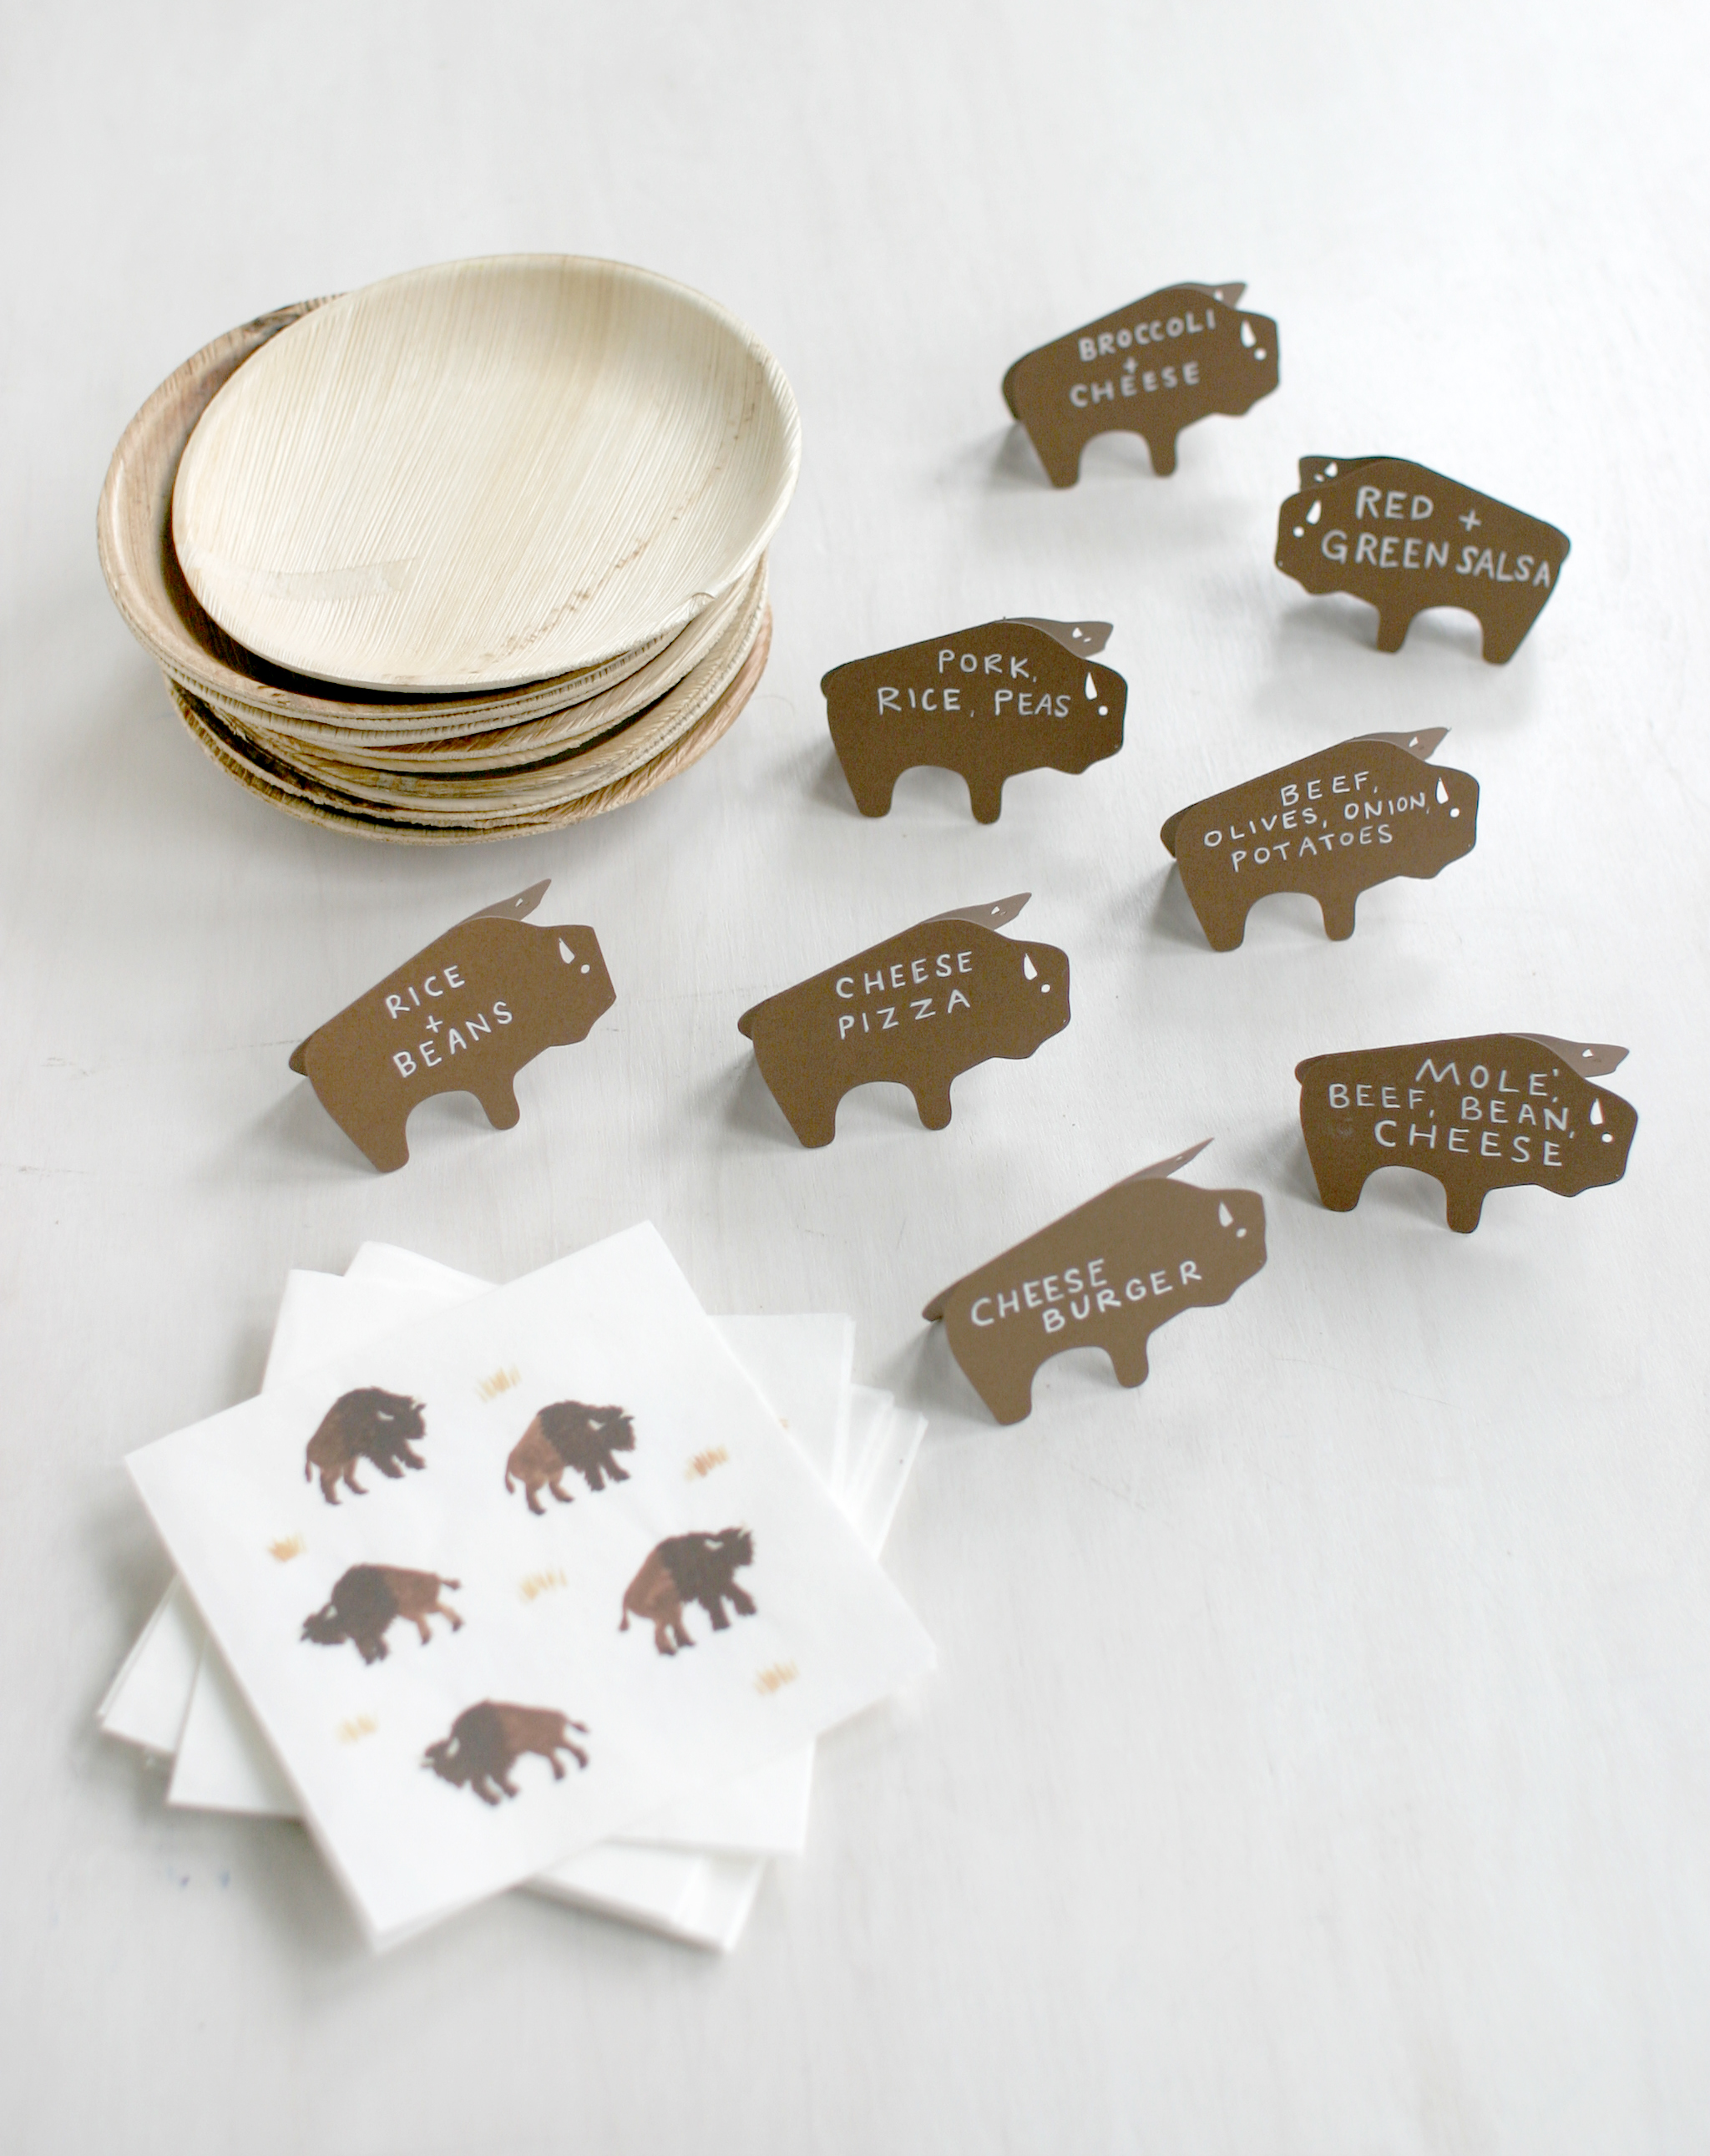
I used my digital cutter to cut out some puzzle shaped cards to use for tags, games, and food labels. I pulled the palette for the papers from the family portrait, using papers I had on hand. For a party favor I had a bunch of cute erasers also leftover from a shoot and I just stapled a puzzle tag on to close them in a striped paper bag.

1FBEF67D-7CE4-412C-9847-C6AB28F92783.jpg

At the time of the shower they didn’t have a name decided for the new baby, calling him Katani as a placeholder (I think it means “little one” in Hebrew), so we came up with a game to help them pick one. We provided some funny prompts for the name and had the parents choose a letter. Then guests wrote down a name for each prompt beginning with that letter. Everyone read out their answers and I wrote them on a puzzle shaped card to put in a bowl for Eli to pick the winners.

IMG_8809.jpeg

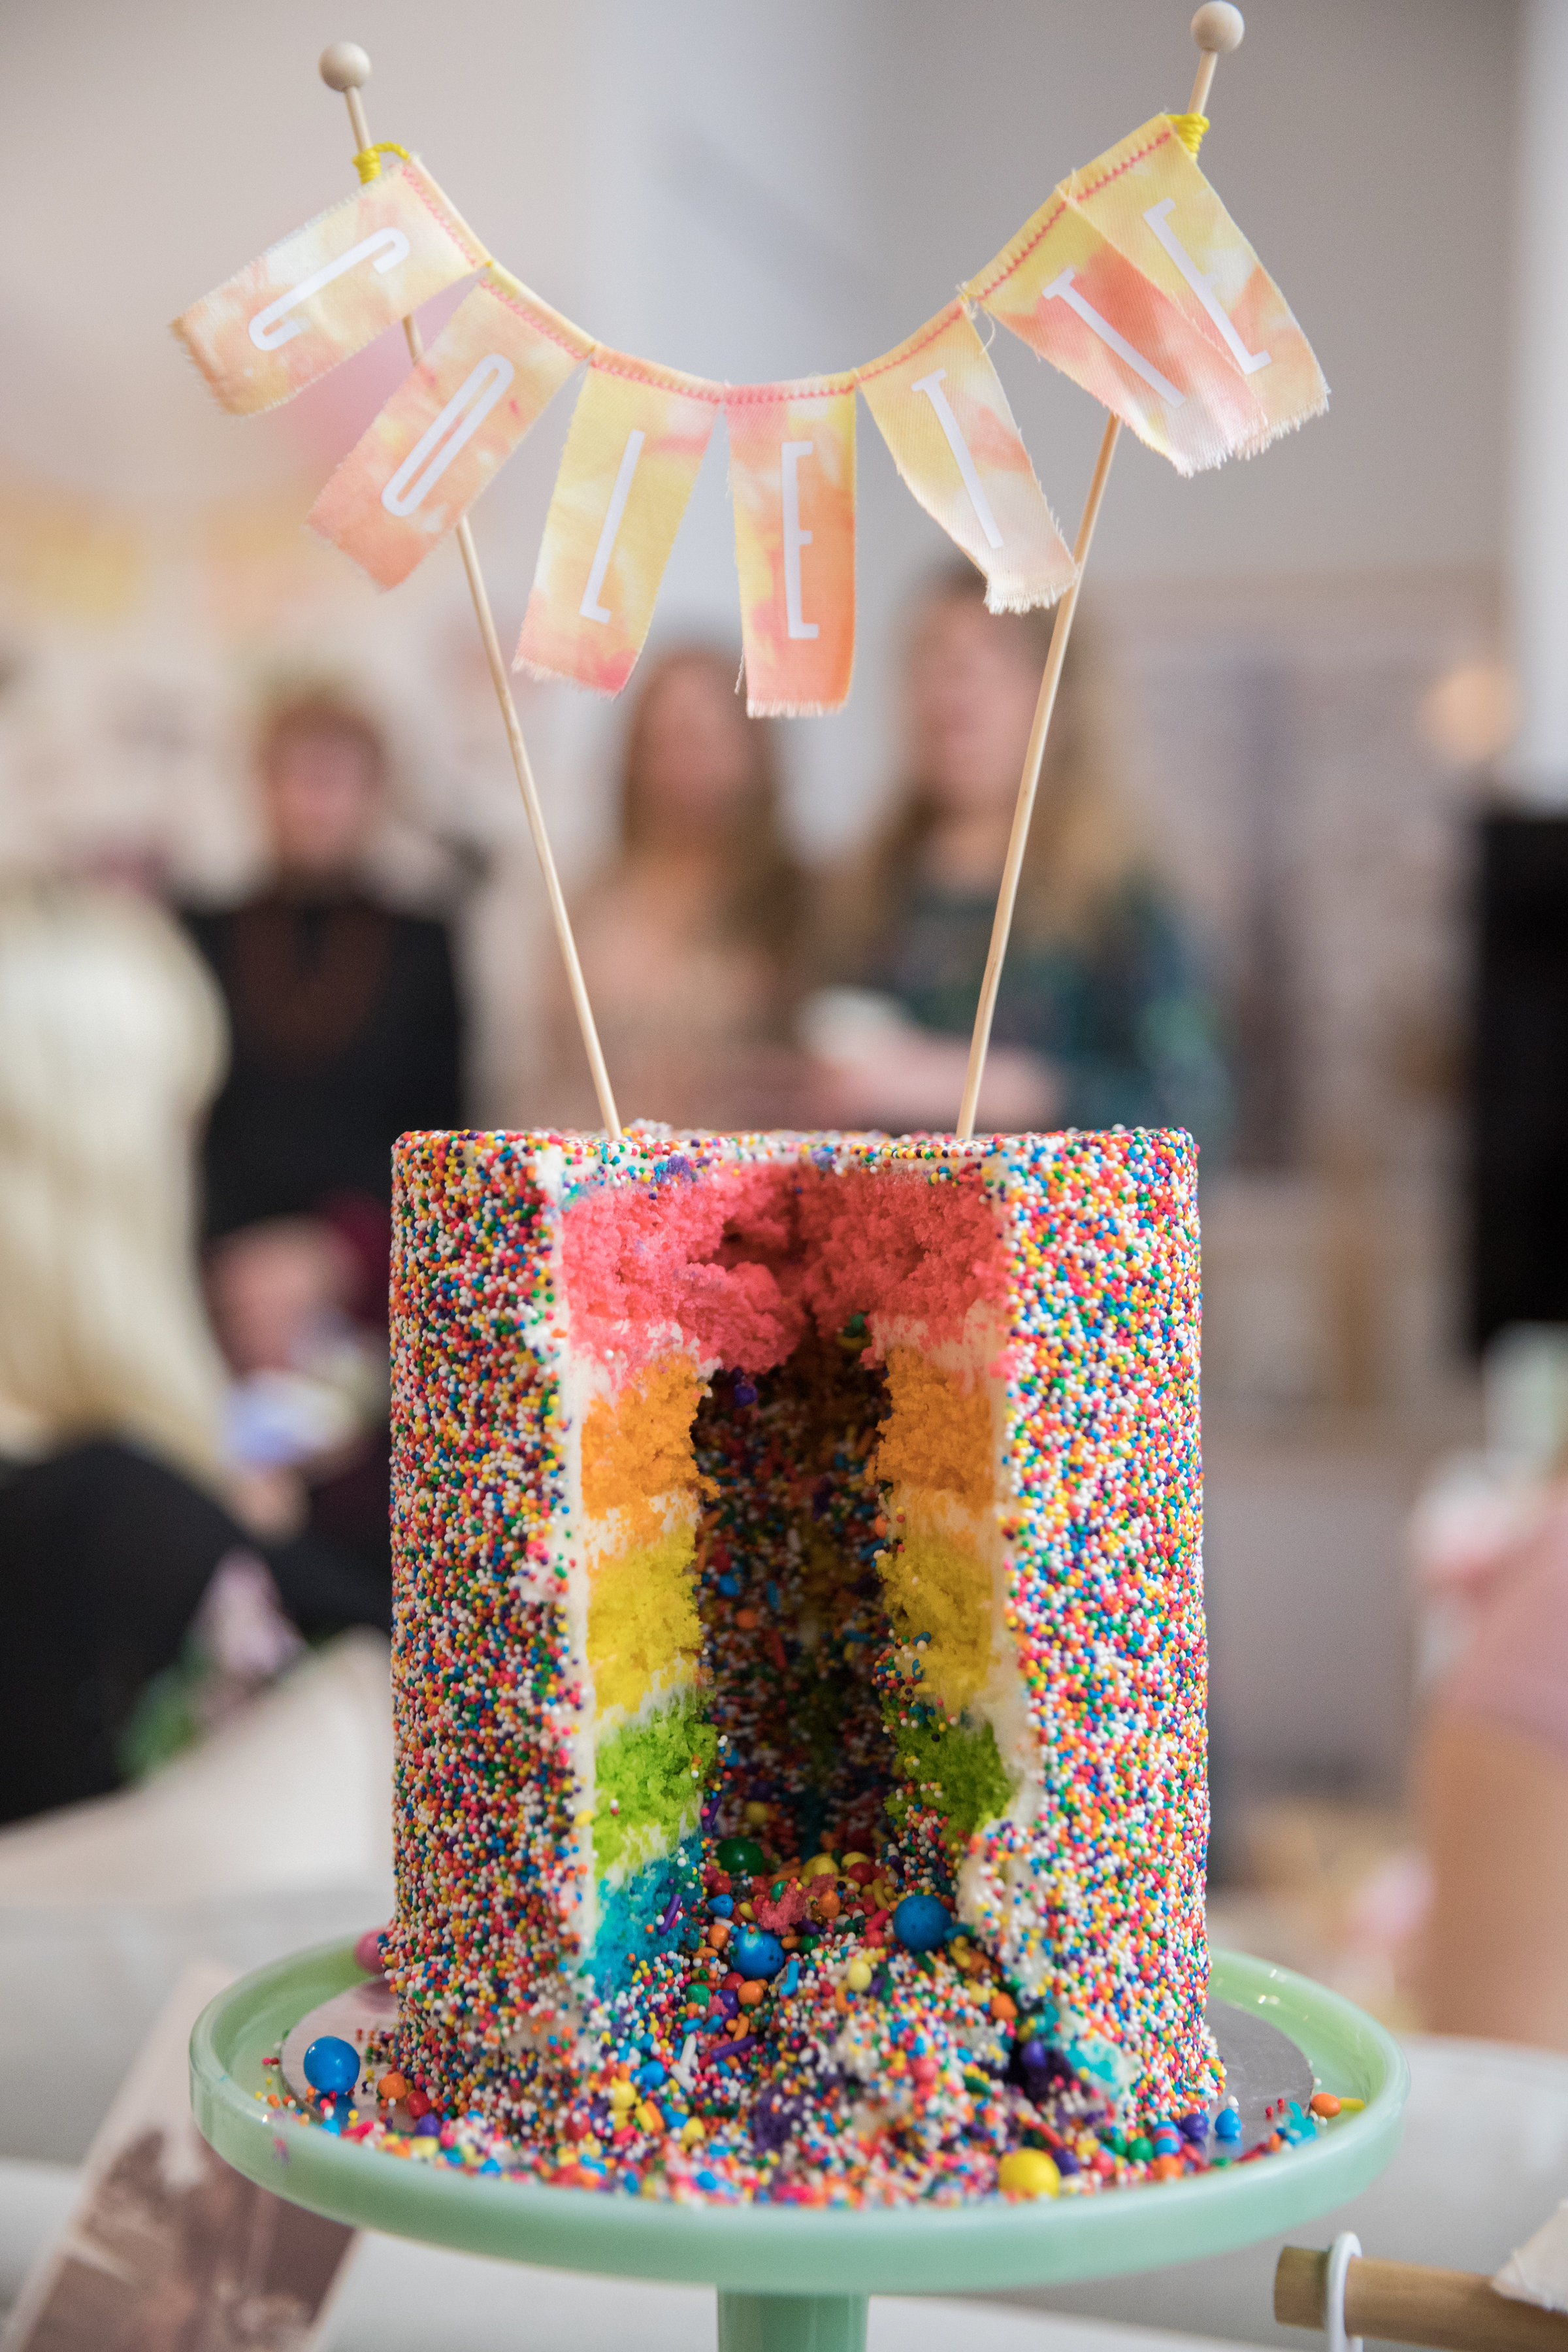
My friend Jo made a delicious chocolate peanut butter cake - here it is with the winning name Eli picked out for Katani: Joosbox Dunno. A great option for his parents to consider.

IMG_7099.jpeg
IMG_8795.jpg

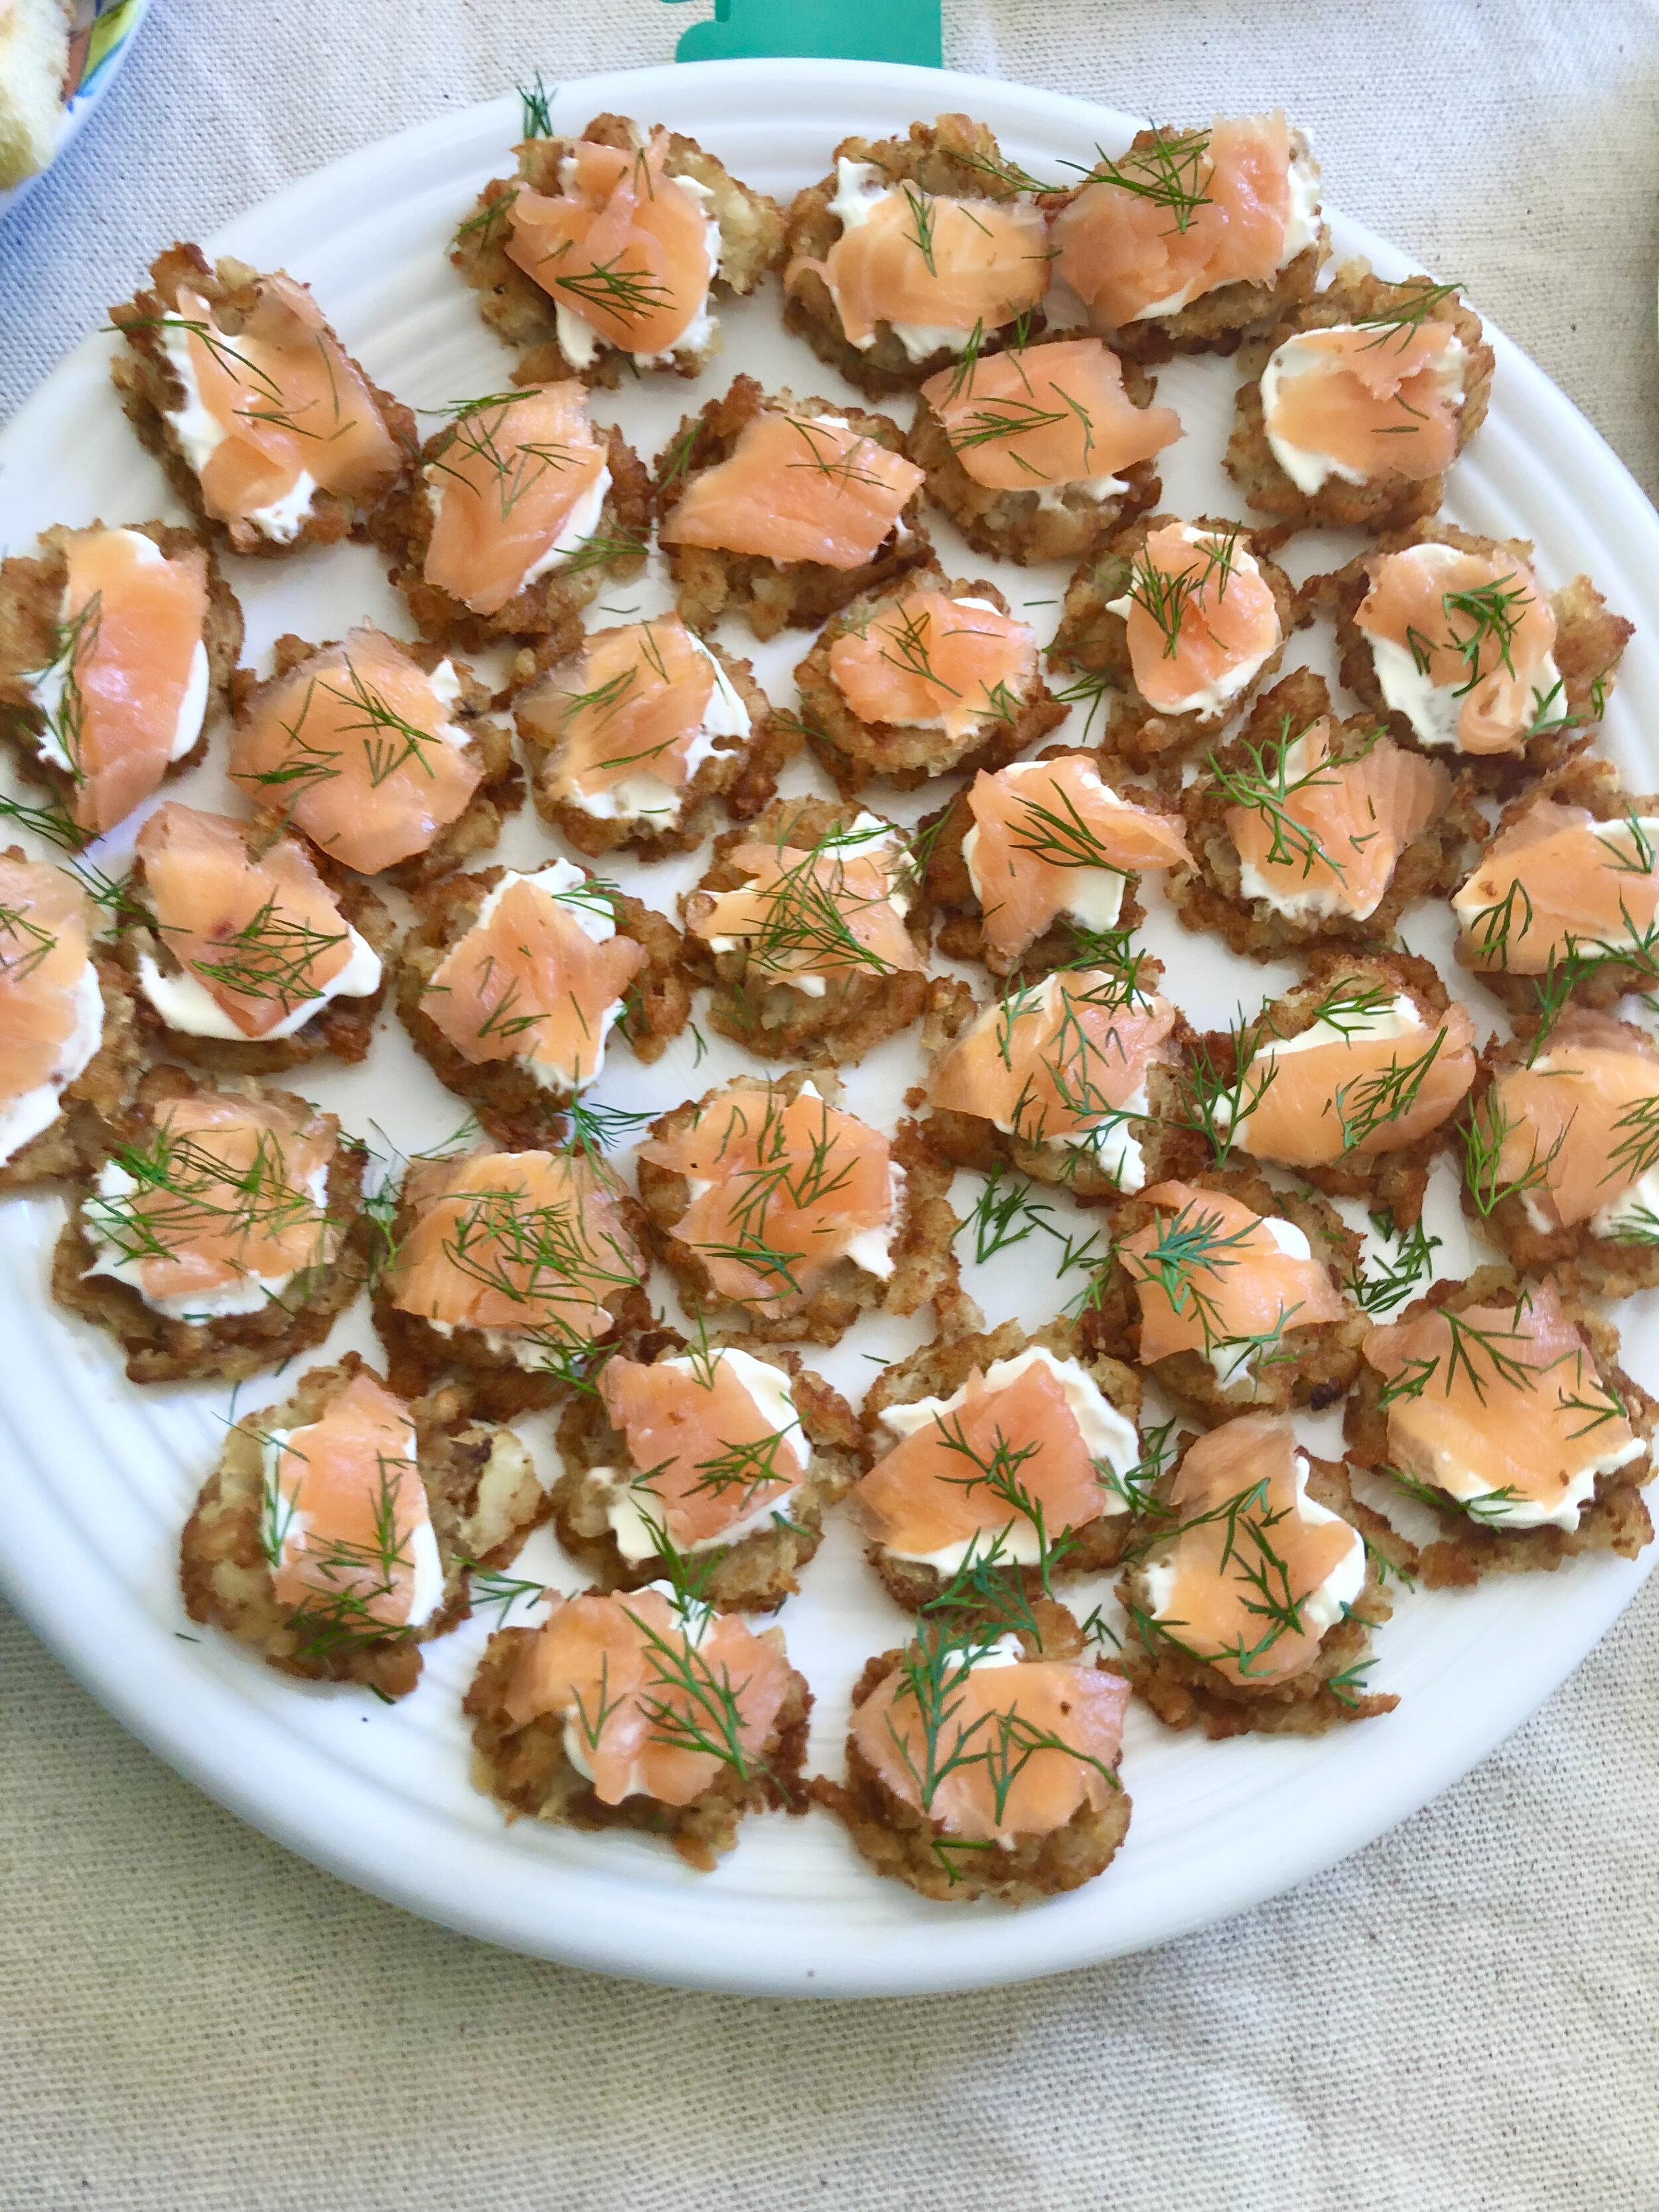
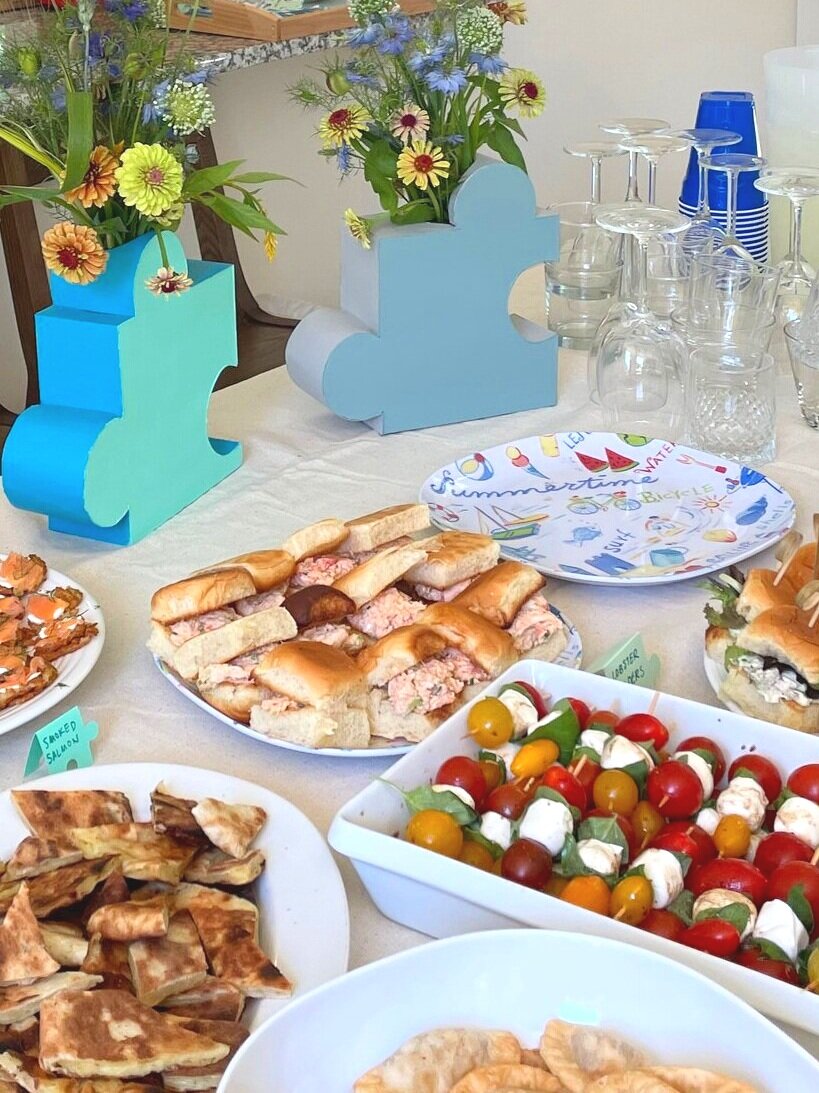
I’m definitely not a food stylist but I am extremely proud of how photogenic these potato “totkes” turned out. We made them by smushing two tater tots into one little tiny crispy plate and topping with creme fraiche, smoked salmon, and dill. My friend Eddie coined the name and executed this concept brilliantly. For the other food we made tasty mini snacks like lobster sliders, empanadas, and caprese skewers.

IMG_7100.jpeg
807C3D2E-E808-461A-B575-7CF5E9DC5C62.jpg
IMG_7047.jpg

Hope you’re inspired to try some of these ideas!

IMG_4882.jpg

GIFT HORSE VALENTINE

February 11, 2021

This year, like the past at least four years, I went with a horse theme for our annual valentine. What can I say, once a horse girl, always a horse girl. Since we all have a little extra time this year I wanted the card to be an interactive project and decided to make it a mini version of the gift horse I made for Handmade Charlotte. I’ve also always wanted to try designing a Swedish style dala-inspired horse.

IMG_4880.jpg

The front of the card shows some dala-esque horses deeply in love and then the back has the instructions on how to make a standing gift horse. I sent the cards with a piece of wax paper so the only materials required are a pair of scissors and double stick tape (or you can use regular tape and make it into double sided rolls). If you’d like to make a gift horse, drop me an email and I’ll mail you a card and wax paper! Or, if you want to make a whole herd, you can download the card here and your own. Please note that in the download I included a full page of pink for printing on the back of the front illustration if you’re having trouble with registration. You can use any tissue paper you have around for the tail (even an actual tissue would work to be honest).

IMG_4898.jpg

STEP 1: Cut out the rectangle shown on the back of the card.

IMG_4901.jpg

STEP 2: Roll the rectangle into a tube about 1” wide and tape shut.

IMG_4907.jpg

STEP 3: Cut out the horses using the front of the card as a guide - don’t cut from the back, as those horses include a bleed area so they’re bigger than the ones on the front.

IMG_4909.jpg

STEP 4: Apply tape where indicated in the head area of the horses and stick them together. Be careful to line up the two silhouettes.

37B84371-E3D0-4B9C-90EE-D89EA25E4558.jpg

STEP 5: Now put tape where indicated in the belly of each horse and tape the roll in between them. You want the roll centered between the two horses so it might take a little finagling.

IMG_4922.jpg

I like to bend the ears apart a bit to give it a little bit more life. Now that the horse can stand, it’s done! This is a perfectly fine little paper horse in a dala style but if you want to get extra credit you can add a tail and even wrap a little gift!

IMG_4923.jpg

STEP 6: Cut fringe in a piece of tissue or wax paper. The piece I included with my valentines is about the same size as the card, or about six inches wide and nine inches long. I cut the fringe about an inch and a half deep into the long side of the paper, and keep them about an eighth of an inch wide. Fringing scissors also work great here!

IMG_4927.jpg

You can just roll the tissue into a tail, or you can wrap a teeny tiny gift inside. Here’s a selection of some items I own that definitely will fit inside, including some dollhouse miniatures I’ve collected, jewelry, candy, an iron-on patch, and when all else fails some office supplies.

IMG_4933.jpeg
IMG_4934.jpeg
IMG_4937.jpeg

STEP 7: Wrap and roll! Here is how to wrap a tiny penguin stamp I got at Muji. Fold up about an inch of the non-fringe side over your teeny gift and then roll. Twist the end so the tail fans out. You could also tie with a little string.

IMG_4943.jpg

And finished! Now all that’s left to do is celebrate valentine’s day or just play with your paper horses.

IMG_E7676.jpg

TRAVEL INSPIRATION: MEXICO

March 5, 2019

My first trip to Mexico finally happened and every second of it was packed with vibrant crafts, unforgettable food, and inspiring architecture. I grew up in South Florida so I have no idea why it took me so long to get there. Luckily we were invited to a wedding in San Miguel de Allende, thus creating the perfect excuse to spend time there and in Mexico City. I would say of all the places I’ve visited, Mexico had the most craft inspiration per square foot and I loved it!

IMG_6371.JPG
IMG_6379.JPG
IMG_6388.jpg

MEXICO CITY: SAN ANGEL
In Mexico it seems that making incredible things by hand is just woven into the fabric of the culture - whether it’s crafts or food, everywhere you turn you see (or taste) something you want to remember. My trip coincided with the release of This Is Mexico City by Abby Clawson Low, a designer I’ve admired for a while, so I was happy to have that as a guide and it served me so well. My cousin also lived in Mexico City for a few years so I had plenty of great recommendations from her too. I tagged all the places that interested me on a Google map to find little clusters of sites to wander. The first one we checked out is the San Angel neighborhood, where we toured Diego Rivera and Frida Kahlo’s studio museum with its insanely smart cacti fencing. Touring Diego’s studio is where I first got obsessed with papier-mâché folk art - he has an excellent collection of the large scale figures, hand painted with playful patterns. Around the corner from there is the best craft market I saw, Bazaar Saturday. If you’re going to be in Mexico City on a Saturday and you love crafts, don’t miss this one. You can start with a romantic brunch at the San Angel Inn which has a glorious courtyard and great pastries, but be sure to make a reservation for an outdoor table.

IMG_6405.JPG
IMG_6422.JPG
IMG_6411.JPG
IMG_6444.JPG
IMG_6440.JPG
IMG_E6446.JPG

Bazaar Saturday and the nearby shops held a dizzying amount of handmade goods in a riot of colors. Intricate figurative beading, a waterfall of pom poms, soft sculpture skeletons, brightly painted punched tin ornaments, and of course a horsey piñata were some of my favorites.

IMG_6418.JPG
IMG_6424.JPG
IMG_6425.JPG

I also couldn’t get enough of the miniatures - they’re so clever and intricate. The teeny tiny shadow boxes, each featuring a different profession or famous person, are hilarious and if I had a dollhouse I would have bought a suitcase full of the mini housewares like this splatterware pitcher and cleaning supplies.

IMG_6528.JPG
IMG_E6537.JPG
IMG_E6538.JPG

MEXICO CITY: CENTRO HISTORICO
We started our day exploring the city center by hitting La Cuidadela, another folk art market, after a perfect breakfast at El 123 which is right around the corner. The crafts on offer there are similar to Bazaar Saturday, although the prices were a little more expensive. I did very much enjoy seeing these woven masks, brightly colored embellished boxes, and an adorable hand stitched zebra.

IMG_6555.JPG
IMG_6588.JPG
IMG_6544.JPG
IMG_E6592.JPG
IMG_6581.JPG
IMG_6566.JPG

Next up was the Folk Art museum which a crafter really can’t miss. The examples of traditional crafts are superb. My interest in the use of papier-mâché continued when I saw a row of brightly painted horse busts. I was especially drawn to the crafts made with natural materials, like the whimsical mother of pearl mermaid comb, the most cleverly painted corn husk dolls, and the creatures and figures made with basket weaving techniques. My favorite item was this incredible woven headdress, with concentric rings of colored metallic foil which is absolutely stunning with its shimmering palette and modernist aesthetic. Even their gift shop had some of the best crafts I’ve seen, although weirdly I wasn’t allowed to take photos in there.

IMG_7316.JPG
IMG_7317.JPG

Not far from the Folk Art museum is churro heaven, the renowned El Moro. Not only are the churros and dipping chocolate worth every calorie, the packaging design is very very good and I’m a little sad I didn’t buy a coffee mug. There are a few locations of El Moro, like this one where you can see the playful patterns designed by Cadena + Asociados in full force.

IMG_7325.JPG
IMG_7324.JPG
IMG_7326.JPG

Somewhat near the central historic district (which goes on and on and is completely chock full of architectural and historical wonders which isn’t my focus so I’m just highlighting the crafts and design I saw) is the best store I visited in Mexico - Utilitario Mexicano, a curated collection of utilitarian objects sourced from around the country. The objects are simple and well designed, representing how mass produced doesn’t have to mean bad. Function can be beautiful! If you want to stock up on enamelware or rubber alphabet stamps, as I did, this is the place.

IMG_6790.JPG
IMG_6799.JPG
IMG_6768.jpg

MEXICO CITY: LUIS BARRAGÁN
As I’m sure many design focused visitors to Mexico City have figured out, no trip there is complete without a pilgrimage to one of the buildings designed by Luis Barragán, Mexico’s master architect of color and minimalism. Touring one of his projects can impart a whole new understanding of the power of light. To see Casa Gilardi, you need to book a private tour with the family who still lives there and be prepared to be completely awed by the indoor pool and yellow gallery.

IMG_6847.JPG
IMG_6840.jpg
IMG_6880.JPG

His home and studio are also tour-able and near Casa Gilardi (make a day of it and have lunch at the cute pizza spot with a charming garden, Cancino San Miguel), though you need to book a tour in advance there too. I loved the textured white walls and the way the windows could shut out all the noise from the city streets outside. And it goes without saying that he put yellow to use in a way I never would appreciated without seeing the space myself.

IMG_7206.jpg

The furthest out and the most transformative Barragán site we visited was the San Cristobal stables. After a desperate internet search, I finally was able to contact the current owner of the stables (by emailing Mia at cuadrasancristobal@gmail.com) who very generously allowed us to come see it the next day. For most of our time wandering the grounds, we were completely alone except for a friendly cat and some sweet horses. The space has a magical stillness and tranquility. It’s a bit of an Uber ride from the city center but completely worth the trip.

IMG_7117.JPG
IMG_7142.JPG
IMG_7151.JPG

The long rectangles of hot pink are somehow both exhilarating and relaxing. Even though the weather wasn’t as brilliant as it could have been, visiting the stables was my favorite Barragán experience.

IMG_6949.JPG

MEXICO CITY: FRIDA KAHLO

Finally, a trip to Mexico City definitely isn’t complete without paying respect to Frida at her altar in the Blue House, the museum dedicated to her life (definitely book a ticket there in advance). What an altar! Covered in bright geraniums and some of her favorite crafts, I got some great ideas for my own death display.

IMG_6913.jpg
IMG_6906.JPG
IMG_6918.JPG
IMG_6919.JPG
IMG_6928.jpg
IMG_6927.JPG

Throughout the house there are the best examples of papier-mâché skeletons with the most fun patterns and colors. I’d love to have a coffee table book all about this traditional craft - it seems like Diego and Frida alone had a substantial collection.

IMG_6956.JPG
IMG_6959.jpg

There was a great temporary exhibit of Frida’s clothes which were so much a part of her identity. Her style was radical at the time and her way of expressing herself through her clothes still reverberates in fashion today. I love the shapes of the shirts paired with a big patterned skirt - a look I’d wear any day.

IMG_7380.JPG

SAN MIGUEL DE ALLENDE
After Mexico City we headed to San Miguel de Allende (SMdA) for a wedding, which is anywhere from 2.5 hours 5 hours away depending on the traffic. The city is supremely picturesque, with its combination of vivid hues and fairytale architecture. The streets are steep and cobblestoned so bring some comfortable shoes because you have to just wander around and get lost. I’d heard about SMdA from my aunt who travels there every year and I can see why she loves it so much.

IMG_E7593.JPG
IMG_7597.JPG

First all, the wedding was so awesome it would be too hard to describe it all here but by far the highlight for me was getting to participate in the wedding processional. It’s a tradition in San Miguel for the entire wedding party to parade through the streets, following an adorable donkey decked out in flowers, musicians, and most importantly giant papier-mâché mojigangas based on the happy couple. Mojigangas are like way larger than life puppets that dance and twirl and just generally delight. It’s a tradition started in SMdA and the reason a wedding there is so special.

IMG_7416.JPG
IMG_7498.JPG
IMG_7514.JPG

I kept seeing awesome old VW bugs in the streets during my wanders. It’s impossible to take an uninspiring photo there - there’s going to be an insane color palette, a ridiculously detailed door knocker, a charming window tied with ribbons and flowers, something cool.

IMG_7454.JPG
IMG_7455.JPG

I stumbled upon this market in front of the Templo del Oratorio de San Felipe Neri and it took me a few minutes to realize all these colorful figures are made of sugar! The church is worth seeing in and of itself as it has a bright pink facade.

IMG_7458.JPG
IMG_7459.jpg
IMG_7457.JPG

I also came across this basket store which really blew my mind - they had so many handwoven critter shaped baskets and I wanted them all (I got a horse one). I can’t find the name of the shop but it is located right around Cjon. de Loreto 9.

IMG_7422.JPG
IMG_E7424.JPG
IMG_7428.jpg

This store Colors had some very interesting baskets woven out of brightly colored plastic, sort of like what friendship bracelets are made out of. I guess I’m just very drawn to weaving projects. There’s plenty of it in Mexico, and just generally more craft inspiration than I could ever remember so I’m happy to have documented some of what I saw here.

IMG_E7463.JPG
IMG_6363.jpg
IMG_7492.jpg

One more craft I saw a few times throughout the trip to Mexico - these chandeliers would definitely be DIY-able. The first one looks like it was made with leather laces, the second has an indigo tassel situation, and the last one appears to be strips of linen. Thank you Mexico for all the crafting inspiration!

IMG_3444.JPG

DIY: ICE ICE (DYE) BABY SHOWER

August 15, 2018

My dear friend and talented photographer, Ana Gambuto, recently had a baby girl named Colette Starling and I was so happy to help decorate her shower. She has an amazing group of lady friends who helped organize the event to make it such a smash. I was in charge of bringing in some decor although as you'll see her apartment is so gorgeous it doesn't really need anything.

IMG_4138.JPG
BabyShower-7813.jpg

To make the shower decorations, I created a textile using an ice dye technique. It's super simple and very satisfying to do. 

IMG_3376.JPG

To ice dye fabric you just need powdered dye, ice, and a container for holding the fabric as the ice melts. You can probably use items you already have in your kitchen. That's pretty much it! Here's what I did: 
1. Soak fabric in water. I used this french twill because it's made to dye well. Any all natural fabric such as cotton or silk should work. 
2. Place a wire cooling rack inside a tray big enough to catch the melting ice. I used a disposable tray that fit the size of a cooling rack I already had. 
3. Put the wet fabric on the cooling rack, scrunching it here and there so it fits in the space. 
4. Cover the fabric with ice. 
5. Sprinkle the ice lightly with powdered dye. I used RIT Petal Pink and iDye Bright Yellow. A little bit goes a long way! Pretend like you're just sprinkling salt here and there over a finished dish. 
6. Let the ice completely melt, creating soft swirly patterns in the dye. 
7. Rinse the fabric until the water runs clear and use to make tons of shower decorations! 

IMG_3374.JPG
IMG_3375.JPG

I dyed a couple of yards this way so I had plenty to use. One piece I left large to use as a runner for the table. I just ripped the fabric and didn't hem the edges; the raw edge was inspired by fabric installation I'd seen at ABC Carpet & Home (and also very easy). 

BabyShower-7562.jpg
IMG_3446.JPG
BabyShower-7506.jpg

I also used the dyed fabric to make a bunch of garlands and banners: for the cake, for Colette's nursery, a wall of baby photos, etc. To add text to the banners I cut out letters from iron-on vinyl using my Silhouette Cameo. 

BabyShower-7547.jpg
BabyShower-7918.jpg
BabyShower-7508.jpg
BabyShower-7845.jpg
IMG_3452.JPG
BabyShower-7846.jpg
BabyShower-7703.jpg

I also made a fabric-bound guest book/card and scanned the fabric in to print the pattern on paper. Guest wrote their wishes for Colette on strips of the patterned paper. 

BabyShower-7796.jpg
BabyShower-7535.jpg

We also installed an interactive collage wall on a column - guests took pieces of paper I cut into abstract shapes (in a select palette) and taped them to the mural. The base is a piece of gray set paper. Ana was able to photograph a flattened version of the finished product even though it wrapped around a column in her apartment. Here it is as guests added pieces throughout the party...

BabyShower-7516.jpg
IMG_3459.JPG
BabyShower-7787.jpg

Here's the finished piece! It's a fun way to create a collaborative art project. 

Collage-6O6A7883-Edit-A.jpg

Because Ana is a total wizard, she also made an art piece for Colette's nursery by printing and framing a scan of the fabric. I don't know how she does it! Colette is so lucky to have such a smart, talented, and stylish mama! 

BabyShower-7522.jpg
BabyShower-7911.jpg
IMG_5033.JPG

DIY: BISON BABY SHOWER

March 6, 2018

We threw a very low key, adults only shower for our dear friends having their first child. Because the party was in the evening at our apartment, I didn't get the best photos during the event so I saved some of the decor to shoot in the light of day. The mom to be is from North Dakota so I went for a bison on the prairie theme. I made this simple garland by cutting out a bison shape on my Silhouette Cameo (see below for the template) and wrapping little bundles of dried grasses (see below for details) along the twine. I used copper tape to hold the bundles in place. 

IMG_5009.JPG
IMG_5014.JPG

The dried grasses are from Afloral.com and I ordered rye, bunny tail, foxtail millet, and bell cup stems. The good part about using all the dried grasses is I could make the arrangements ahead of time without worrying they would wilt; the flip side is it was pretty messy - oats all over the place. But overall it was easy to put together some plains-inspired florals in simple white vases I already had. 

IMG_5015.JPG

For additional decor items I could scatter around the room I ordered these wooden animals from Happy Bungalow. They're hand made, cute, and all natural so safe for little Ivy to play with eventually. The animals are all natives of the parents' home states: North Dakota and Oregon.  

IMG_5036.JPG
IMG_5055.JPG

I had to order at least two of each of the dried grasses so I had plenty. I made these simple little wreaths using the inside of a few embroidery hoops. I just cut about three to four inches off the tip of the grasses and hot glued them to the outside of the hoops. I'm tempted to make some of these with the other dried flowers I've hoarded.

IMG_4999.JPG

The food was super simple - we just ordered a bunch of empanadas with guacamole and plantain chips. Empanada Mama is a great option for catering in NYC. To label all the flavors, I cut out a bison-shaped card and wrote with a white gel pen. See below for bison templates. 

IMG_3051.jpg

For dessert I made a bison shaped brownie. I baked a double batch of brownies in 12" square pans and cut them into a bison shape (you can use the same template provided for the piñata, see below). Then I covered it with store bought chocolate icing. I used a piping bag to create the textured part of the bison fur. 

IMG_4996.JPG
IMG_5023.JPG

I painted a bison on the plains image and scanned it in to decorate custom napkins and cups from Zazzle. I loved how the napkins turned out - as a collector of cocktail napkins making my own was thrilling. The cups were a bit leaky so I might not make those again. 

IMG_4986.JPG
IMG_4989.JPG
IMG_4993.JPG

One idea I used for my wedding and many events since is an instant photo guest book. I illustrated a few pages in a blank album and we provided the Fujifilm Instax Mini, washi tape, stickers, and pens. 

IMG_3055.jpg

Unfortunately I didn't get to take a great picture of the bison piñata I made before it was destroyed, so you have to take my word for it that it looked pretty cute standing on the table. I made it by cutting the same simple bison shape out of a spare cardboard box twice (see template). I used a thinner cardboard to make strips, about four inches wide, glued around the edges of the bison shapes to make it an enclosed box, leaving a little section open until we filled it. Then I cut strips of fringe out of brown tissue paper and glued them to the front of the bison to make the fuzzy half. I also glued fringe on a skinny piece of cardboard to make a tail. We filled the piñata with little baby necessities like pacifiers and socks. The parents had fun smashing it with a wooden dowel. 

This bison shower was super fun to put together. Here are the templates I used to make some of the projects: 

Bison folded card
bison garland
Bison cake or piñata
IMG_2445.JPG

TRAVEL INSPIRATION: THREE SHOPS IN LONDON

March 1, 2018

I spent two quick nights in London right before the holidays last year. I only had a day to wander so I hit the Tube to check out a few particularly awesome stores in search of inspiration. Because it was late December it was an especially good time to explore - London really does Christmas well. 

IMG_2449.JPG
IMG_2448.JPG

THE CONRAN SHOP
There used to be a Conran Shop in NYC, but sadly it's now a T.J. Maxx, which I am bummed about whenever I think of it. So it's a special treat to visit the store in London and ogle their colorful holiday decor amidst contemporary furniture. The selection of taper candles and linens in the best colors is hard to resist. They also had the most fun paper honeycomb decor for the holidays and the display of cacti in colored sand is a very well executed Pinterest bait. 

IMG_2457.JPG
IMG_2447.JPG

The linen selection reminds me of Merci in Paris - clearly linens in good colors is a display that works. 

IMG_2462.JPG
IMG_2463.JPG

This holiday tablescape makes me want to ditch my traditional red and metallics and go neon. The colors look so good against that Conran cobalt blue. I'm in love with those velvet chairs.

IMG_2452.JPG
IMG_2453.JPG
IMG_2455.JPG
IMG_2454.JPG

How fun would these decorations be for any kind of holiday, not just Christmas? Conran Shop, please come back to NYC!

IMG_2483.JPG

MOMOSAN SHOP
These delightfully tiny vases live in one of the best curated shops I've ever seen. I could spend hours in that very small room. Every piece is a little bit of everyday art - the salt and pepper shakers I got are truly sculptural. 

IMG_2474.JPG
IMG_2475.JPG

It was hard to leave without one of those ceramic canisters - the brush mark pattern is so pretty. 

IMG_2468.JPG
IMG_2473.JPG

Shelves full of treasures, bathed in gorgeous light. I'm a very big fan of the spanish moss wreath with dried flowers and dark ribbon. Finally, justification for my hoarding of dead flowers. 

IMG_2479.JPG
IMG_2480.JPG

The way the jewelry is displayed is so smart, especially the ring box filled with chunky salt. And I think there is definitely a DIY in those marbled clay statement earrings. 

IMG_2471.JPG
IMG_2477.JPG

I wish my whole life were as perfectly designed as this nutcracker. And every pattern on those cards is one I'd wear. 

IMG_2469.JPG
IMG_2470.JPG
IMG_2478.JPG

All the ceramics in the shop are very cool. I did manage to get one of those incense holders in my suitcase. 

IMG_2501.JPG
IMG_2494.JPG

PRESENT & CORRECT
When it comes to paper goods and office supplies, I'm an obsessive fangirl, and Present & Correct is the definitive voice. On my previous trip to London I timed a visit to the store wrong and could only peer sadly through the glass. So getting to spend as much time as I wanted amidst the modern and vintage supplies was glorious.

IMG_2493.JPG
IMG_2496.JPG

That funny little tabletop Christmas tree is what I've always wanted (we usually end up with something closer to nine feet which tends to take over the entire apartment). Those giant paper pencils could definitely be a DIY - maybe something back to school related? I'd love to have this archive of vintage holiday stamps for illustration inspiration. 

IMG_2495.JPG
IMG_2498.JPG

I love a good pegboard display, especially when it includes some very special pairs of scissors. The font on those alphabet stamps is an absolute winner - I regret leaving this behind.

IMG_2499.JPG
IMG_2500.JPG

Two of my greatest weaknesses - erasers and washi tape - are very well represented here. Present & Correct is just as inspiring in person as it is on Instagram. 

IMG_4976.JPG

BEHIND THE SCENES: NEW WEBSITE MAILER

February 27, 2018

After way too many years of feeling embarrassed about my portfolio website, I finally created an up to date version here. As I have in the past, I sent out a promotional mailing around Valentine's day, this time with a paper horse to announce the new site. It featured as many horses as I could get in one mailing, as I've always been pretty obsessed with them and decided it's about time I embrace it. In grade school the kids called me Flicka, which I can't say I didn't deserve. 

IMG_4969.JPG
IMG_4956.JPG

The front of card is a gouache illustration I first made in my sketchbook - I tend to draw horses. I scanned it in and designed the back of the card (after spending a while figuring out a logo) in Illustrator. The cards were printed with Moo, which I've done a number of times and I'm always happy with the results. The colors are bright and the thickness of the paper is nice too. I get the Luxe postcards which have a colored edge. 

IMG_4981.JPG

The other good thing about Moo is you can order as many different designs for the back of your cards as you want. So I ordered half with the promotional back and the other half a valentine message for family and friends. Everyone got a paper horse.

IMG_4955.JPG

I cut out the horses on my Silhouette Cameo. It's great having a digital cutter, but man they can be finicky. Starting with the horse I designed for a logo, I had to work through a few different versions to get something simple enough it would cut easily. In the end it still saves a ton of time to have the machine. Mine is an older version but it's still working well for me. 

IMG_4979.JPG

The envelopes are my favorite shade of sea foam from Paper Presentation, where I also got the paper for the horses. The postage stamp is a custom from Zazzle and my horse-shaped address stamp I've had for a while - it was made by Casey Rubber Stamps which is an institution in the East Village. I addressed the envelopes with a Kuretake brush pen from Jet Pens  - such a great resource for hand letterers. 

It's been fun hearing feedback about the mailing - my friends with kids have gotten some good use out of the horse. I need to start thinking about what to do next year! 


IMG_1576.JPG

DIY: TINY HORSE CUPCAKE PICKS

February 15, 2018

I love horses and tiny things, so this craft is a double win. I made them as a goodbye gift for my coworkers when I left the crafts merchandise department at Martha Stewart. They're small and not too fussy to make so a great opportunity for flow. 

IMG_1561.JPG
IMG_1550.JPG
IMG_1555.JPG

Each one can have its own personality by using different bits of feather and drawing dapples on with the Sharpie. You can also use the technique to make other animals - a polar bear or llama would work well. The air dry clay most commonly comes in white and is easy to work with. If it ever feels a bit dry, just wet your fingers and work into the clay to refresh it. 

IMG_1588.JPG

Supplies: 
- feathers
- small scissors
- silver Sharpie or paint pen
- piece of cork or styrofoam
- toothpicks
- air-dry paper clay in white

IMG_1594.JPG
IMG_1595.JPG

1. Using the scissors, snip off the delicate end of a feather so it's about a half inch long. From another part of the feather, snip out a section that's also about a half inch in length and then cut it through the shaft so you only have one side of the piece with feathered fringe. 

2. Break off a chunk of air-dry clay, about the size of a quarter. 
 

IMG_1600.JPG
IMG_1602.JPG

3. Roll the clay into a ball, then flatten it a bit. Gently pull on opposite corners to ease out the beginning of a neck and hind legs. Pull out one more corner for the front legs. 

4.  Continue gently pulling on the legs so they thin out a bit and get longer. Pull out the neck a bit more, continuing to keep it pretty flat. Bend the end of the neck down, making a sharp corner, and form the shape of the head. Pull up a flap from the top of the head for the ears from the top of the head. 
 

IMG_1603.JPG
IMG_1609.JPG

5. Pull out the legs even further so they're nice and long. Squish the body of the horse a bit so it lengthens and thins out. 

6. Use the scissors to snip the shape of the ears. Snip each set of legs apart and cut off the ends of the legs so they're all the same length.  
 

IMG_1618.JPG
IMG_1622.JPG

7. Stick the end of the feather into the horse to make the tail. Use the scissors to make a dent down the back of the neck. 

8. Place the other piece of feather in the neck for the mane, pressing the clay back together to hold it in place. 
 

IMG_1625.JPG
IMG_1629.JPG

9. Place the horse on a cupcake pick. 

10. Use the Sharpie to draw eyes, nostrils, and color the hooves. 

Let the horses dry overnight before using. 
 

IMG_1586.JPG
IMG_8769.JPG

TRAVEL INSPIRATION: MOROCCO

January 22, 2018

In February of 2017 my husband and I took a trip to Morocco. We met up with my cousin and her husband who both work for the State Department and were based in Africa at the time. Morocco has been calling to me for a while and boy did it exceed my expectations. I came away from the trip so inspired by the colors, textiles, patterns, and craftsmanship on display in every direction. It's like walking around in a real-life Pinterest board with all of the most incredible products and design right up in your face. As overwhelming as the sensory overload can be, Morocco is an extremely welcoming place and I found it very easy to be a tourist there. I'll go back as soon as I can justify it!  

IMG_8843.JPG

FEZ

From the airport in Casablanca we took the train to Fez for a few nights. It's the perfect first stop in Morocco - an ancient, maze-like city steeped in tradition and yet small enough that it's (relatively) easy to navigate. We stayed at Riad Rcif which is like the inside of jewel box - every surface is covered in mosaics. While dizzying, the patterns are small scale so the overall effect is calming, which could also be thanks to the fountain in the central courtyard. 

IMG_8642.JPG
IMG_8645.JPG
IMG_8658.JPG

Because my cousin had stayed at Riad Rcif on a previous trip with her mom, they really treated us like family, though Moroccan hospitality is always very warm. Our first day, the Riad set us up with a guide for a walking tour which was a great choice for an introduction to the city while coping with jetlag. We followed our guide through the narrow winding streets and saw some examples of traditional craftsmanship - rug weaving and leather tanning. 

IMG_8705.JPG
IMG_8706.JPG
IMG_8709.JPG

We also visited Poterie de Fes, a ceramics studio and gallery a little outside of the city. While it's definitely a place catering mainly to tourists, getting to see the artisans hand painting ceramics and assembling mosaics is well worth it. Their skill is truly exceptional. 

IMG_8723.JPG
IMG_8720.JPG

I love this collection of mosaic shapes and colors. Every perfect little piece is chipped by hand. 

IMG_8724.JPG
IMG_8727.JPG
IMG_8739.JPG

To make a big mosaic table top, they first lay out the intricate patterns by hand, face down. This means that if you put the wrong color in the wrong spot you won't know until the table is finished, but apparently it's easy to fix. Next they lay a metal frame over the design and pour in concrete to hold the pieces in place. I can't imagine how much work it takes to make a large, complicated design and yet mosaics are everywhere in Morocco. So much patience and attention to detail! 

IMG_9066.JPG
IMG_9091.JPG

CHEFCHAOUEN 

From Fez we took a taxi to Chefchouen, an insanely photogenic town in the mountains. The walls of the city are painted shades of periwinkle, either to deter mosquitos or to welcome Jews fleeing Hitler, depending on whom you ask. We stayed at Casa Perleta, another excellent choice by my cousin. It's impossible to take a photo of Chefchaouen that captures all the magic, but it's also impossible to take a bad photo so you're good either way.

IMG_8928.JPG

A popular souvenir from Chefchaouen is dried pigment - vibrant bags of it are all over the place.  

IMG_8939.JPG
IMG_8930.JPG

Like every city in Morocco, shaggy rugs with patterns as bananas-awesome as this one are waiting for you around every corner. Also, baskets covered in colorful pom poms definitely started in this country. I haven't done the research, but I feel fairly certain pom poms and tassels started In Morocco in general. 

IMG_9001.JPG

The colors on these little woven basket containers are nuts and I could not commit to just one, so I didn't get any. After returning to New York I saw some of these for sale in Bergdorf Goodman for a very different kind of price. I learned that if you see something you love in Morocco, buy it and figure out the suitcase situation afterwards, because it's way more expensive everywhere else. 

IMG_9119.JPG

TANGIER

This is the city in Morocco that did it for me. A seaside town with a glamorous past, a hop and skip away from Europe yet with a medina packed with treasures - it totally blew me away. Not least because we stayed in the most jaw-droppingly stunning home, Dar Tus, with an incredible host who took me on the shopping trip of a lifetime. Dar Tus fulfills all my wildest dreams about what a home can look like and every corner has some clever touch that only a french woman living in Tangier could have thought up. 

IMG_9131.JPG
IMG_9140.JPG
IMG_9135.JPG
IMG_9357.JPG
IMG_9107.JPG
IMG_9117.JPG
IMG_9341.JPG
IMG_9370.JPG
IMG_9359.JPG

The rugs - the tiles - the furniture - the rooftop terrace - the built in storage! It all made me blurry with heart-eyes. I want to move back this instant, learn french, and leach every ounce of style from Marie-Laure, our host, who not only designed this home but, naturally, always looked impeccable (she's a designer whose line, Au Fil de Tangier, is available at the cute concept store Las Chicas). And she took me on a whirlwind stylist's tour of Tangier, showing me corners and goods I never would have discovered on my own. 

IMG_9303.JPG
IMG_9304.JPG

The place where I did the most damage on Marie-Laure's tour is the weaver's market - Fondouk Chejra. The building, somewhat difficult to stumble upon, has an interior courtyard lined with weaver's stalls. They make blankets, shawls, table linens, robes, bathmats, etc. The patterns (stripes! pom poms! pom pom stripes!) and colors are crazy good and unlike anything I've ever seen before. It's all made by hand on creaky wooden looms, running nonstop as you browse the wares. I definitely needed my suitcase expansion. 

IMG_9282.JPG
IMG_9285.JPG
IMG_9352.JPG

Some more treasure from Marie-Laure's home - this adorable tea handle cover and this incredible corkscrew. And those rugs! 

IMG_9337.JPG
IMG_9325.JPG
IMG_9330.JPG

Another place in Tangier oozing with style is the Hotel Nord-Pinus. We had dinner here and went back for a drink on their amazing terrace the next day. I'm still quite obsessed with this gridded pom pom throw over a trunk in the bar: 

IMG_9327.JPG

Tangier does not disappoint in the eye candy category. Wandering around the old medina there are plenty of charming doorways and facades, and some Chefchaouen-esque blues. If I could only revisit one city in Morocco again, Tangier would be the one.  

IMG_9252.JPG
IMG_9261.JPG
IMG_9266.JPG
IMG_9257.JPG
IMG_9253.JPG
IMG_9262.JPG

MARRAKECH

Our final stop in Morocco was Marrakech. By far the most sprawling, dynamic of the places we visited, Marrakech requires just a little bit of perseverance to get around without getting run over by a motorcycle and discover what's hiding behind the unassuming exteriors. But it does reward the diligent! 

IMG_9491.JPG
IMG_9497.JPG

An easy win for vibrant colors and spectacular succulents is Yves San Laurent's Jardin Majorelle. His former home in Marrakech is a relaxing oasis from the dusty, busy streets. There's now a museum devoted to him which was just about to open when we visited - for sure will be a must see for the next trip. 

IMG_9465.JPG

Outside of Marrakech are a number of rug cooperatives where you can acquire the beni ourain (shaggy wool with squiggly lines) or boucherouite (colorful rags in fun patterns) of all your dreams, but there are plenty of vendors in the city center as well. I also love browsing the options available online at the Anou.

IMG_9541.JPG
IMG_9562.JPG
IMG_9554.JPG

Another oasis worth visiting is Le Jardin Secret, a gorgeous botanical garden right in the midst of all the chaos. 

IMG_9634.JPG
IMG_9630.JPG
IMG_9632.JPG

My favorite spot for a bite in Marrakech is La Famille, a vegetarian cafe and design shop. I love their logo of many hands and the cozy courtyard setting. It's also conveniently located near the Badii Palace, an awesomely ruined palace worth exploring. When we went the iconic storks of Marrakech were nesting all over it. They're incredibly elegant birds. 

IMG_9588.JPG
IMG_9612.JPG

I would say at least a quarter of my photos from the trip are of stunning tile work. The hand painted ones always called out to me, as well the incredible mosaic patterns. 

IMG_9108.JPG
IMG_9563 2.JPG
IMG_8809.JPG
IMG_8819.JPG

Morocco completely seduced me. All of the images, smells, and sounds are burned in my brain. Two weeks is certainly not enough time and I hope I'm lucky enough to spend more of mine there. 

068-072 PAR1017 COSTU-1.jpg
068-072 PAR1017 COSTU-2.jpg
068-072 PAR1017 COSTU-3.jpg
068-072 PAR1017 COSTU-4.jpg

BEHIND THE SCENES: PARENTS HALLOWEEN COSTUMES

January 19, 2018

I loved working on the halloween costumes for Parent's magazine this past year. Halloween has always been one of my favorite holidays because crafting is such an essential part of it - going out on halloween night and seeing handmade costumes is the best. You can make something totally crazy, wear it all night, and people go nuts for it! What other holiday is like that? 

For the 2017 costume story, Parents asked me to come up with ideas that would (hopefully) actually be funny. It was definitely a challenge to think of ideas that would make adults laugh but are appropriate and fun for kids to wear. My sense of humor is not always kid-friendly, but most kids I know are hilarious, so it was fun thinking of concepts.  

IMG_0425.JPG
IMG_0762.JPG

To test the sizing of the costumes, Parents sent me some kid-size dress mannequins which lived in my living room for about a month. A little creepy, but very helpful for figuring out the fit. 

IMG_0440.JPG
IMG_0645.JPG

One of the ideas we went with that was the most educational for me was the slime costume. I've been under the impression that slime is neon green and dumped on your head during a game show, à la Nickelodeon, but apparently nowadays kids are making slime at home with Elmer's glue. This version of slime is often pink and sparkly (or even rainbow colored and referred to as unicorn poop). I tested ideas to make the green Nickelodeon-y slime (bubblewrap and surgical gloves), but heard from my editor that we needed to go in a different slime direction. 

IMG_0765.JPG
IMG_0769.JPG

This slime needed to be pink, swirly, and sparkly. We ended up using pink ribbed tights stuffed with pool noodles and batting. I also tried a version where two cotton dresses are layered with batting in between and then lines sewn on to create sections. 

I like this option although it could have gone a little more cream puff than slime. In the end, the pool noodle swirl method looked best. Having so recently learned about the slime of today, I was a little unsure about whether it would work or not but luckily the model who wore the costume (Jaliyah Mariah) was a huge fan of slime to begin with and LOVED it. She totally rocked it and did mind being stuffed inside a pool noodle swirl covered in glitter one bit. Here's a side by side of the final costume and "real" slime.

af3f7e7af2eb758548300478899b7cad--glitter-slime-pink-glitter.jpg
IMG_E0875.JPG

The other costumes went through a couple different versions as well. For the "nacho baby" costume, I tested a few options to find the right shade of felt to use for the tortilla chips - the chip needed to be chip-colored but not the same shade of yellow as the cheese.

IMG_0633.JPG

Luckily, Purl Soho has the best shades of felt so I was able to figure out the right combo. Purl also came through with some amazing, whimsical yarn for the unicorn dog's tail. A friend lent me her dog, Izzi, to test drive the unicorn dog costume. Izzi is less than thrilled but a good sport about it. 

IMG_0691.JPG
IMG_0687.JPG

The dog who wore the costume for the shoot, Danger, was even more chill than Izzi about wearing the costume and not shy about taking a nap in it. 

IMG_1613.JPG

Danger is relaxing on one of the set pieces made by Sara Foldenauer who did an incredible job. I loved the palette and the props - such a cool set for the costumes! 

For the avocado toast costume, I experimented with number of slices of avocado and toppings. The perfect slice of avocado toast is a delicate balance of composition and texture, as any self respecting hipster would know. 

IMG_0639.JPG
IMG_0640.JPG
IMG_0641.JPG
IMG_0642.JPG

The model for the toast was really able to sell the "I'm so millennial" thing. 

My assistant Eddie also wears some avocado very well. 

IMG_0635.JPG
IMG_0862.JPG
IMG_0855.JPG

It was a super fun shoot with a great team - Ari Michelson took the awesome final images, Annie Caruso brought the best clothes and accessories, Thora made their hair and makeup look incredible, and Melanie Sawyer made sure the kids were all having fun. To see the rest of the images from the shoot, check out the project in my portfolio. 

030_EK_140327_1543.jpg

WELCOME

January 19, 2018

Welcome to my new website and this blog, where I'll share some behind the scenes of my published work, inspiration from my travels, and original craft projects.  

Latest Posts

Featured
Jul 10, 2021
DIY: PUZZLE BABY SHOWER
Jul 10, 2021
Jul 10, 2021
Feb 11, 2021
GIFT HORSE VALENTINE
Feb 11, 2021
Feb 11, 2021
Mar 5, 2019
TRAVEL INSPIRATION: MEXICO
Mar 5, 2019
Mar 5, 2019
Aug 15, 2018
DIY: ICE ICE (DYE) BABY SHOWER
Aug 15, 2018
Aug 15, 2018
Mar 6, 2018
DIY: BISON BABY SHOWER
Mar 6, 2018
Mar 6, 2018
Mar 1, 2018
TRAVEL INSPIRATION: THREE SHOPS IN LONDON
Mar 1, 2018
Mar 1, 2018
Feb 27, 2018
BEHIND THE SCENES: NEW WEBSITE MAILER
Feb 27, 2018
Feb 27, 2018
Feb 15, 2018
DIY: TINY HORSE CUPCAKE PICKS
Feb 15, 2018
Feb 15, 2018
Jan 22, 2018
TRAVEL INSPIRATION: MOROCCO
Jan 22, 2018
Jan 22, 2018
Jan 19, 2018
BEHIND THE SCENES: PARENTS HALLOWEEN COSTUMES
Jan 19, 2018
Jan 19, 2018